How To Fix Ergonomic Split Keyboard Tent Leg Snapping?
Your split keyboard tent leg snapped, and now your setup wobbles every time you type. This is a common problem for people who love ergonomic keyboards. The good news? You do not need to panic or buy a whole new keyboard.
Tenting is what makes split keyboards so comfortable. It angles your keys inward, so your wrists and forearms stay relaxed. But the small plastic legs that create this angle often feel fragile. One wrong move, and snap, you are back to a flat keyboard.
This article will show you practical ways to fix a broken tent leg. We will also cover temporary fixes you can use right away, like chair armrests or household items. You will learn how to adjust your chair and desk height to keep good posture, even without a leg.
Most importantly, we will explain how to avoid this problem in the future. A little care goes a long way. By the end, you will know how to fix your keyboard and keep it working for the long run.
In a Nutshell
Here’s the quick fix rundown for your broken tent leg:
-
Stop using the broken leg right away. Wobbling keys can lead to typing errors and wrist strain. Address it before it gets worse.
-
Try simple temporary fixes first. A folded cloth, a small block, or even a chair armrest can prop up your keyboard while you plan a real repair.
-
Check if the leg is truly snapped or just loose. Sometimes the mounting point is the issue, not the leg itself. This changes your repair approach completely.
-
Adjust your chair height to match your tenting angle. Proper positioning matters more than perfect hardware. Sit upright and keep the keyboard close.
-
Avoid overcomplicating the fix. Many people jump to complex solutions when a simple support does the job. Keep it easy and functional.
-
Prevent future breaks by rotating your setup throughout the day. Positional variety reduces stress on tent legs and on your body too.
Small changes now save you bigger headaches later.
Understanding Tent Legs and Why They Snap
Tent legs on split keyboards serve one main purpose: they angle each half of your keyboard to reduce wrist strain. When you tilt your keyboard halves outward, your forearms stay in a more neutral position. This angle reduces tension in your wrists, shoulders, and neck during long typing sessions.
The legs typically attach to the underside of each keyboard half. They prop up the inner edge, creating that characteristic “tent” shape. Most designs use plastic or metal supports that connect via small mounting points.
Why do tent legs snap? The problem usually comes from repeated stress on the mounting area. Each time you adjust your keyboard or apply pressure while typing, the connection point experiences tiny movements. Over months or years, this constant flexing weakens the material.
Another common cause is improper setup. When your chair height doesn’t match your tenting angle, you might unconsciously press down on the keyboard. This extra downward force concentrates stress on the legs. The mounting points weren’t designed to handle that kind of pressure.
Temperature changes also play a role. Plastic legs expand and contract with heat and cold. In offices with variable temperatures, this cycling gradually weakens the connection.
The real issue isn’t always the leg itself. Sometimes the mounting bracket cracks or loosens before the leg snaps. A wobbly keyboard might mean the bracket needs reseating rather than the leg needing replacement.
Understanding these causes helps you prevent future breaks. Proper ergonomic positioning reduces unnecessary stress on your legs. Gentle adjustments and correct chair height make a real difference. Your tent legs will last much longer when your entire setup works together properly.
Why Tenting Matters for Wrist and Forearm Health
Wrist and forearm health depends heavily on how you position your hands while typing. When your keyboard sits flat on your desk, your wrists bend downward at an unnatural angle. This position forces your forearm muscles to work harder than they should.
Tenting changes everything. By angling each keyboard half upward, tenting keeps your wrists in a neutral, straight position. Your forearms stay relaxed instead of constantly flexed. This simple angle adjustment reduces strain on the tendons and nerves running through your wrists.
The benefits go beyond just comfort. Proper tenting can help prevent repetitive strain injuries over time. When your wrists stay neutral, the pressure on your median nerve decreases. This matters if you spend eight or more hours typing daily.
Your body also needs variety. Keeping the same wrist angle all day creates problems. Tenting lets you adjust your keyboard angle throughout your workday. You might use a steeper angle in the morning and a gentler one in the afternoon. This positional variety keeps your muscles from overworking.
Split keyboards with tenting already reduce shoulder tension compared to standard keyboards. Adding proper tenting amplifies this benefit even more. Your shoulders stay relaxed because your arms don’t need to rotate inward to reach the keys.
The connection between tenting and forearm health is direct. Your forearm muscles control finger movement and wrist stability. When tenting keeps your wrists neutral, these muscles work efficiently without constant tension. Over weeks and months, this difference adds up to noticeably less pain and fatigue.
Assessing the Damage: Signs Your Tent Leg Has Failed
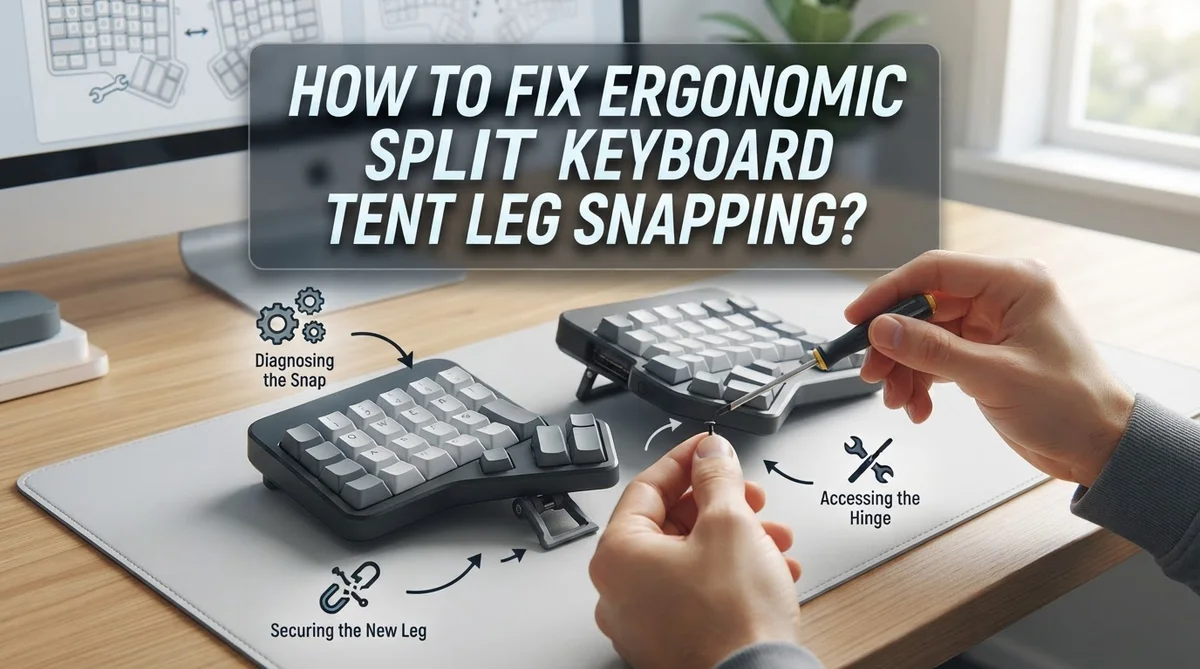
When your split keyboard tent leg breaks, you need to identify what actually happened. Start by examining the leg closely. Look for a clean break, cracks, or splintering along the material. A true snap means the leg separated completely from the keyboard half or fractured within itself.
Check the mounting point next. Sometimes the leg isn’t broken at all. Instead, the attachment area where the leg connects to your keyboard may have loosened or cracked. Gently wiggle the leg to see if it moves independently or if the whole connection shifts. This distinction matters because a loose mount needs different treatment than a snapped leg.
Pay attention to how your keyboard behaves. Does it wobble when you type? A broken leg creates uneven support, making one side sit higher or lower than the other. Your keyboard might feel unstable or shift position as you work. These signs point to leg failure rather than other issues.
Look for visible damage around the base. Cracks radiating from the mounting point suggest stress fracture. Splintered edges indicate a clean break. Bent legs that still hold together need different fixes than fully separated pieces.
Test the leg’s flexibility. A healthy leg resists pressure without moving. A damaged leg may bend, flex, or feel loose when you apply gentle force. Press carefully to avoid making the damage worse during your inspection.
Document what you find. Take a mental note of the break location, whether the leg separated completely, and how the keyboard sits now. This information helps you choose the right repair method. Understanding exactly what broke guides your next steps forward.
Step-by-Step: Temporary Fixes Using Household Items
When your tent leg snaps, household items can buy you time while you arrange a permanent fix. The goal is simple: create a stable support that holds your keyboard at the right angle.
Start with what you have nearby. A folded towel works well. Stack it under the keyboard half where the leg broke. Adjust the thickness until your wrist sits in a neutral position. Your forearm should feel relaxed, not bent upward or downward.
Small wooden blocks are equally effective. A book, a coaster, or even a phone stand can prop up one side. The key is finding something with enough height to match your preferred tenting angle. Test different items until the height feels right.
Chair armrests offer another quick solution. Position your keyboard half on the armrest of your chair. This keeps your hand supported while you work. Make sure the armrest height aligns with your elbow when sitting upright. This prevents your shoulder from hiking up.
Rubber shims or wedges provide stability without sliding. They grip better than smooth surfaces. If you use stacked items, secure them together with tape so they don’t shift during typing.
Stay aware of your posture while using these fixes. Bring the keyboard closer to your body. Adjust your chair height so your elbows bend at roughly ninety degrees. These positioning changes matter more than the exact tenting angle.
Change your setup throughout the day. Alternate between different support heights or even remove the support for short periods. This variety prevents strain from settling into one position.
Temporary fixes work fine for a few days or weeks. They’re not permanent solutions, but they keep you comfortable and productive while you plan your next step.
Using Chair Armrests and Adjustable Supports as Workarounds
Your chair armrests can become an immediate tenting solution when a tent leg breaks. This approach works because armrests already sit at a natural height near your keyboard workspace.
Position your keyboard half directly on the armrest. Make sure the armrest height matches your typing position. Your wrist should stay straight, not bent upward or downward. Adjust your chair height if needed to align the armrest with your desk surface.
Use a small rubber shim or wedge under the keyboard to prevent sliding. Place it between the keyboard and armrest for grip. This keeps your setup stable during typing. Test the stability before you start working.
Bring the tented keyboard closer to your body. Moving it nearer reduces strain on your shoulders and arms. Your elbows should stay bent at roughly 90 degrees. This positioning matters more than the tenting angle itself.
Change your setup throughout the day. Spend part of your morning with the keyboard on the armrest. Switch to a flat position on your desk later. This variety prevents your muscles from getting stuck in one posture.
Monitor your posture carefully with this workaround. Armrest tenting can feel awkward at first. Your body needs time to adjust. Stop if you feel pain or tingling in your hands.
This solution works best as a temporary fix. Use it for a few days while you order a replacement leg or explore other options. Armrest tenting keeps you productive without forcing you to stop work completely. It also helps you understand what tenting angle feels most comfortable for your body before investing in a permanent solution.
Reinforcing and Stabilizing a Broken Tent Leg
When a tent leg snaps, your keyboard loses stability. You need to reinforce what remains and create a solid foundation. This prevents wobbling and protects your wrists during typing.
Start by examining the break point carefully. Is the leg cracked partway through, or completely severed? A partial crack needs different reinforcement than a full break. Clean away any debris around the damaged area. Dirt and dust weaken adhesives and wrapping materials.
Wrapping provides immediate reinforcement. Use strong tape or adhesive wrap around the damaged section. Wrap tightly in overlapping layers. This binds the broken pieces together and adds thickness to the weakened spot. The goal is to make the leg rigid again, not flexible.
Add external support structures next. Small wooden dowels or metal rods work well. Position them alongside the broken leg. Secure them firmly using strong adhesive or wrapping. This creates a splint effect, similar to how broken bones heal. The external support transfers weight away from the damaged area.
Test stability before using your keyboard. Press down gently on the reinforced leg. It should feel solid and resist bending. If wobbling continues, add more wrapping or additional support pieces.
Consider the mounting point too. Sometimes the break occurs where the leg connects to the keyboard base. Reinforce this connection area with extra wrapping or adhesive. A strong connection prevents future failures.
Monitor the repair over time. Reinforced legs may loosen after weeks of typing vibration. Check regularly for new cracks or movement. Reapply wrapping or adhesive as needed. A well reinforced leg often lasts several months before needing replacement.
Preventing Future Tent Leg Snapping
The best way to stop tent leg snapping is to prevent it from happening in the first place. Start with proper setup and positioning. Your chair height matters greatly. Adjust it so your elbows rest at a 90 degree angle when your hands touch the keyboard. This reduces stress on the tent legs because they won’t bear as much weight.
Keep your posture upright and bring the keyboard closer to your body. When you slouch or reach forward, you put extra pressure on the tent legs. Moving the keyboard nearer means less strain overall. Your shoulders and arms will thank you too.
Change your keyboard position throughout the day. Don’t keep it at the same tenting angle for eight hours straight. Alternate between different angles or even remove the tent legs occasionally. This variety prevents the repetitive stress that causes snapping.
Inspect your tent legs regularly for signs of wear. Look for small cracks, bending, or discoloration. Catch problems early before they become breaks. If you notice damage, reduce tenting angle immediately or use a workaround while you arrange a replacement.
Check that your tent legs attach securely to the keyboard base. Loose connections create wobbling and put uneven pressure on the legs. Tighten any loose parts you find. Make sure the legs sit flat and level on your desk surface too.
Use your desk properly. Keep the keyboard away from desk edges where it might get bumped or knocked over. Avoid leaning on the keyboard or putting weight on the tent legs. Treat your split keyboard gently, and it will last much longer.
Common Mistakes When Repairing or Replacing Tent Legs
People often make mistakes when fixing or replacing tent legs on split keyboards. Understanding these errors helps you avoid costly repairs and prolonged discomfort.
Over complicating the repair process is the first major mistake. Many users try to reinforce a snapped leg with excessive layers of tape, glue, or metal brackets. This adds weight and changes how your keyboard sits. Keep reinforcement simple and minimal. Use one layer of strong adhesive wrap or a single support rod.
Ignoring proper ergonomic positioning during repairs leads to continued problems. You fix the leg but then position your keyboard too far away or too low. Your wrist and forearm strain increases even with a working tent leg. Sit upright and bring your keyboard closer to your body after any repair.
Replacing tent legs without checking the mounting point causes new breaks quickly. The connection where the leg attaches to your keyboard base may be loose or damaged. Tighten this connection before installing a replacement leg. A weak attachment point will snap the new leg just as fast as the old one.
Failing to vary your setup throughout the day puts constant stress on tent legs. Using the same tenting angle for eight hours straight creates fatigue in the support structure. Change your keyboard position every few hours. This reduces stress and extends the life of your legs.
Adjusting only the keyboard without changing chair height creates awkward angles. Your tent leg compensates for poor desk setup. Raise or lower your chair so your elbows stay at ninety degrees. Proper chair height reduces the burden on tent legs significantly.
Final Thoughts
A snapped tent leg feels like a big problem. But it’s usually a small fix.
You can repair it fast with tape, dowels, or adhesive wrap. These fixes hold up well for daily typing.
Prevention matters more than repair. Good posture and proper desk height stop most breaks before they happen.
Keep your keyboard close to your body. Sit upright instead of leaning forward.
Small habits protect your equipment. Check your tent legs often for cracks or wear. Catching damage early saves you time later.
Remember to change your keyboard position throughout the day. Staying in one tenting angle for hours adds stress to the legs.
Your chair height also plays a role. Raise or lower it to match your tenting angle properly.
This keeps your wrists and arms in a natural position. It also reduces pressure on the tent legs themselves.
Avoid overcomplicating repairs. Simple solutions often work best for minor breaks.
Don’t skip ergonomic checks after fixing a leg. A repaired leg still needs proper support to last.
Always inspect the mounting point before reattaching a leg. A weak connection point causes repeat snapping.
Split keyboards already help reduce shoulder and wrist strain. Tenting adds even more comfort when done right.
Fixing a broken leg is only part of the solution. Building good habits keeps your setup working longer.
Take a few minutes each week to check your equipment. This simple step prevents future frustration.
With the right care, your split keyboard can serve you well for a long time. Small adjustments make a big difference in comfort and durability.
Stay consistent with these habits. Your hands and wrists will thank you.
Frequently Asked Questions
Why do tent leg breaks happen so often on split keyboards?
Tent legs snap because they bear your keyboard’s weight at an angle. When you slouch or reach forward, extra pressure builds up on these legs. The mounting points take the most stress. Over time, small cracks form and grow into breaks. Poor desk and chair height setup makes this worse. Positioning matters more than you might think.
Can I use my split keyboard without tent legs?
Yes, you can use it flat on your desk. However, you lose the ergonomic benefits that tenting provides. Flat keyboards force your wrists into less natural positions. Split keyboards already reduce shoulder tension, but tenting amplifies those benefits. Your arms stay more relaxed when the keyboard angles up. Consider temporary solutions while you repair or replace the legs.
What temporary solutions work best for broken tent legs?
Chair armrests can support your keyboard at an angle. Books or small blocks under the keyboard base create tenting too. These options work for a few days while you arrange repairs. They cost nothing and keep you comfortable. Just make sure your setup feels stable. Adjust your chair height to match whatever angle you create.
How do I know if my tent legs will snap soon?
Inspect them weekly for small cracks or bending. Look for discoloration or stress marks. Check that legs attach securely to the keyboard base. If you notice wobbling, the connection is loosening. Act fast when you see these signs. Regular checks catch problems early. Small issues become big breaks quickly if ignored.
Should I try DIY repairs or get replacements?
Simple breaks respond well to tape or adhesive wrap around the damaged area. Severe snaps need replacement legs. Check your keyboard’s manual for part availability. Some manufacturers sell replacement legs separately. Others require contacting support. Keep your receipt and warranty information handy.

Hi, I’m Jessamine Rowell, the founder and voice behind ResizeMake (https://resizemake.com/), a space where I share my love for technology with the world. I write detailed and honest reviews on the latest tech products, gadgets, electronic devices, and trending Amazon items to help readers make smarter buying decisions.