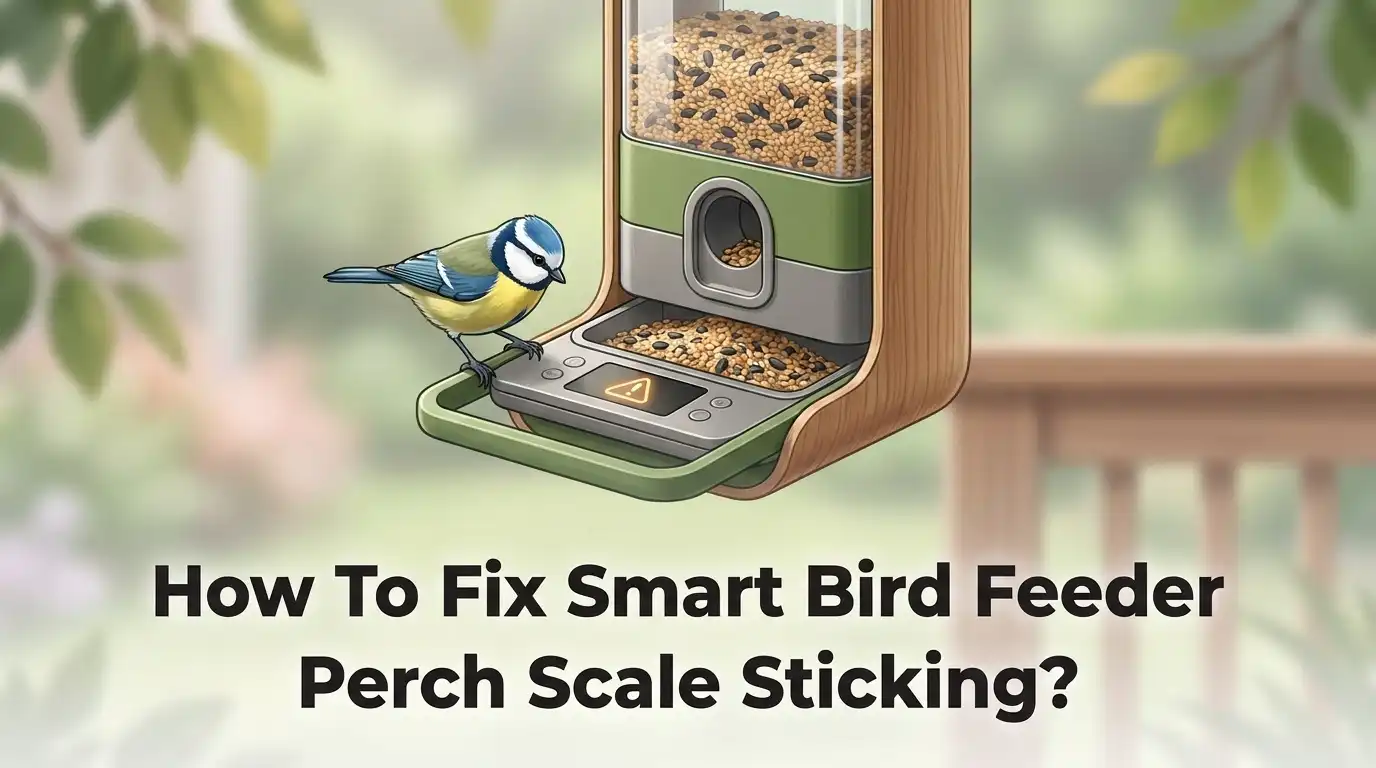
How To Fix Smart Bird Feeder Perch Scale Sticking?
Does your smart bird feeder perch feel stuck or stiff? You are not alone.
Many bird lovers face this small but annoying problem. The good news is that it’s usually easy to fix.
A sticking perch scale often happens because of loose parts or misalignment. Sometimes the wing nut at the bottom becomes loose over time. Other times, the perch ring is not seated correctly.
This can stop your feeder from weighing birds properly or recognizing them at all.
In this guide, we will walk you through simple steps to solve this issue. You will learn how to check the wing nut, adjust the perch angle, and use a shim for better alignment.
We will also cover common mistakes people make when fixing their feeders. Many users try to adjust perches that are not designed to move, which can cause more harm than good.
By the end of this article, you will know exactly how to get your feeder’s perch working smoothly again. Let’s get your feathered friends back to feeding happily!
In a Nutshell
Here is a quick summary to help you fix your sticking perch scale fast.
-
Check the wing nut first. A loose wing nut at the bottom of the feeder is the most common cause of sticking. Tighten it firmly to fix the problem.
-
Use a shim for angle issues. Slide a small shim behind the top of the perch. This adjusts the tilt and stops sticking.
-
Seat the perch ring properly. Make sure the ring sits correctly in its slot. A loose ring often causes weight or motion errors.
-
Test all pegs before assembly. Every peg should rotate freely. Stiff pegs can jam the whole perch system.
-
Know your model type. Some perches are non-adjustable by design. Trying to force adjustments on these can cause damage.
-
Ask the community if stuck. Share photos of your setup online. Other users can often spot issues you might miss.
These small checks solve most sticking problems quickly. Patience and careful setup make a big difference.
Understanding Why Your Perch Scale Sticks
A sticking perch scale happens when parts lose their proper position or connection. Understanding the root cause helps you fix the problem faster and prevents it from happening again.
Loose components are the main culprit. The wing nut at the bottom of your feeder can gradually loosen from normal use, vibration, or weather changes. When this nut becomes slack, the entire perch assembly shifts slightly. This shift creates friction that makes the perch feel stuck or resistant to movement.
Misalignment also causes sticking issues. The perch ring needs to sit perfectly in its slot to function correctly. If the ring shifts even a small amount, it can bind against the feeder body. This binding prevents smooth operation and makes the scale unresponsive.
Moisture and debris play a role too. Rain, bird droppings, and dust accumulate around the perch mechanism over time. These materials can create resistance that feels like sticking. They also interfere with the sensor’s ability to register bird weight accurately.
Assembly errors during setup create sticking problems from day one. If pegs don’t rotate freely before you assemble the feeder, they will stick later. Improper seating of components during initial setup compounds the issue.
Design limitations matter for some models. Certain feeders have non-adjustable perches by design. These cannot move or tilt, so “sticking” actually means the perch works as intended. Understanding your specific model prevents confusion.
The good news is that most sticking issues stem from simple mechanical problems. Once you identify which factor affects your feeder, the fix becomes straightforward. We will cover each solution in the following sections.
Tools and Materials You’ll Need
Before you start fixing your smart bird feeder perch scale, gather the right tools and materials. Having everything ready makes the job faster and easier.
You will need a wrench or adjustable tool to tighten the wing nut at the bottom of your feeder. This nut often comes loose during use or shipping. A small wrench fits most standard feeders without trouble.
A shim or thin wedge is essential for angle adjustments. You can use a plastic shim, a thin piece of wood, or even a small rubber wedge. This goes behind the perch at the top to fix tilt problems.
Keep a soft cloth or brush nearby to clean debris. Dust and dirt can accumulate around the perch ring and cause sticking. Wipe away any buildup gently before reassembly.
You should have a small flashlight or headlamp to see inside tight spaces. The bottom of your feeder can be dark, and good lighting helps you spot loose components quickly.
A level tool helps verify proper alignment. Place it against the perch to check if it sits straight. Misalignment often causes sticking, so this simple check matters.
Grab a notebook or phone camera to document your setup. Take photos before you begin work. These images help you remember how parts fit together during reassembly.
Finally, keep your device manual or app nearby. Some feeders have specific assembly steps that prevent sticking. Reference materials guide you through proper setup and troubleshooting.
Having these basic tools and materials ready means you can fix your sticking perch scale without delays or frustration.
Step-by-Step Guide to Fixing a Sticking Perch
A sticking perch scale usually happens when components shift out of position during use or assembly. The problem feels frustrating, but the fix is straightforward once you know where to look.
Start by checking the wing nut at the bottom of your feeder. This single component causes most sticking problems. Use your wrench to tighten it firmly. A loose wing nut allows the entire perch mechanism to wobble, which prevents smooth movement.
Next, inspect the perch ring to confirm it sits correctly in its slot. The ring must stay fully seated during operation. If it has shifted, gently remove the perch and reseat the ring by hand. Push it down until you hear or feel it click into place.
Test each peg for free rotation before you reassemble anything. Grab each peg and turn it by hand. Every peg should spin without resistance. If one peg feels stuck or gritty, clean around it with a soft cloth to remove debris.
For angle related sticking, use the shim method. Slide a thin shim or wedge behind the top of the perch to adjust its downward tilt. This simple fix often resolves binding issues on non adjustable models.
Check for debris and moisture inside the feeder housing. Bits of seed, dirt, or water droplets can jam the mechanism. Use your flashlight to peer inside and your brush to sweep away any buildup.
Finally, verify alignment with a level tool. Place it against the perch to confirm it hangs straight. Misalignment causes binding that feels like sticking.
These practical steps solve most perch scale sticking problems without special skills or equipment.
How to Use the Shim Method for Non-Adjustable Perches
The shim method works best for non-adjustable perches that stick due to angle problems. A shim is simply a thin wedge or spacer that you place behind the perch to change its tilt.
Start by removing your perch from the feeder housing. Look at where the perch connects to the main body. You’ll see a mounting point at the top where the perch attaches. This is where you’ll insert your shim.
Cut or gather a thin shim material. You can use plastic, rubber, or even a folded piece of sturdy material. The shim should be roughly the width of your perch and thin enough to fit in the mounting gap without forcing anything.
Insert the shim behind the perch at the top mounting point. Push it in gently until it sits flush. The shim creates a slight angle that changes how the perch sits. This small adjustment often stops sticking by ensuring proper clearance.
Reinstall the perch into the feeder. Check that it moves freely without binding. Test the perch movement several times to confirm the sticking has stopped.
If the perch still sticks, try a slightly thicker shim. Sometimes you need to experiment with shim thickness to find the right fit. Keep track of what works by noting the material thickness in your phone or notebook.
The shim method requires no special tools or skills. It’s a mechanical fix that addresses angle related sticking without permanent changes to your feeder. Most people see results within their first attempt.
Checking and Tightening the Bottom Wing Nut
The bottom wing nut holds your perch scale in place. When this nut loosens, the perch shifts and sticks during operation. Checking and tightening this component is often the quickest fix.
Locate the wing nut on the underside of your feeder. You will find it where the perch assembly connects to the main housing. Use your wrench or adjustable tool to grip it firmly. Turn clockwise to tighten. Do not force it. Stop when you feel solid resistance.
A loose wing nut causes the perch to wobble and catch. This wobbling creates friction that makes the scale stick. Tightening eliminates this movement immediately. Many users find this single step solves their problem completely.
Check the nut regularly during operation. Vibrations from birds landing and taking off can loosen it over time. Make it part of your monthly maintenance routine. A quick check takes less than one minute.
If the wing nut is already tight, the problem lies elsewhere. Move on to inspect the perch ring and test peg rotation. Sometimes multiple loose components work together to cause sticking.
Document your findings with photos or notes. Record whether the nut was loose and how much you tightened it. This information helps you identify patterns. You may notice the nut loosens after certain weather conditions or heavy bird activity.
Tightening the bottom wing nut prevents most perch scale sticking issues. This simple maintenance task keeps your feeder working smoothly. Start here before trying more complex fixes. Your smart feeder will reward you with accurate readings and smooth perch operation.
Best Practices to Prevent Future Sticking
Preventing future sticking requires consistent maintenance and smart setup habits. Start with proper assembly every time you install your feeder. Make sure all pegs rotate freely before you put pieces together. This simple check stops many problems before they begin.
Keep the perch ring seated correctly during operation. The ring must stay in its slot without shifting. Check it weekly to confirm it hasn’t moved. A properly seated ring prevents friction and sticking.
Tighten your bottom wing nut regularly. A loose wing nut causes the perch to wobble and catch during use. Check it every two weeks, especially after heavy bird activity. A snug wing nut keeps everything stable and functional.
Moisture and debris create sticking problems over time. Clean your feeder housing every month with a dry cloth. Remove any seeds, dirt, or moisture inside the mechanism. Keep the perch area dry to prevent corrosion and friction.
Use your app or device manual to verify proper setup. Most sticking issues come from incorrect installation. Follow the setup steps exactly as written. Take photos of your assembled feeder to compare with instructions if needed.
Test your perch movement weekly by hand. Gently move it up and down to check for resistance. Early detection stops small problems from becoming big ones. If you feel any sticking, address it immediately using the shim method or wing nut adjustment.
Store your feeder indoors during extreme weather. Temperature changes and moisture cause components to swell or shift. Proper storage extends the life of your perch scale and keeps it functioning smoothly for years.
Common Mistakes to Avoid
Many people make simple errors that cause perch sticking problems. These mistakes are easy to fix once you know what to avoid.
The most common mistake is leaving the bottom wing nut loose. People assemble their feeder and forget to check this critical component. A loose wing nut allows the perch to wobble and catch during operation. Always verify this nut is tight before you use your feeder.
Another frequent error involves improper perch ring seating. The perch ring must sit correctly in its designated slot. If you force the ring or seat it at an angle, the perch will stick when it moves. Take time to align the ring properly during assembly.
Failing to test pegs before reassembly causes sticking too. Each peg must rotate freely without resistance. Many people skip this step and discover problems later. Spend a few seconds rotating each peg by hand to confirm smooth movement.
People also make the mistake of ignoring moisture and debris buildup. These materials accumulate inside the feeder housing and create friction. Regular cleaning prevents this issue from developing.
Some users attempt adjustments on truly non-adjustable models. You cannot force an adjustment where none exists. Instead, use the shim method for angle related problems on fixed perches.
Finally, many people forget to verify proper setup through their app or manual. Incorrect initial setup creates sticking issues that seem mysterious. Follow your device instructions carefully during the first assembly.
Avoiding these common mistakes saves you time and frustration. Most sticking problems stem from these preventable errors rather than equipment failure. Stay consistent with maintenance and setup best practices to keep your perch scale working smoothly.
Troubleshooting Persistent Perch and Scale Issues
When your smart bird feeder perch scale sticks, the problem usually comes from a few specific causes. Misalignment and loose components are the main culprits behind this frustrating issue.
Start by examining the perch ring. This ring must sit flush against the feeder body. If it’s tilted or partially seated, the perch will bind when you try to move it. Remove the perch carefully and reseat the ring with firm, even pressure all around.
Next, inspect all the pegs that support your perch. Each peg should rotate freely without any grinding or resistance. Spin them by hand before you reassemble anything. Stuck pegs will cause the entire perch to jam. If a peg feels stiff, apply a small amount of lubricant designed for outdoor equipment and work it back and forth gently.
Check your perch assembly for debris or moisture. Bird seed dust, pollen, and water can accumulate in the joints and create friction. Wipe down all surfaces with a dry cloth. Pay special attention to where the perch connects to the feeder body.
If sticking persists after these checks, the perch angle might need adjustment. Insert a shim, which is a thin folded piece of sturdy material, behind the perch at the top mounting point. This shifts the angle slightly and often resolves binding issues.
Test your perch movement by hand after each adjustment. Move it up and down slowly to feel for any catching or resistance. Your perch should glide smoothly without effort. If problems continue, document the issue with photos and share details with your community for additional guidance.
Final Thoughts
Fixing a sticky perch scale does not need to feel hard. Most problems come from simple, fixable causes.
A loose wing nut causes most sticking issues. Tighten it first before trying anything else.
Check your perch ring next. It must sit properly for smooth movement every time.
Test each peg by hand. They should rotate freely without any resistance at all.
For non-adjustable models, the shim method works well. Place a small shim behind the perch at the top. This adjusts the angle and fixes the downward tilt.
Regular checks prevent most future problems. Make this part of your normal feeder routine.
Weather and debris affect your feeder over time. Clean it often and store it indoors when needed.
Your feeder app can guide you through proper setup. Use it to verify settings whenever you feel unsure.
Some issues need community input, especially with camera features. Share photos with other users when you feel stuck.
Patience matters during this process. Rushing repairs often creates new problems instead of solving old ones.
Take your time with each step. Small adjustments often make a big difference in performance.
Remember that most sticking issues have simple solutions. You rarely need professional help for these common problems.
Trust the basic checks first. Wing nuts, perch rings, and pegs solve most sticking issues quickly.
With regular care, your feeder will work smoothly for years. Your feathered visitors will thank you for the effort.
Simple maintenance keeps everything running well. A little attention now saves bigger headaches later.
Stay consistent with your checks. Your smart feeder will reward you with reliable performance every single day.
Frequently Asked Questions
Why does my perch stick even after I tighten the wing nut?
A tight wing nut helps, but sticking often comes from multiple issues working together. Your perch ring might not be seated correctly in its groove. The pegs supporting the perch could have debris or moisture trapped inside them. Check each component one at a time rather than assuming the wing nut alone fixes everything.
Also inspect whether your perch sits at the right angle. Sometimes the perch needs a slight tilt adjustment that tightening alone cannot provide. Take photos of your setup and compare them to your manual for proper positioning.
Can I use the shim method on my feeder?
Yes, the shim method works for most models, especially non adjustable ones. A shim is a thin wedge you insert behind the perch at the top. This changes the angle and helps the perch move freely again.
Insert the shim carefully so it does not interfere with the scale sensor. Test the perch movement after adding the shim. You may need to adjust the shim position slightly to find the sweet spot where movement feels smooth.
What should I check before contacting support?
Start with the basics. Verify your wing nut is tight. Make sure your perch ring sits fully in its seat. Rotate each peg by hand to confirm they move without resistance.
Clean around the perch assembly gently to remove any dust or debris. Check your app setup matches your manual instructions. These quick checks solve most sticking problems without needing outside help.
Why won’t my perch move at all?
A completely stuck perch usually means a loose wing nut or an unseated perch ring. Tighten the wing nut firmly at the feeder bottom. Then lift your perch gently and reseat the ring in its groove.
If movement still does not happen, debris may block the pegs. Gently clean the area around the perch assembly. Test movement again after cleaning.

Hi, I’m Jessamine Rowell, the founder and voice behind ResizeMake (https://resizemake.com/), a space where I share my love for technology with the world. I write detailed and honest reviews on the latest tech products, gadgets, electronic devices, and trending Amazon items to help readers make smarter buying decisions.