How To Fix Underwater Camera Housing O-Ring Bulging?
A bulging o-ring can ruin your dive day fast. You open your camera housing and notice the rubber ring looks swollen or misshapen. This small issue can lead to a big problem: water leaking into your expensive gear.
The good news? You can fix this yourself without special tools or a trip to the repair shop.
Bulging usually happens because of poor lubrication or trapped debris. Sometimes it is a mix of both. Your o-ring works hard to keep water out, so it needs proper care.
In a Nutshell
- Remove the o-ring first. Take it out of the housing and check the groove for any damage or debris.
- Clean everything thoroughly. Use an air blower to clear dust and hair from the groove. Rinse the o-ring with fresh water to remove sand or salt.
- Apply a light coat of silicone grease. Only use the lubricant your manufacturer recommends. A thin layer is all you need.
- Avoid stretching the o-ring. Gently reseat it into the groove without pulling or twisting it.
- Make cleaning a habit. Rinse your housing after every dive and lubricate it before each trip into the water.
- Watch for common mistakes. Over-lubricating, using wrong grease types, and leaving debris behind are the top causes of bulging.
What Causes O-Ring Bulging in Camera Housings
O-ring bulging happens when your rubber seal swells up inside the housing groove. This swelling prevents a tight fit and lets water seep into your camera. Understanding what causes it helps you prevent future problems.
Poor lubrication is the main culprit. When your o-ring dries out, it loses flexibility. The rubber becomes stiff and can’t seat properly in the groove. A dry o-ring also attracts dust and salt particles that make bulging worse.
Debris trapped in the groove creates another common issue. Sand, hair, and salt crystals build up over time. These tiny particles push against the o-ring and force it to bulge outward. Your o-ring can’t compress evenly when debris blocks part of the groove.
Over-lubrication causes bulging too. Too much grease makes your o-ring swell like a sponge absorbing water. Excess lubricant also prevents the ring from seating deeply enough in the groove. The o-ring sits too high and looks visibly swollen.
Salt and mineral buildup from ocean water hardens inside the groove. Salt doesn’t rinse away easily with casual rinsing. It crystallizes and creates rough spots that push your o-ring out of position.
Stretching during installation damages the o-ring material. When you pull or twist the ring too hard, it loses its original shape. A stretched o-ring won’t compress properly and appears bulged even when lubricated correctly.
Temperature changes affect rubber material too. Cold water makes rubber contract while warm storage makes it expand. Rapid temperature swings can cause temporary bulging that goes away once the o-ring adjusts.
Catching bulging early prevents water damage. Regular inspection before and after dives keeps your housing safe. Fresh water rinses and proper lubrication stop most bulging problems before they start.
Signs Your O-Ring Needs Immediate Attention
A bulging o-ring shows clear warning signs before it floods your camera. Watch for visible swelling where the rubber ring looks puffy or enlarged compared to its normal flat shape. You might notice the o-ring sits higher than it should in the groove or appears to bulge outward on one or more sides.
Feel the o-ring during handling to detect firmness changes. A healthy o-ring feels slightly spongy but holds its shape. A bulging one feels overly soft or mushy, like it has absorbed too much lubricant or moisture. This texture change tells you trouble is coming.
Check the housing groove itself for signs of trouble. Look for visible cracks, tears, or permanent deformation in the rubber. If the o-ring leaves an indent or depression that doesn’t bounce back, damage has already occurred. Sand or salt crystals stuck in the groove also indicate maintenance issues.
Test the seal before diving by closing your housing and looking for gaps. A properly seated o-ring should sit flush in the groove with no visible space between the rubber and the housing walls. Any separation means water can seep inside during your dive.
Pay attention to moisture inside your housing after dives. Condensation or water droplets on your lens suggest the o-ring failed to create a watertight seal. This happens when bulging prevents proper contact with the housing walls.
Don’t ignore these warning signs. A bulging o-ring will leak, and water damage to your camera happens fast. Even small amounts of water can ruin expensive equipment. If you spot any of these issues, remove your o-ring immediately and follow the cleaning and lubrication steps before your next underwater use. Catching problems early saves your gear and your dive day.
Step-by-Step Guide to Fixing a Bulging O-Ring
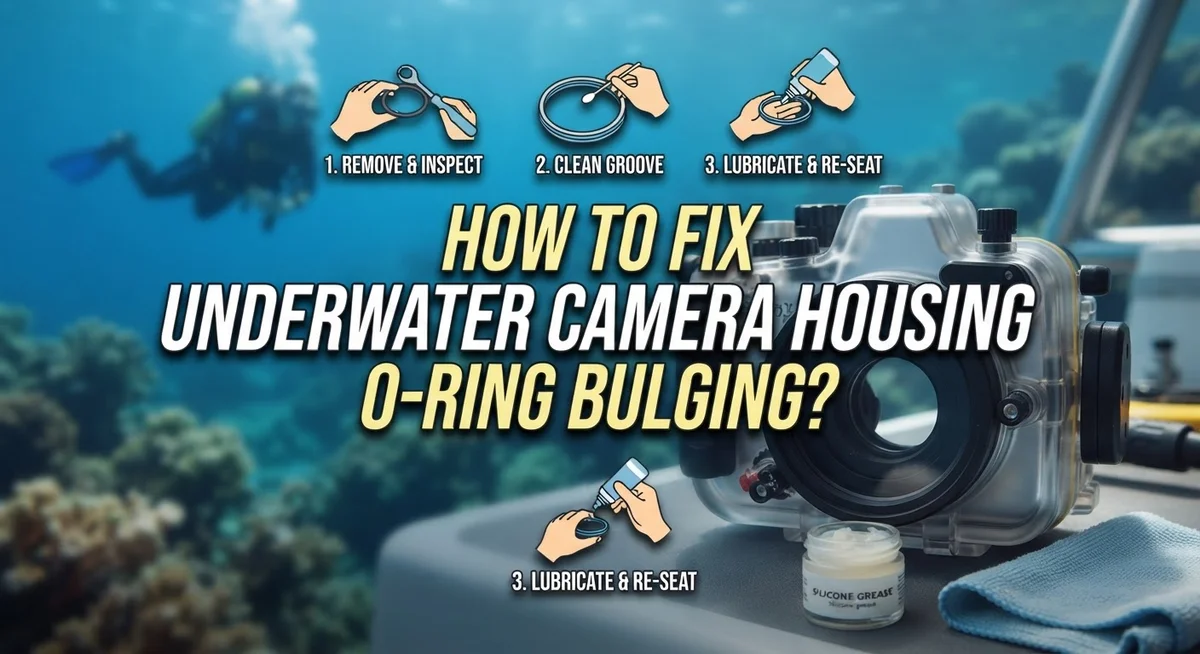
Start by removing your o-ring from the housing groove. Handle it gently and avoid stretching the rubber material during removal. Place it on a clean, dry surface where you can examine it closely.
Inspect the groove where your o-ring sits. Look for sand, salt crystals, hair, or other debris trapped inside. These particles prevent the o-ring from seating properly and cause bulging. Use an air blower to remove loose particles from the groove. Work the blower around the entire groove to ensure complete cleaning.
Rinse your o-ring under fresh water. Salt and mineral deposits harden on the rubber and reduce flexibility. Gently rub the o-ring surface with your fingers to remove stubborn buildup. Pat it dry with a lint-free cloth. Make sure no moisture remains before applying lubricant.
Apply a thin layer of silicone grease to your o-ring. Use only the lubricant your camera housing manufacturer specifies. Different housings require different grease types. A light coating is all you need. Over-lubricating causes the o-ring to swell and bulge again.
Now reseat the o-ring into the groove carefully. Push it down gently and work your way around the entire groove. Avoid pulling or twisting the rubber. The o-ring should sit flat and even throughout the groove with no bunching or gaps.
Close your housing and check for any visible gaps between the o-ring and the housing edge. A proper seal shows no separation. If gaps appear, remove the o-ring and repeat the seating process.
Test your seal before your next dive. Fill your housing with water in a sink and watch for leaks. This simple test catches problems before they damage your camera. Once the seal passes testing, your housing is ready for water.
Choosing and Applying the Right Silicone Grease
Silicone grease is your first line of defense against o-ring bulging. The right lubricant keeps your seal flexible and prevents water from entering your camera housing.
Check your housing manual first. Each manufacturer specifies which silicone grease works best for their equipment. Using the wrong type of lubricant can actually make bulging worse, not better. Some greases contain additives that cause rubber to swell. Stick with what your manufacturer recommends.
Before you apply any grease, your o-ring must be completely clean. Rinse it under fresh water and dry it thoroughly. Any salt crystals or sand particles left on the surface will get trapped under the grease and create pressure points. These pressure points lead directly to bulging.
Apply grease sparingly. This is the most common mistake people make. You need only a thin, light coating around the entire o-ring. Think of it as a barely visible layer, not a thick paste. Too much grease acts like a cushion that pushes your o-ring outward against the groove walls.
Use your finger or a soft cloth to spread the grease evenly. Work your way around the entire circumference of the o-ring. Make sure no spots are missed, but also make sure no area has excess buildup.
Now reseat your o-ring into the groove carefully. Push it down gently and work it around the full circle. The groove should hold your o-ring snugly without gaps.
Test your seal before diving. Close your housing and look for any visible separation between the o-ring and the housing edge. If you see daylight through any gap, your o-ring needs adjustment.
Perform this cleaning and lubrication routine before each dive. Post-dive, rinse everything with fresh water. This simple habit prevents salt from hardening in the groove and keeps your seal working properly.
Pre-Dive and Post-Dive Maintenance Routine
Your pre-dive routine keeps your camera safe from water damage. Start by removing your o-ring from the housing groove gently. Inspect the groove carefully for any sand, salt crystals, or debris stuck inside.
Use an air blower to clear the groove completely. Hair and dust hide in corners and cause bulging later. Work the blower around the entire groove to dislodge everything.
Rinse your o-ring under fresh water thoroughly. Rub it gently with your fingers to remove salt buildup. Pay special attention to any white crusty deposits. These mineral deposits harden over time and push your o-ring outward.
Check the o-ring itself for any visible damage or cracks. A damaged o-ring needs replacement, not just lubrication. Look for flat spots or permanent dents that indicate material fatigue.
Apply a thin layer of silicone grease to your clean o-ring. This step matters most. Too much grease causes bulging. Too little leaves gaps where water enters. Use just enough to coat the entire o-ring with a light sheen.
Reseat your o-ring into the groove slowly and evenly. Don’t stretch it as you install it. Let the groove guide the o-ring into place naturally. Work your way around the entire housing to seat it properly.
After your dive, rinse your housing and o-ring with fresh water immediately. Salt water dries and hardens quickly. Work all buttons and controls to dislodge salt crystals trapped inside.
Pat everything dry with a soft cloth. Store your housing with the o-ring removed and the groove exposed to air. This prevents moisture from sitting trapped inside.
Check your o-ring weekly during regular use. Early maintenance stops bulging before it starts. Your camera stays dry and ready for the next dive when you follow this routine consistently.
Common Mistakes That Worsen O-Ring Problems
Over-lubricating your o-ring is the fastest way to cause bulging. Many divers think more grease means better protection, but this approach backfires. Excess lubricant creates pressure inside the groove and forces the o-ring outward.
Stretching your o-ring during installation damages its shape permanently. When you force it into the groove too quickly or pull it too hard, the rubber loses its ability to seal properly. Always seat it gently and evenly around the entire groove.
Failing to remove salt and debris before applying grease traps contaminants against your o-ring. Sand particles and salt crystals act like tiny wedges that push the o-ring out of position. Your pre-dive cleaning must include an air blower to clear the groove completely.
Using the wrong lubricant type causes chemical reactions that swell the o-ring. Some divers use general-purpose greases or oil-based products instead of silicone grease. This mismatch between lubricant and rubber material leads to expansion and bulging.
Ignoring small bulges allows the problem to worsen before your next dive. A slightly raised o-ring will leak, and water enters your housing quickly. Catching bulging early means a simple fix instead of camera damage.
Reseating a dirty o-ring back into the groove repeats the same failure. If you didn’t clean it properly the first time, bulging returns within days. Always start fresh with a clean o-ring and clean groove.
Skipping post-dive rinsing leaves salt buildup in the groove. This buildup hardens and prevents your o-ring from seating flat on your next dive. Rinse immediately after every dive, even if you’re tired.
Working your camera’s buttons and controls with dirty hands adds grit to the groove. This contamination pushes against your o-ring and creates bulging. Keep your hands clean and dry during all maintenance steps.
Troubleshooting Persistent Bulging or Leaks
When persistent bulging or leaks continue despite your cleaning efforts, you need to dig deeper into the problem. The issue often hides in places you haven’t checked yet.
Start by removing your o-ring and inspecting the groove itself very carefully. Look for tiny scratches, cracks, or rough spots inside the groove. Even small damage to the groove wall can prevent a proper seal. Run your finger gently along the entire groove to feel for irregularities. Sand, salt crystals, or hardened debris stuck in the groove will cause bulging every single time.
Use an air blower with steady pressure to clear the groove completely. Hold your housing at different angles so air reaches all corners. Sometimes debris hides in the deepest part of the groove where your fingers cannot reach.
If bulging returns immediately after you reseat the o-ring, the groove itself may need attention. Rinse the groove with fresh water and let it dry completely. Check if any corrosion or discoloration appears inside the groove. This suggests salt damage that prevents a tight fit.
Your o-ring itself might be permanently stretched or deformed. Even proper maintenance cannot fix an o-ring that has lost its original shape. If the o-ring no longer springs back to its original size after you remove it, replacement becomes necessary.
Test your seal by closing your housing without diving first. Look for visible gaps between the o-ring and the housing wall. Press gently on the housing to see if the o-ring moves or shifts position.
If bulging persists after groove cleaning and o-ring inspection, water may be entering from a different location entirely. Check all other seals, buttons, and control interfaces on your housing. Sometimes the problem appears as o-ring bulging when the actual leak comes from somewhere else on your equipment.
Final Thoughts
Fixing a bulging o-ring does not need to feel hard. Most problems come from small habits like skipping cleaning steps or using too much grease. Once you understand the pattern, prevention becomes simple.
Your camera housing depends on one tiny ring for protection. That small part decides if your gear stays dry or gets ruined. Treating it with care every time you dive protects your entire investment.
Think of o-ring care as part of your dive routine, not an extra chore. Just like checking your tank or testing your regulator, o-ring checks deserve the same attention. This mindset shift makes maintenance feel natural instead of tedious.
Consistency matters more than perfection. You do not need advanced tools or expert skills. You just need patience and a steady routine before and after each dive.
If bulging keeps happening, do not ignore it. Small issues today can turn into flooded housings tomorrow. Catching problems early always costs less than fixing water damage later.
Remember that every housing and o-ring reacts differently to heat, pressure, and saltwater exposure. What works for one diver might need slight changes for your own gear. Stay observant and adjust your care routine as needed.
Keep spare o-rings on hand for trips. A backup ring can save a dive if your current one shows damage. This small step gives peace of mind underwater.
Your camera housing protects memories that matter. A little effort in care and cleaning keeps your gear reliable dive after dive. Simple habits now prevent bigger headaches later.
In the end, o-ring care is not complicated. It just needs attention, the right lubricant, and a routine you follow every single time you dive.
Frequently Asked Questions
How often should I clean and lubricate my o-ring?
Perform this maintenance before and after every dive. Pre-dive cleaning ensures no debris sits in the groove. Post-dive rinsing removes salt that hardens overnight. This routine prevents buildup that causes bulging.
What type of lubricant should I use?
Always use the silicone grease specified by your housing manufacturer. Different housings require different formulations. Using the wrong lubricant causes chemical reactions that swell your o-ring. Check your manual for the exact product name.
Can I reuse the same o-ring multiple times?
Yes, you can reuse o-rings with proper care. Clean it with fresh water after each dive. Inspect it for cracks or permanent stretching. Store it in a cool, dry place away from direct sunlight. Replace it if you notice flattening or deformation.
Why does my o-ring bulge even after I clean it?
Bulging often means debris remains trapped in the groove. Use an air blower to clear the channel completely before reinserting the o-ring. Apply only a light coating of lubricant. Too much grease causes swelling. If bulging returns immediately, the groove itself may need deeper inspection or your o-ring may be permanently damaged.
What’s the difference between bulging and a failed seal?
Bulging is visible swelling of the o-ring itself. A failed seal means water enters your housing. Bulging usually happens before leaking occurs. Catching bulging early prevents water damage to your camera. If your housing floods despite a clean o-ring, the problem may come from a cracked housing or damaged groove.

Hi, I’m Jessamine Rowell, the founder and voice behind ResizeMake (https://resizemake.com/), a space where I share my love for technology with the world. I write detailed and honest reviews on the latest tech products, gadgets, electronic devices, and trending Amazon items to help readers make smarter buying decisions.