How To Fix Mirrorless Camera Hot Shoe Bracket Loosening?
Does your flash wobble on top of your camera? A loose hot shoe bracket is a common problem for mirrorless camera owners. It can turn a simple photo shoot into a frustrating experience.
This issue affects more than just your flash. A shaky hot shoe can disrupt your microphone, monitor, or other accessories too. Stability matters for every shot you take.
Many people try to fix this by tightening the bracket from outside. This method rarely works. The real fix requires a different approach altogether.
In this guide, we will show you exactly how to fix a loose hot shoe bracket. You will learn why external tightening fails every time. We will also cover the correct disassembly steps needed to access the internal mounting points.
Safety comes first in any camera repair. We will point out common mistakes to avoid along the way. You will also learn when it makes sense to call a professional instead.
By the end, you will understand this repair process clearly. Let’s get your camera accessories stable again.
In a Nutshell
A loose hot shoe bracket needs an internal fix, not a quick external tightening. Here is a quick summary of what you need to know.
-
The real cause: The bracket loosens from inside the camera body. You cannot fix it by turning screws on the outside.
-
Two main solutions: You can replace the metal bracket if it looks damaged or ripped. Or you can open the camera and tighten the screws from within.
-
Skip the glue trick: Adhesive might seem like an easy fix. But it will not solve the root problem long term.
-
Disassembly is required: You must open the camera body to reach the mounting points. This lets you tighten everything properly from the interior.
-
Model matters: Sony and Canon cameras have different internal layouts. Your repair steps will vary based on your specific model.
-
Know your limits: If you feel unsure about opening your camera, professional service is a smart choice. This protects your gear from further damage.
Follow these steps carefully, and your accessories will sit steady again.
What Causes a Hot Shoe Bracket to Loosen
A loose hot shoe bracket happens because of how the bracket connects inside your camera. The bracket sits beneath the top surface of your camera body. It attaches to the internal frame using screws from the inside.
Over time, vibration causes these internal screws to come loose. Every time you press the shutter button or move your camera, tiny vibrations occur. These vibrations gradually loosen the screws that hold the bracket in place. Eventually, the bracket shifts and becomes unstable.
Another reason involves repeated accessory changes. When you mount and remove flashes, microphones, or monitors many times, the bracket experiences stress. Each insertion and removal creates small movements. This constant action weakens the connection over time.
Impact and drops can also cause loosening. Even a minor bump transfers force to the bracket. The internal screws may shift slightly after impact. If this happens multiple times, the bracket becomes noticeably loose.
The bracket itself may develop issues too. Metal brackets can crack or become bent from rough handling. When the bracket is damaged, it cannot hold the screws tight anymore. A ripped or deformed bracket loses its grip on the fasteners.
Here’s what makes this tricky: You cannot tighten these screws from outside your camera. The screws are completely hidden inside the body. Trying to force them tight from the exterior will not work. You need internal access to fix the problem properly.
This is why many people feel frustrated with loose brackets. External attempts fail because the real problem sits beneath the surface. Understanding this helps you choose the right repair method. You now know that internal work is necessary to solve this issue permanently.
Signs Your Hot Shoe Bracket Needs Repair
Your mirrorless camera gives you clear warning signs when the hot shoe bracket starts failing. Learning to spot these signs helps you act before the problem gets worse.
Watch for wobbling accessories. If your flash, microphone, or external monitor rocks back and forth when you touch it, the bracket is loose. This movement happens even when you think you’ve secured everything tightly. The accessory should sit completely still on top of your camera.
Check for visible gaps. Look closely at where your flash connects to the camera body. You might see small spaces between the accessory and the shoe. These gaps mean the bracket has shifted inside. Gaps often appear on one side more than the other.
Listen for clicking sounds. When you walk or move your camera, pay attention to any clicking or rattling noises from the top. These sounds indicate internal movement. Your camera should be silent during normal use.
Notice difficulty inserting accessories. If your flash or microphone feels harder to insert than before, the bracket may be misaligned. You might need to wiggle it into place instead of sliding it smoothly.
Feel for movement when you press down. Gently push on your mounted accessory from different angles. A healthy bracket holds everything firm. Movement means the internal screws have come loose.
Check the shoe contacts. Examine the metal pins on your camera’s shoe. If they look bent, corroded, or damaged, the bracket connection is compromised.
These signs tell you it’s time to disassemble your camera and fix the bracket from inside. Don’t wait until the bracket fails completely or your accessories fall off.
Tools and Preparation Needed Before Disassembly
Before you open your camera, gather the right tools. This preparation step prevents damage and makes the repair go smoothly.
You will need a set of small screwdrivers. Get ones with different head sizes because camera screws vary. Precision screwdrivers work best for this job. Avoid using regular household screwdrivers, as they often slip and strip screw heads.
A clean workspace matters greatly. Find a flat surface where you can organize small parts. Use a small container or tray to keep screws separate. Label each group so you remember where each screw came from during reassembly.
Lighting is essential for seeing inside your camera. A headlamp or small flashlight helps you spot the bracket mounting points clearly. You will be working in tight spaces, so good illumination prevents mistakes.
Get a camera cleaning cloth nearby. You may need to wipe away dust or debris from internal surfaces. Never use regular tissues, as they leave fibers inside.
Consider having a parts diagram ready. Most camera manufacturers provide exploded views online. These diagrams show exactly where screws go and how components connect.
An anti static wrist strap protects your camera’s electronics. Static electricity can damage sensitive circuits inside your mirrorless body. Wear the strap throughout your work.
Keep your camera manual accessible. Different models have unique disassembly procedures. Sony and Canon cameras, for example, access the hot shoe differently.
Finally, have tweezers on hand. Small screws and springs can be tricky to handle with fingers alone. Tweezers give you better control in confined spaces.
This preparation takes just minutes but saves you from frustration and potential camera damage.
Step-by-Step Guide to Fixing a Loose Hot Shoe Bracket
Start by powering off your camera completely and removing the battery. This prevents any electrical issues while you work inside the camera body.
Next, locate all the screws holding your camera’s external panels. Your camera manual shows exactly where these are positioned. Take a photo of the screw locations with your phone before removing anything. This helps you remember where each screw goes during reassembly.
Remove the exterior panels slowly and carefully. Set each screw in a small container or on a labeled piece of tape. Do not force any panels if they seem stuck. Gently wiggle them while pulling.
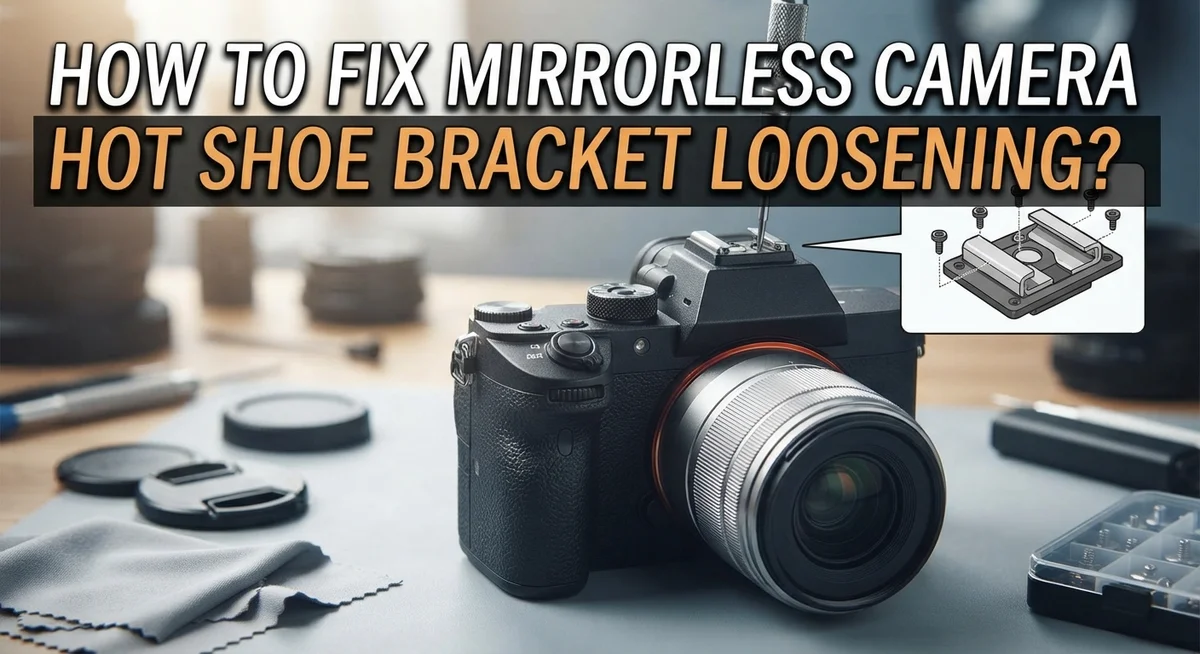
Once inside, you will see the hot shoe bracket mounted to the camera’s top plate. Look for the screws securing this bracket from the interior side. These are the screws causing your problem. They have loosened over time due to vibration and repeated accessory changes.
Using the appropriate small screwdriver, gently tighten each screw. Do not over tighten, as this can strip the metal threads. Turn each screw just until it feels snug and stops naturally.
Check the bracket itself for visible damage or cracks. If the bracket is bent or broken, you may need to replace it entirely. Damaged brackets cannot be fixed by tightening alone.
Before reassembling, inspect all internal components for dust or debris. Use a soft brush or compressed air to clean gently. Then carefully reassemble your camera in reverse order, following your photo reference.
Insert your battery, power on the camera, and test your hot shoe with an accessory. The bracket should now feel solid and stable without any wobbling or movement.
Replacing a Damaged or Ripped Hot Shoe Bracket
When your hot shoe bracket is cracked or severely damaged, simply tightening won’t fix it. You need to replace the entire bracket assembly. This is more involved than a basic tightening job, but it’s still manageable at home.
First, power down your camera and remove the battery completely. Then gather your small screwdrivers and locate all external screws holding your camera panels. Remove these panels carefully and set them aside in order.
Once inside, you’ll see the damaged hot shoe bracket mounted to the top plate. Identify all the screws holding it in place. Gently remove each screw using the correct screwdriver size. Be patient here because stripping a screw makes everything harder.
Carefully lift away the old bracket. Check the mounting area for any debris or damage to the camera body itself. Clean this area gently with a soft cloth.
Now position your replacement bracket in the exact same location. The mounting holes should align perfectly. Start all screws by hand first before tightening them with your screwdriver. This prevents cross threading.
Tighten each screw firmly but not excessively. Over tightening can crack the new bracket or strip the holes. The bracket should sit flush against the camera body with no gaps.
Before reassembling your camera panels, test the bracket by gently pressing on it. It should feel solid and immobile.
Carefully reinstall all external panels and screws in reverse order. Insert your battery and power on the camera. Test the bracket with an accessory to confirm the repair worked properly.
If you’re uncertain about any step, professional camera repair services can handle this replacement quickly.
Model-Specific Differences: Sony vs Canon vs Other Brands
Sony and Canon mirrorless cameras experience hot shoe loosening differently due to their bracket designs and mounting systems. Understanding these differences helps you fix the problem correctly.
Sony cameras typically use a simpler bracket design with fewer mounting points. The bracket sits directly on the top plate and secures with two or three screws. This design makes Sony repairs straightforward. You access the bracket by removing the top panel and tightening from inside. Sony brackets rarely crack because they use softer metal that absorbs impact better than other brands.
Canon mirrorless models feature more complex bracket systems. Their brackets often have additional support arms that extend into the camera body. This means you may need to remove more internal components to reach all fastening points. Canon brackets use harder metal, which means they crack more easily but hold tighter when properly secured.
Other brands like Nikon and Panasonic fall somewhere in between. Nikon brackets require moderate disassembly and typically have three mounting screws. Panasonic uses a hybrid design that combines elements from both Sony and Canon approaches.
The key difference lies in how deep the bracket extends into your camera. Sony brackets sit mostly external, while Canon brackets go deeper. This affects your repair difficulty and time investment.
Before you start repairs, check your camera’s manual for the exact screw count and location. Each brand positions fasteners differently. Sony users usually finish repairs in 15 minutes. Canon owners should budget 30 to 45 minutes due to additional disassembly steps.
If your specific model has a unique bracket design, professional repair services understand these variations. They can complete the job faster than first time repairs.
Common Mistakes to Avoid During Repair
When fixing a loose hot shoe bracket, many people make mistakes that cause further damage. Understanding these errors helps you avoid costly repairs.
The biggest mistake is attempting external tightening. Many camera owners try to tighten the bracket from the top of the camera. This simply does not work. The bracket connects from inside the camera body, so external pressure accomplishes nothing. You must access the interior to fix the problem properly.
Another common error involves using adhesive as a standalone solution. Some people apply glue to the bracket hoping it stays in place. This approach fails because adhesive alone cannot handle the stress from heavy accessories. Flashes and microphones create constant movement and vibration. Glue breaks down over time and leaves sticky residue inside your camera.
Improper disassembly causes serious problems too. Rushing through the disassembly process damages delicate internal components. You might crack ribbon cables or bend small metal parts. Take your time and document each step with photos. This helps you reassemble everything correctly.
Not inspecting the bracket before reassembly is another mistake. You should examine the bracket for cracks or damage while you have the camera open. A slightly damaged bracket fails again after reassembly. Replace it if you notice any issues.
Forgetting to clean internal dust is also problematic. Debris inside your camera interferes with proper reassembly. Use a soft brush or air blower to remove dust carefully.
Finally, many people overtighten the screws. Excessive force strips the threads or cracks the bracket. Tighten screws firmly but gently. Stop when you feel resistance.
Avoiding these mistakes ensures your hot shoe bracket stays secure and your camera remains undamaged.
When to Seek Professional Camera Repair Service
A loose hot shoe bracket affects your camera’s stability. Accessories like external flashes, microphones, and monitors sit on this bracket. When it loosens, these items shift or fall during shoots. This is not normal operation, and you should address it promptly.
You need professional repair service in several situations. First, if you feel uncomfortable disassembling your camera body, a technician can handle this safely. Second, if your bracket shows visible cracks or metal damage, replacement becomes necessary. Third, if you’ve already attempted a DIY fix without success, professionals have the right tools and experience.
Professional repair shops understand model specific procedures. Sony, Canon, Nikon, and Panasonic cameras each have different internal layouts. Technicians know exactly where mounting points sit and how deep brackets extend into your camera. They avoid common mistakes that cause additional damage.
Another reason to seek professional help involves warranty concerns. Opening your camera yourself might void your coverage. Repair shops maintain your warranty while fixing the issue properly.
The repair process typically takes one to three days. Technicians will disassemble your camera, access the internal mounting points, tighten or replace the bracket, and reassemble everything carefully. They test the bracket before returning your camera.
Cost varies based on damage severity. Minor tightening costs less than bracket replacement. Professional repair ensures your camera functions correctly afterward.
Contact authorized service centers for your camera brand first. They have factory parts and training. Independent repair shops also work well if authorized centers aren’t available locally. Either way, professional service protects your investment and restores your camera’s reliability.
Final Thoughts
A loose hot shoe bracket is a real problem, not something you should ignore. It affects how your flash, microphone, or monitor sits on your camera. Left unfixed, it can damage your accessories too.
External tightening never works for this issue. The bracket sits inside your camera body, so you need proper disassembly to reach it. This is the core fact to remember.
Gluing might feel like a quick fix, but it rarely holds up. Adhesive wears down with regular use. It also makes future repairs harder for anyone who opens the camera later.
If your hot shoe shows visible damage or rips, replacing the metal bracket is often the better choice. This involves removing screws and installing a new part. It solves the problem at its source.
For internal loosening without damage, disassembly and retightening from inside works best. This method addresses the actual mounting points. It gives you a lasting fix instead of a temporary patch.
Your comfort level matters here. Some camera owners feel confident opening their gear. Others prefer to leave this job to trained hands.
Either path can work well. What matters most is following the correct steps for your camera model. Rushing or skipping steps often leads to more damage than the original problem.
Remember that this issue is not normal wear you should accept. A properly working camera keeps its hot shoe bracket firm and stable. Any looseness signals something needs attention.
Take action early rather than waiting. Small issues become bigger ones when ignored. Your camera accessories deserve a solid, secure connection every time you use them.
Frequently Asked Questions
Why does my hot shoe bracket keep loosening?
Hot shoe brackets loosen because the internal mounting screws gradually shift over time. This happens when you attach and remove accessories repeatedly. The bracket itself sits inside your camera body, so external tightening won’t help. The screws need tightening from the inside of your camera.
Can I fix a loose hot shoe bracket without opening my camera?
No, you cannot fix this problem from the outside. The mounting points are internal, so you must disassemble your camera body to access them. Attempting to tighten from the top simply doesn’t work. You’ll need to open your camera carefully and reach the bracket from inside.
What happens if I ignore a loose hot shoe bracket?
A loose bracket makes your accessories unstable. Flashes, microphones, and external monitors can fall off or shift during shooting. This creates safety risks for your gear and potentially ruins shots. A wobbly bracket also damages the contact pins over time, which can cause electrical connection problems with your accessories.
Is gluing the bracket a good solution?
Gluing is not recommended as your main fix. Adhesive might seem quick, but it rarely holds under the stress of repeated accessory attachment. Glue can also damage internal components and create problems during future repairs. The proper solution involves accessing and tightening the internal screws.
Should I attempt this repair myself or visit a professional?
This depends on your comfort level with camera disassembly. If you’ve opened electronics before, you might manage it. However, if you’re unsure, professional repair services are safer. Authorized service centers know your specific camera model’s layout and can complete the repair without risking damage.

Hi, I’m Jessamine Rowell, the founder and voice behind ResizeMake (https://resizemake.com/), a space where I share my love for technology with the world. I write detailed and honest reviews on the latest tech products, gadgets, electronic devices, and trending Amazon items to help readers make smarter buying decisions.