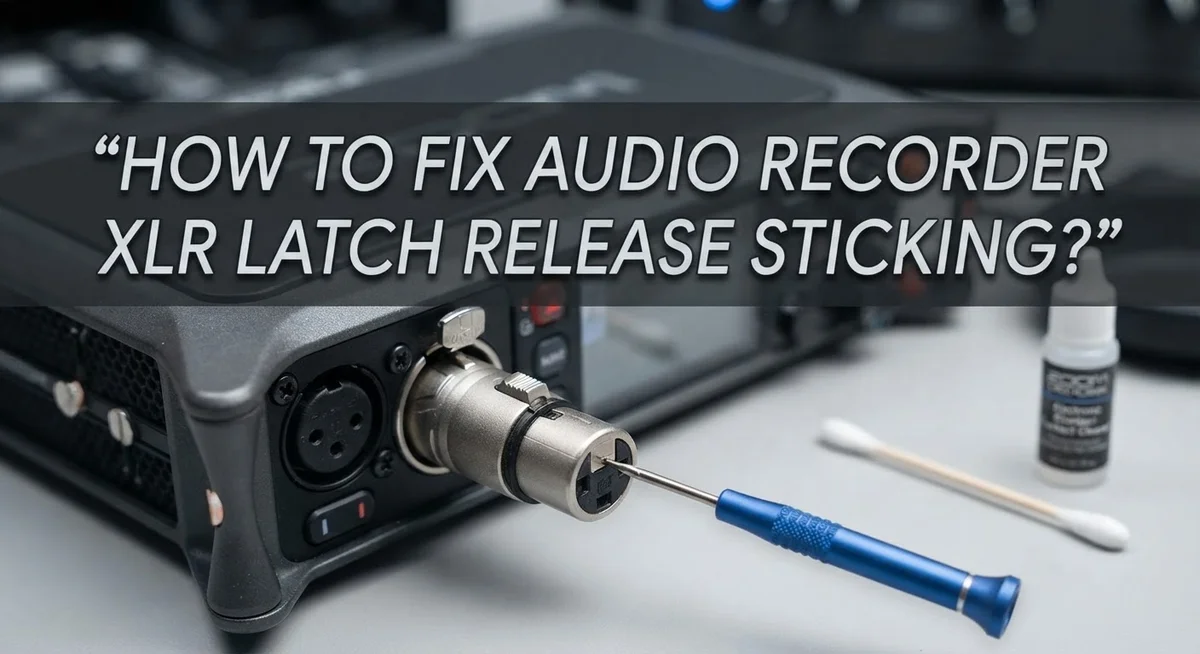
How To Fix Audio Recorder XLR Latch Release Sticking?
Have you ever tugged on an XLR cable, only to find it refuses to budge? A sticking latch release can turn a simple task into a frustrating struggle.
This problem happens to podcasters, musicians, and sound engineers alike. Your audio recorder depends on a smooth connection to work properly.
The latch on your XLR connector helps keep cables secure during use. But debris, corrosion, or bad alignment can cause it to jam over time.
In a Nutshell
- Turn off the device first. This protects your gear and keeps you safe while you work on the connector.
- Support the equipment chassis. Hold the panel steady so you don’t twist or bend it during removal.
- Press the latch fully inward. This releases the locking mechanism before you attempt any pulling.
- Pull the connector straight out. Keep it aligned with the jack axis. Never yank it at an angle.
- Use pliers for gentle rotation. If the connector still resists, a slight twist can help break it free.
- Try unscrewing the connector end. This gives you extra grip and control for tricky situations.
Understanding the XLR Latch Mechanism
The XLR latch mechanism is a small but crucial part of your audio connector. It keeps your cable locked firmly in place during performances, recordings, and live events. Understanding how this system works helps you fix problems safely.
The latch sits on one side of the XLR connector body. When you insert a cable into the jack, the latch slides into a groove on the jack itself. This groove holds the connector in place and prevents accidental disconnection during use.
The release button or lever is what you press to unlock the latch. Pressing it retracts the latch inward, allowing the connector to slide out freely. This simple push and pull design works reliably for years when maintained properly.
Problems occur when dirt, dust, or corrosion builds up inside the mechanism. These particles jam the latch so it won’t move smoothly. Misalignment can also cause sticking when a connector is forced in at an angle.
The key to understanding this mechanism is recognizing that everything must move in straight lines. The latch slides in one direction only. The connector pulls straight out along the jack axis. Any sideways pressure or angled pulling creates resistance and potential damage.
When your latch gets stuck, the problem usually sits in one of three areas: the latch itself, the release button, or the jack opening. Identifying which part resists helps you apply the right fix. Some sticking comes from the connector body binding against the jack opening rather than the latch mechanism itself.
Knowing this structure prevents you from forcing things incorrectly. You’ll understand why certain techniques work and why others cause damage. This knowledge guides every step of your repair process.
What Causes an XLR Latch to Stick
Stuck XLR latches happen for several clear reasons. Understanding what causes the problem helps you fix it safely without damaging your cables or equipment.
Dust and debris build up inside the latch mechanism over time. Audio environments collect particles from the air, and these tiny materials settle into the connector’s moving parts. When you repeatedly plug and unplug cables, you push debris deeper into the latch channel. This creates friction that prevents smooth movement.
Corrosion develops when moisture reaches the metal components inside the connector. If your equipment sits in humid environments or experiences temperature changes, condensation forms on the internal parts. The metal oxidizes and creates a rough surface. This corrosion makes the latch stick in place.
Misalignment occurs when connectors experience stress from pulling at angles. Each time someone yanks a cable sideways instead of straight out, the latch housing shifts slightly. Over many uses, this misalignment prevents the latch from sliding freely in its channel.
Salt and mineral deposits accumulate in venues near coastal areas or in hard water environments. These substances crystallize on metal surfaces and create additional resistance.
Age and wear naturally affect the mechanism. Metal parts develop microscopic scratches and pitting. The spring that operates the latch loses tension after hundreds of connect and disconnect cycles.
Contact resistance builds when the latch surfaces lose their smooth finish. Oxidation and wear create an uneven surface that catches instead of gliding smoothly.
The good news is that most stuck latches result from preventable causes. Regular cleaning, proper insertion technique, and careful storage reduce these problems significantly. Knowing what causes sticking helps you take action before your connectors fail completely.
Safety Precautions Before You Begin
Before you attempt to fix your stuck XLR latch, you need to protect both yourself and your equipment. Safety comes first when working with audio gear.
Turn off all power to your recorder and any connected devices. This prevents electrical damage and eliminates shock risk during the removal process. Unplug cables from wall outlets and disconnect batteries if your device uses them.
Let your equipment cool down if you’ve been using it. Hot components can burn your hands or cause discomfort while you work. Wait at least 15 minutes after powering down before touching internal areas.
Inspect your work area for proper lighting. You need to see exactly what you’re doing with the connector. Use a lamp or flashlight to illuminate the jack and latch mechanism clearly.
Gather your tools before starting. You’ll want pliers with a gentle grip, a flashlight, and possibly a small brush. Having everything ready prevents fumbling around mid repair.
Support your equipment properly on a stable surface. Never hold the recorder in one hand while pulling the connector with the other. Place it on a flat table or workbench where it won’t tip or shift.
Protect the connector end if it has any exposed pins. Avoid touching these areas with bare hands or metal tools. Oils and dirt on pins cause connection problems later.
Wear safety glasses if you have them available. Small pieces can occasionally pop loose during connector removal. This protects your eyes from unexpected debris.
Keep children and pets away from your work area. Audio equipment and small connector parts present choking hazards and damage risks.
Step-by-Step: Releasing a Stuck XLR Connector
Start by turning off power to your recorder and any connected audio equipment. This protects both you and your gear from electrical damage. Wait a few minutes for everything to cool down completely.
Support your recorder firmly on a stable, flat surface. Use your hand or a soft cloth to prevent the device from moving during the extraction process. This step matters because pulling on a connector without support can damage the input jack or internal circuitry.
Locate the latch release button on the XLR connector. Press it fully inward with your thumb or finger. Hold it down steadily. Some latches require firm pressure, so don’t hesitate to apply moderate force here.
Grasp the connector body firmly with your other hand. Use your palm and fingers, not just your fingertips. This gives you better control over the extraction process.
Pull the connector straight out along the same axis as the jack opening. Keep your pull perfectly aligned. Pulling at angles causes internal damage and makes the problem worse. Move slowly and steadily rather than yanking suddenly.
If resistance builds up, stop pulling. Instead, try rotating the connector gently back and forth within the jack. This small movement can break the resistance caused by corrosion or debris buildup.
For extra grip, wrap a cloth around the connector body. This protects the connector finish and gives your hand better traction.
If the connector still won’t budge, consider using pliers with cloth padding around the connector to avoid scratching it. Apply gentle rotating pressure while maintaining your straight pull angle.
Never force the connector with sudden jerking motions. Patience and steady pressure work better than aggression.
Using Tools Safely for Extra Grip
When you need extra grip to release a stuck XLR latch, tools can help. Always prioritize safety first before reaching for any instrument.
Start by turning off power to your recorder and all connected devices. This step protects you from electrical shock and prevents damage to your audio equipment during the extraction process.
Support your recorder firmly on a stable work surface. This prevents the device from moving or tilting when you apply pressure to the connector. A tilted recorder can cause internal damage to the jack mechanism.
Wrap a soft cloth around the XLR connector body. This protects the metal surface from scratches and marks. The cloth also provides better grip without slipping.
Use pliers with the cloth padding in place. Grip the connector gently and apply steady, even pressure. Avoid sudden jerking motions that can snap internal components.
Press the latch release button fully inward while holding the connector steady. This disengages the locking mechanism inside the jack.
Pull the connector straight out along the jack axis. Keep your pull motion aligned with the opening. Pulling at angles causes internal damage that may be permanent.
If resistance remains, rotate the connector gently within the jack. This small rotational movement can break corrosion or debris buildup without forcing the connector.
Never apply sudden force or twist aggressively. Excessive torque damages both the connector and the jack permanently.
Work slowly and deliberately. Take breaks if your hand gets tired. Fatigue leads to mistakes and accidental damage.
If the connector still won’t release after these steps, consider alternative methods like unthreading the connector end or consulting a professional technician. Your equipment is worth the extra time and care.
Common Mistakes That Cause Damage
When you try to remove a stuck XLR connector, mistakes during extraction cause the most damage. Understanding what goes wrong helps you avoid expensive repairs.
Pulling at angles ranks as the top mistake people make. The XLR jack expects straight, aligned pulls along its central axis. When you yank the connector sideways or at an angle, the internal pins bend or break inside the jack. Your recorder then loses audio on that channel completely. Always pull straight out, never at an angle.
Applying excessive force destroys connectors and jacks quickly. Many people assume more strength solves the problem. Instead, hard jerking motions snap latch mechanisms and crack plastic housing. The internal components inside your jack suffer permanent damage. Gentle, steady pressure works far better than sudden force.
Not supporting your equipment creates additional problems during removal. When you pull on a connector without stabilizing your recorder, the entire device moves with your hand. This motion twists and stresses the jack mounting internally. The jack can separate from the circuit board inside. Always hold your recorder firmly in place with your other hand.
Ignoring the power requirement creates electrical hazards. Pulling connectors while power runs through them can cause electrical arcing inside the jack. This burns out the connection points permanently. Turn off all power before you touch anything.
Rotating the connector too aggressively while stuck causes pin misalignment. Gentle rotation helps break resistance, but spinning hard damages the latch teeth. These teeth guide the connector in and out safely.
Take your time. Support everything properly. Pull straight. Use gentle pressure. These simple practices prevent most damage to your audio recording equipment.
Troubleshooting Persistent or Severe Sticking
When your XLR latch stays stuck despite basic techniques, you need a different approach. Persistent sticking means the connector won’t budge with gentle pressure alone.
First, accept that you’re dealing with a serious jam. This happens when corrosion builds up inside the jack, debris blocks the latch mechanism, or the connector misaligns during insertion. Stop using force immediately. Forcing a severely stuck connector damages both the jack and the connector permanently.
Try rotating the connector slowly within the jack. This gentle rotation can break the resistance without pulling. Keep the rotation small and controlled. Move it only a quarter turn at a time. This method works because it shifts the contact points and dislodges debris gradually.
Apply a small amount of lubricant designed for electronics around the connector base. Let it sit for several minutes to penetrate the stuck areas. The lubricant reduces friction and helps loosen corrosion. Then attempt the straight pull again with steady, even pressure.
If rotation and lubricant fail, unscrew the connector end to gain additional grip length. This gives you more leverage without increasing force on the latch mechanism itself. Wrap cloth around the connector body for better hand control.
When nothing works, you’ve reached the final option: carefully cut the cable. This preserves your recorder’s jack. After cutting, you can dismantle the connector to manually release the latch from inside without stressing the jack further.
Never risk your equipment’s audio input by forcing a severely stuck connector. Your recorder’s jack is expensive to repair. Patience and proper technique protect your investment far better than aggressive pulling ever will.
Preventing Future Latch Problems
Preventing future latch problems keeps your audio recorder functioning smoothly. The best defense starts with proper connector handling every single time you use your equipment.
Always insert XLR connectors straight into the jack. Align the connector body with the jack axis before pushing it in. This simple habit prevents the latch from binding or seating incorrectly. Crooked insertion creates stress on the latch mechanism and causes sticking later.
Apply gentle, steady pressure when connecting. Don’t force connectors with hard pushes. You should feel a smooth insertion with a click when the latch locks. If you meet resistance, stop and check the alignment. Forcing a misaligned connector damages both the latch and the jack.
Store your cables properly between uses. Coil them loosely without kinks or sharp bends near the connectors. Bent cables put strain on the connection point and eventually cause latch problems. Keep cables in a dry environment away from moisture and dust.
Inspect your connectors regularly for visible damage or corrosion. Clean the connector pins gently with a dry cloth if you notice any discoloration. Corrosion builds up over time and makes latches sticky.
Support your recorder during each connection and disconnection. Hold the device firmly so the jack doesn’t move when you work with the connector. This prevents internal stress on the latch mechanism.
Rotate your cables occasionally if you use the same connection repeatedly. This spreads wear evenly across the latch rather than creating stress points. Small preventive actions save you from dealing with stuck connectors later.
Final Thoughts
A stuck XLR latch feels frustrating, but you now know how to handle it safely. The key is patience, not power. Rushing the process almost always leads to broken pins or cracked jacks.
Remember the basics every time. Power down your device first. Support the chassis with one hand. Press the latch fully and pull straight, never at an angle.
Most sticking problems come from small causes. Dust, corrosion, or slight misalignment can jam a latch quickly. Regular cleaning and careful insertion prevent most of these issues before they start.
If a connector refuses to budge, stay calm. Try gentle rotation before reaching for tools. A little lubricant made for electronics often breaks the resistance without any damage.
Cutting the cable should always be your last choice. Only use this method when every other step fails and your equipment is at risk otherwise.
Think of your XLR connectors as long term investments. Treating them gently during every connection extends their life and keeps your recordings clean and reliable.
Good habits matter more than quick fixes. Store your cables properly. Check them for wear. Insert and remove them slowly instead of yanking them out.
Your audio recorder depends on strong, secure connections. A sticking latch might seem minor, but ignoring it can lead to bigger problems later.
Take a few extra seconds each time you connect or disconnect gear. This small effort protects your equipment and saves you money on repairs.
In the end, fixing a stuck XLR latch is simple once you understand the steps. Stay steady, stay patient, and your connectors will serve you well for years to come.
Frequently Asked Questions
Why is my XLR latch stuck in the first place?
XLR latches get stuck from several common reasons. Dust and debris accumulate inside the jack over time. Corrosion builds up on metal parts, especially in humid environments. The connector may have been inserted at a slight angle, causing the latch to jam. Sometimes the latch mechanism itself wears out from repeated use. Power surges can also cause internal misalignment.
Can I use lubricant to free a stuck latch?
Yes, but use the right type. Electronics lubricants work best because they don’t attract dust. Apply a small amount around the connector base where the latch meets the jack. Let it sit for a few minutes to penetrate. Then gently rotate the connector while pressing the latch inward. Avoid heavy oils or WD40 style products, as these can damage internal components over time.
What’s the safest way to pull out a stuck connector?
Support your audio recorder with one hand first. This prevents the jack from getting damaged by panel torque. Press the latch fully inward with your thumb. Pull the connector straight along the jack axis, never at an angle. Use steady, gentle pressure instead of sudden jerks. If it resists, stop and try rotating it slightly within the jack before pulling again.
When should I consider cutting the cable?
Cut the cable only as a last resort. Try all other methods first, including rotation, lubricant, and unscrewing the connector end for extra grip. If the connector still won’t budge after 10 to 15 minutes of careful attempts, cutting becomes reasonable. This prevents damage to your recorder’s audio input jack, which costs far more to repair than replacing a cable.

Hi, I’m Jessamine Rowell, the founder and voice behind ResizeMake (https://resizemake.com/), a space where I share my love for technology with the world. I write detailed and honest reviews on the latest tech products, gadgets, electronic devices, and trending Amazon items to help readers make smarter buying decisions.