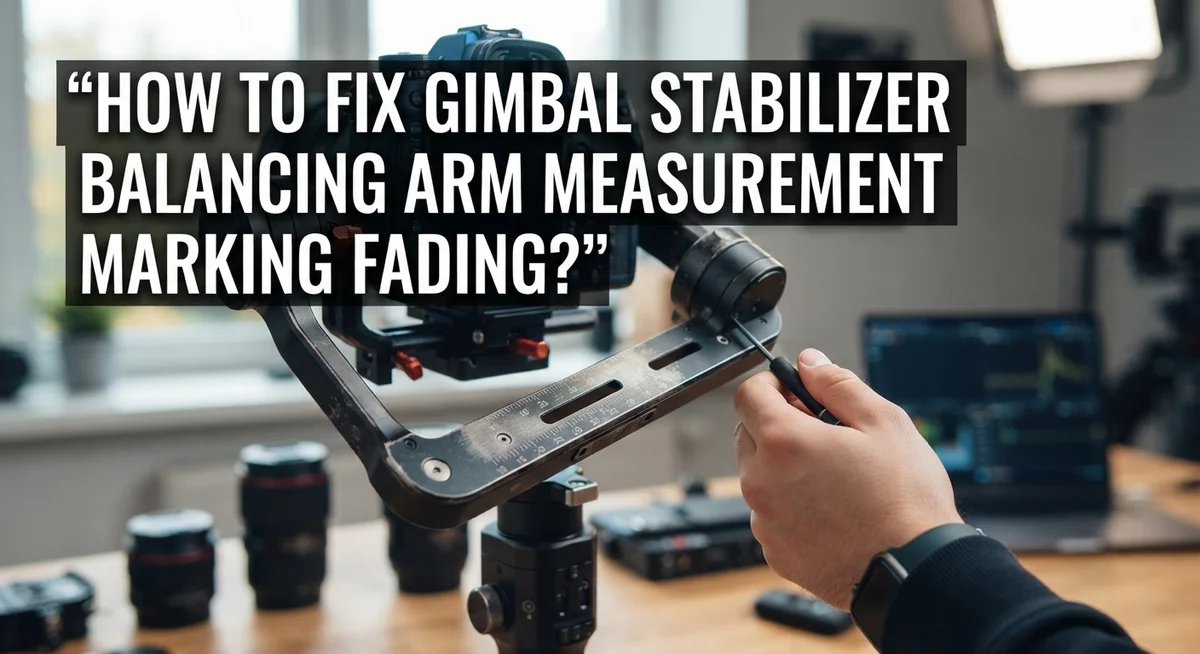
How To Fix Gimbal Stabilizer Balancing Arm Measurement Marking Fading?
Your gimbal stabilizer keeps your shots smooth. But faded measurement markings on the balancing arm can turn a simple task into a guessing game.
Balancing your gimbal correctly matters. It reduces motor strain and keeps your footage steady. Without clear markings, you lose track of your exact camera position.
This problem happens over time. Frequent use, sunlight, and handling wear down those tiny printed numbers. Soon, you cannot tell where your camera sat during your last perfect balance.
In a Nutshell
- Mark your own reference points. Use a fine tip marker or nail polish to create new lines once you find the correct balance position.
- Balance by feel, not just by numbers. Focus on how the camera sits and moves instead of relying only on printed marks.
- Follow the correct order. Adjust tilt first, then roll, and finish with pan for accurate results.
- Test at multiple angles. Check balance at 45 degrees and other positions before locking anything in place.
- Use the Auto-Tune feature. This helps distribute motor power evenly, even if your markings are unclear.
- Attach all accessories first. Add your battery, microphone, and filters before you start balancing.
Why Measurement Markings Fade Over Time
Measurement markings on your gimbal fade for several practical reasons. The most common cause is UV light exposure. Your gimbal sits in sunlight during shoots, and UV rays break down the ink or paint used on those balance marks over weeks and months.
Heat also plays a major role. Gimbals get warm during operation, especially during long recording sessions. Temperature changes cause the material underneath the markings to expand and contract. This movement eventually cracks and peels away the printed numbers and lines you rely on.
Physical wear happens constantly. Every time you adjust the balancing arm, your fingers touch those markings. Dust, sweat, and oils from your hands gradually wear down the surface. Repeated adjustments in the same spots accelerate this fading process.
Moisture creates another problem. If your gimbal gets wet or sits in humid environments, water seeps under the markings. The ink separates from the metal or plastic surface. Salt water from coastal shoots is especially damaging.
The material itself matters too. Cheaper printing methods fade faster than others. Some manufacturers use basic inks that simply do not last long under regular use and outdoor conditions.
Finally, cleaning products can damage markings. If you wipe down your gimbal with harsh chemicals or rough cloths, you accidentally remove the printed information. Even gentle rubbing over time wears away the marks.
Understanding these causes helps you prevent future fading. You can protect your gimbal from direct sunlight when not in use, store it in a cool dry place, and handle the balancing arms carefully. These simple steps keep your markings visible longer and make future adjustments easier.
Signs Your Balancing Arm Markings Need Restoring
Your balancing arm markings send you clear signals when they need attention. Watch for these specific warning signs during your daily gimbal use.
Blurry or illegible numbers make it hard to see where you are on the scale. You might squint at the markings and still cannot read them clearly. This happens when ink fades or becomes smudged over time. Take a close look at your tilt, roll, and pan adjustment areas right now.
Uneven horizon in your footage often points to balance problems linked with faded marks. Your camera tilts slightly to one side even after you thought you balanced it. You cannot tell if you moved the adjustment arm to the right spot because you cannot see the numbers anymore.
Difficulty remembering your settings becomes frustrating when marks disappear. You balanced your gimbal perfectly last week, but now you cannot recall which number you used. Faded markings mean you have no visual reference to return to your previous position.
Visible scratches or worn areas on the marking surface show physical damage. The numbers might still be readable, but they look faint or partially erased. Dust and debris settle into these worn spots, making visibility even worse.
Inconsistent stabilization performance can stem from repeated guessing at balance positions. Your gimbal works fine one day and feels shaky the next because you adjusted based on unclear marks. This inconsistency signals that your reference system needs restoration.
Motor strain sounds might increase when you cannot balance precisely. The motors work harder to compensate for slight imbalances you created by misreading faded numbers. Listen for grinding or unusual noises during operation.
These signs tell you it is time to restore your markings and regain control over your gimbal balance.
Tools and Materials for Remarking Your Gimbal Arm
You need specific tools to remark your gimbal arm properly. Start with marking instruments because they apply new lines clearly over faded areas. Fine tip permanent markers work well for precise lines. Nail polish also creates durable marks that resist fading longer than regular markers. Paint pens offer another option if you prefer thicker, more visible lines.
Measurement guides help you mark accurate positions. A ruler or straight edge ensures your lines stay aligned with the gimbal’s axis. Calipers measure exact distances if you need to replicate original spacing. A protractor helps mark angle references for tilt adjustments.
Cleaning supplies prepare the surface before remarking. Rubbing alcohol removes dirt and old marker residue. A soft cloth prevents scratching the gimbal body while cleaning. Let the surface dry completely before applying new marks.
Reference materials keep your work accurate. Take photos of your current balance settings before fading worsens. Write down your preferred positions in a notebook. Check the gimbal’s manual for original marking specifications if available.
Protective equipment matters for your safety. Wear gloves when using alcohol or solvents. Work in a well ventilated area since markers and nail polish release fumes. Keep materials away from your eyes and skin.
Optional but helpful items include a magnifying glass for reading faded marks and a light source to illuminate work areas. A small container holds your marking tools together. Having everything organized saves time when you start the remarking process.
Gather these materials before you begin. Proper preparation ensures your new markings stay clear and accurate for months ahead.
Step-by-Step: Restoring or Replacing Faded Markings
The process of restoring or replacing faded markings involves several straightforward steps. Start by powering off your gimbal completely and removing the camera or payload from the balancing arm.
Clean the marked surface thoroughly before you begin any restoration work. Use a soft, lint free cloth with mild soap and water. This removes dust, oil, and residue that might interfere with new markings. Dry the area completely with another clean cloth.
Next, examine what remains of the original markings. If marks are only slightly faded, you can enhance them by carefully tracing over the existing lines with a permanent marker or specialized marking pen. Work slowly and follow the original pattern exactly.
For heavily faded markings, you have two options. You can photograph or document the original positions from your gimbal’s manual or reference materials, then redraw the entire scale using these specifications. Alternatively, you can create new markings based on your gimbal’s technical documentation.
Apply new marks in thin, even lines to ensure accuracy. Allow ink to dry completely before handling the arm. Test readability by viewing the marks from different angles and distances.
Once your markings are restored, reattach your camera and all accessories. Power on the gimbal and perform a complete balance check across all three axes: tilt, roll, and pan. Use the restored markings as reference points while adjusting each axis.
Finally, lock all adjustments securely after balancing. Your gimbal should now respond to balance changes more predictably since you can read the measurement positions clearly again. This restoration process typically takes 30 to 60 minutes depending on marking complexity.
Re-Calibrating Balance Without Reliable Markings
When your balancing arm markings fade, you lose your visual reference points. This makes it harder to return to accurate positions. The good news is you can still achieve proper balance through a systematic approach that doesn’t rely on those faded marks.
Start by powering off your gimbal completely. Remove your camera and all accessories. This gives you a clean slate to work from.
Locate the neutral position for each axis. For the tilt axis, gently move your camera forward and backward without power. The point where it naturally rests without tipping is your neutral position. Mark this spot with a temporary indicator like painter’s tape or a removable marker.
Repeat this process for the roll axis. Slide the camera side to side until it balances evenly. The middle point is where you want it positioned.
For the pan axis, rotate the camera until it feels centered without resistance.
Once you’ve identified all three neutral positions, use your gimbal’s Auto Tune feature. This software function automatically distributes motor power across all axes. It compensates for any small positioning variations you cannot see with faded markings.
Reattach all your equipment. Include every accessory you normally use like ND filters, external microphones, or counterweights. These items affect balance significantly.
Test your gimbal at multiple angles. Tilt it forward, backward, and sideways to verify stability. The camera should remain level throughout these movements.
Lock each axis adjustment securely once you confirm proper balance. You’ve now recalibrated your gimbal without relying on visible markings. Your stabilization should perform consistently even with faded measurement indicators.
Tips to Prevent Future Fading and Wear
Preventing fading keeps your gimbal arm markings readable for years. Store your gimbal in a protective case when not in use. Direct sunlight causes ink and paint to fade quickly, so keep your equipment away from windows and bright light sources.
Use a dust cover or padded bag to shield the balancing arm from UV exposure. Temperature changes also harm markings, so avoid storing your gimbal in hot vehicles or humid environments. Consistent room temperature storage works best.
When handling your gimbal, minimize touching the marked areas directly. Skin oils and sweat accelerate fading. Wear clean gloves when adjusting the balancing arm, especially during frequent calibration sessions.
Clean the marked surface gently and infrequently. Harsh scrubbing removes protective coatings and fades markings faster. Use a soft, dry cloth only when necessary. Avoid chemical cleaners that can strip away paint or ink.
Consider applying a clear protective coating over your markings once they’re restored or remarked. This adds a barrier against UV light and moisture without affecting readability.
Rotate your gimbal storage position occasionally. If one side always faces light, that area fades unevenly. Balanced exposure prevents spotty fading patterns.
Keep detailed notes of your calibration positions in a separate document or photo file. This backup system helps you balance your gimbal even if markings become completely illegible. Photograph your freshly marked balancing arm from multiple angles and distances.
Check your markings monthly during regular equipment maintenance. Catching early fading lets you touch up marks before they disappear completely. Small maintenance steps prevent major problems later.
Common Mistakes When Remarking Balancing Arms
People often make mistakes when they remark their balancing arms. These errors can throw off your entire stabilization system. Understanding what to avoid saves you time and frustration.
Using the wrong marking material is the first common mistake. Permanent markers fade quickly under UV light. Paint pens and oil based markers work better because they resist fading longer. Pencil marks smudge easily and disappear with hand contact. Choose materials that stick to metal and resist moisture.
Remarking without proper cleaning causes problems. Old residue and dust prevent new marks from adhering correctly. Clean the surface with a dry cloth first. Remove any oils or debris completely. A clean surface ensures your new markings stay put.
Applying marks too thickly creates another issue. Thick lines make it hard to identify exact positions later. Your marks should be thin and precise. Use steady, controlled strokes to keep lines clean and narrow.
Skipping the verification step is a critical error. After remarking, many people assume their marks are accurate. Test each mark by actually balancing your gimbal. Confirm that the marked positions match your gimbal’s actual neutral points. This catches mistakes before they affect your footage.
Not accounting for equipment changes leads to incorrect marks. Your balancing point shifts when you add or remove accessories. Remark your arms only after attaching all equipment you normally use. Include your camera, batteries, microphones, and filters.
Marking while the gimbal is powered on creates safety risks. Always power off completely before remarking. This prevents accidental motor movement that could damage your equipment or injure your hands.
Troubleshooting Persistent Balancing Issues After Remarking
After you remark your balancing arm markings, your gimbal might still show balance problems. This happens for several reasons. Understanding these issues helps you fix them quickly.
The most common cause is incomplete axis verification. You remarked the markings, but you didn’t test each axis individually. Power off your gimbal and manually check the tilt axis first. Gently push the camera forward and backward. It should resist movement equally in both directions. If it drifts one way, your marks are in the wrong position.
Next, check the roll axis. Rotate the camera left and right slowly. The camera should stay level without tilting. If one side feels heavier, your roll adjustment needs repositioning. Move the balancing arm slightly and test again.
The pan axis requires the final check. Spin the camera around its vertical axis. It should rotate smoothly without catching or feeling unbalanced. Resistance indicates improper marking placement.
Equipment weight changes cause major problems too. Did you add a microphone, ND filter, or external battery after remarking? Even small additions shift the balance point. You must rebalance whenever you add or remove accessories.
Another issue is insufficient Auto Tune calibration. After remarking and manually balancing, run your gimbal’s Auto Tune feature in the motor settings. This distributes motor power correctly across all three axes. Skip this step and your gimbal won’t perform optimally.
Finally, test at multiple angles before declaring success. Hold your gimbal at 45 degrees, then 90 degrees. The horizon should stay level in your footage. If it drifts, return to manual axis checking and adjust your remarked positions slightly. Patience during this verification phase prevents frustration later.
Final Thoughts
Fading measurement marks on your gimbal arm can feel like a small problem. But it affects your entire stabilization setup.
The good news is that fixing this issue takes little time. You just need patience and the right approach.
Remarking your balancing arm restores your ability to balance quickly. You no longer need to guess camera positions.
This saves you time on every shoot. It also reduces strain on your gimbal motors.
Accurate markings mean consistent results every time you rebalance. Your footage stays smooth and stable.
Remember that balancing is not a one time task. Equipment changes require new checks and sometimes new marks.
Make marking maintenance part of your regular gimbal care routine. Check your marks often and refresh them when needed.
Small efforts now prevent bigger headaches later. A gimbal with clear marks saves you setup time before every shoot.
This matters most when you work under time pressure. Clients and deadlines do not wait for balance troubleshooting.
Take the time to remark your arm properly. Use suitable materials and follow the correct steps.
Test your work after remarking. Confirm your gimbal balances correctly at different angles.
Your effort pays off through smoother footage and less mechanical stress on your device. The motors work less hard when balance is correct.
This extends the life of your gimbal. It also improves the quality of every video you capture.
Faded marks are a fixable problem. Do not let them stop you from getting great shots.
With the right approach, you restore accuracy quickly. Your gimbal stabilizer works as well as new again.
Keep this guide handy for future reference. Balancing issues become simple to solve once you understand the process.
Frequently Asked Questions
Why do gimbal balancing arm markings fade over time?
Measurement markings fade due to regular use and environmental exposure. Sunlight, dust, and repeated handling wear away ink or paint. Temperature changes also cause materials to break down. If you frequently adjust your gimbal in bright conditions, fading happens faster.
Can I still balance my gimbal if the markings are completely gone?
Yes, you can balance without visible markings, but it takes longer. You’ll need to manually find the balance point on each axis through trial and error. This method works but requires patience. Having clear markings saves you time on every shoot, especially when you work under tight deadlines.
What’s the best way to restore faded markings?
Clean the balancing arm thoroughly first. Remove dust and old residue with a soft cloth. Once dry, apply new marks using materials that resist fading. Test your marks in normal lighting to ensure visibility. After remarking, verify your balance at multiple angles before your next shoot.
Should I remark my gimbal before or after adding new equipment?
Always remark after attaching all equipment you plan to use. Add your microphone, ND filters, external battery, and any other accessories first. Then adjust and mark your balancing positions. Equipment weight changes affect where the balance point sits. Marking without everything attached creates incorrect reference points.
How often should I check my balancing arm markings?
Check your markings monthly during regular maintenance. Look for fading, smudging, or unclear lines. Replace marks if they become hard to read. This small habit prevents balance problems during important shoots and keeps your gimbal performing at its best.

Hi, I’m Jessamine Rowell, the founder and voice behind ResizeMake (https://resizemake.com/), a space where I share my love for technology with the world. I write detailed and honest reviews on the latest tech products, gadgets, electronic devices, and trending Amazon items to help readers make smarter buying decisions.