How To Fix V-Mount Battery Plate Release Button Jamming?
Have you ever pulled at your V-mount battery plate release button, only to feel it stick or freeze completely? You’re not alone.
This is one of the most common issues filmmakers and camera operators face on set. A jammed release button can bring your shoot to a sudden halt.
The good news is that this problem is usually easy to fix. Most jamming happens because of a simple mismatch between your battery and plate design.
In a Nutshell
- Check battery compatibility first. Older V-mount batteries often don’t fit newer plate designs. This mismatch is the top cause of jamming.
- Look at the plate depth. Many plates sit too flush against the battery lock. The release button needs room to extend properly.
- Avoid forcing the battery in. Pushing an incompatible battery into the plate makes the jam worse. It can also damage the lock mechanism.
- Sand the plate edges if needed. A tight fit sometimes causes the button to stick. Light sanding can help the battery slide in smoothly.
- Test with original equipment first. Your original battery and plate are built to match. Try these before blaming an aftermarket part.
- Inspect the lock mechanism regularly. Make sure it moves freely and extends off the plate surface. A stuck lock usually means something is blocking its path.
Understanding V-Mount Plate Mechanisms
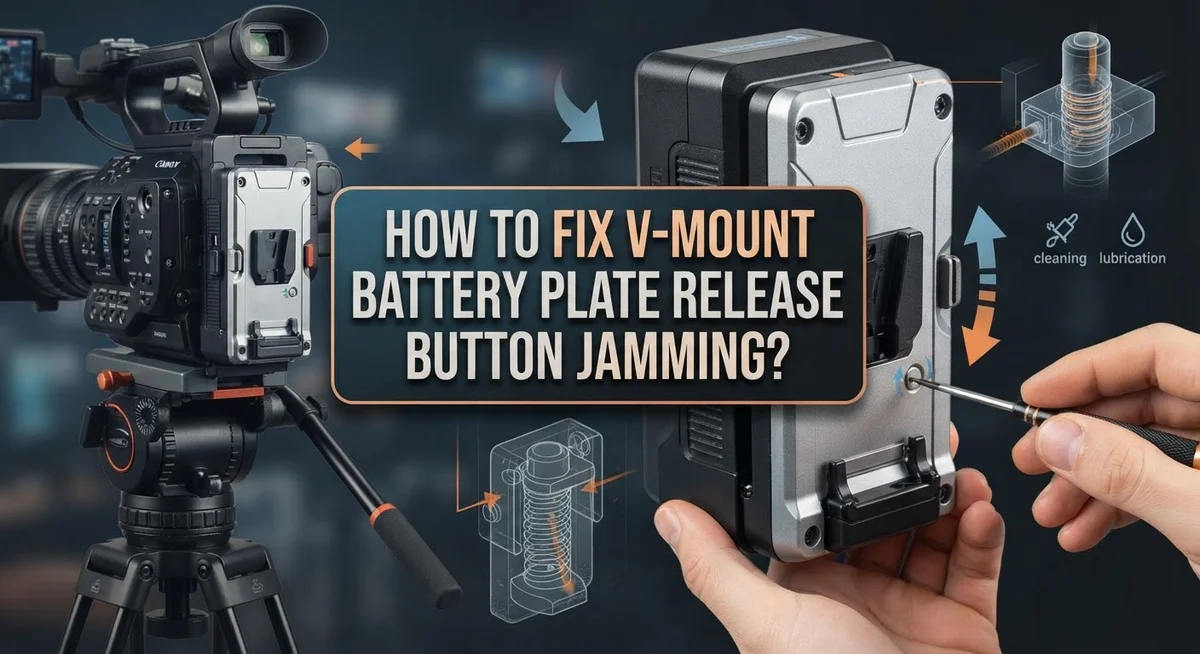
A V-mount battery plate works by holding your battery in place while allowing you to release it quickly when needed. The release button sits on the plate and connects to an internal lock mechanism. When you press the button, it disengages the battery from the mount.
Understanding how this mechanism functions helps you identify why jamming occurs. The lock mechanism must extend properly from the plate surface. If it sits too flush, the button cannot move freely. This creates resistance when you try to press or pull the release.
The plate depth matters significantly for smooth operation. Your battery lock needs proper clearance to move in and out without obstruction. When the plate is too short or too narrow, the battery cannot seat correctly. This causes the lock to bind against the plate edges.
Different battery models have varying lock designs. Older batteries use different lock profiles compared to newer ones. A legacy battery placed into a modern plate may not align properly. The lock mechanism ends up fighting against the plate geometry instead of sliding smoothly.
The release button itself connects to this internal lock system. When components misalign, the button experiences resistance. Pressing becomes difficult or impossible. The button may feel stuck even though nothing is physically broken.
Proper fit means the lock mechanism moves freely without touching plate edges. The button should press and release with minimal effort. You should hear a clear click when engaging or disengaging the battery.
Before making any adjustments, test your battery and plate together in their original configuration. This tells you whether the jam comes from incompatibility or wear. Original equipment typically works smoothly because manufacturers design them to match perfectly.
Why the Release Button Jams: Root Causes
Your V-mount battery plate release button jams for several clear reasons. Understanding these causes helps you fix the problem quickly.
Depth mismatch between plate and battery is the most common culprit. The plate sits too flush against your battery’s lock mechanism. When this happens, the lock cannot extend properly from the plate surface. This forces the release button to stick or freeze when you try to operate it.
Battery model incompatibility creates another major issue. Older V-mount batteries use different lock designs than newer models. When you pair an old battery with a modern plate, the dimensions do not align correctly. The lock mechanism either sits too deep or too shallow. This causes friction that prevents smooth button movement.
Plate dimensions that are too short or narrow prevent proper battery seating. Your battery should slide into the plate with a snug, secure fit. If the plate is undersized, the battery cannot sit at the correct depth. The lock then binds against the plate edges instead of moving freely.
Forcing an incompatible battery into the plate makes jamming significantly worse. Pushing hard on a mismatched combination can damage the lock mechanism. It can also bend the plate slightly, creating permanent binding issues.
Debris or corrosion inside the lock mechanism also causes sticking. Dust, dirt, or oxidation builds up over time. This buildup restricts the lock’s movement even when the fit is correct.
The key is identifying which cause affects your specific setup. Start by checking whether your battery and plate are original equipment pairs. Then inspect the lock mechanism to see if it moves freely. These simple checks reveal the root cause so you can apply the right solution.
Checking Battery and Plate Compatibility
Your V-mount battery and plate must work together properly. Incompatibility between these two components causes most jamming problems. Start by identifying your specific battery model and plate version.
Older battery models don’t always fit newer plate designs. Legacy batteries often have different lock mechanisms than current versions. Check your battery’s documentation to find its model year and specifications. Compare this information with your plate’s design date.
Plate depth is critical for smooth operation. The lock mechanism needs proper space to extend away from the plate surface. If your plate sits too flush against the battery, the release button won’t move freely. Measure the distance between your plate and the battery lock to spot depth mismatches.
Test compatibility first before attempting any fixes. Install your battery into the plate slowly and gently. Notice if resistance occurs during insertion. Feel whether the release button moves smoothly or catches partway through.
Different battery brands sometimes use varying lock designs. A plate made for one manufacturer might not accommodate another brand’s battery properly. Check if both items come from the same equipment line or manufacturer.
Forcing an incompatible battery into a mismatched plate causes permanent damage. Stop immediately if you feel unusual resistance. Pushing through creates binding that worsens jamming significantly.
Inspect the lock mechanism closely before assuming incompatibility. Look at how the internal lock connects to the release button. Verify that this mechanism extends properly from the plate surface. Sometimes the issue isn’t incompatibility but rather a mechanism that sits incorrectly.
Use your original battery and plate combination as a baseline. If these work smoothly together, your setup is compatible. Any jamming with original equipment indicates a different problem requiring inspection.
Step-by-Step Fix: Diagnosing the Jam
Start by removing your battery from the plate completely. Place the plate on a flat, well-lit surface where you can see all angles clearly. Look at the lock mechanism that extends from the plate. This metal piece should move smoothly when you press the release button.
Press the release button slowly and watch what happens. Does it move freely or does it catch halfway through? Listen for any grinding sounds. These noises tell you something is blocking the mechanism’s path.
Next, examine the plate’s edges and corners carefully. Look for bent metal, scratches, or areas where material has deformed. Even small dents can prevent the lock mechanism from extending properly. Check if the plate sits flat without warping.
Now inspect the battery’s V-lock connector. This is where your battery sits on the plate. Look for debris, dust, or corrosion buildup. Wipe it gently with a dry cloth to remove any particles.
Test the depth fit by placing your battery back on the plate without pressing the release button. Does the battery sit evenly? Does it rock side to side? Movement indicates a depth mismatch between your specific battery model and plate design.
Examine the release button itself for cracks or damage. Press it repeatedly to feel if resistance changes or if it gets stuck at certain points. This helps you determine if the problem is internal or external.
Document what you observe. Note which specific moment the button jams. Does it happen immediately, midway, or at the end? This information guides your next repair step and helps you avoid repeating the same issue with your fix.
Step-by-Step Fix: Adjusting and Sanding the Plate
When your release button jams, the problem often lies in how the plate edges interact with your battery’s lock mechanism. Sanding the plate is a practical solution that removes material blocking smooth movement.
Start by identifying which edges cause the jam. Press your battery onto the plate and note where resistance occurs. Mark these spots with a pencil so you know exactly where to focus your sanding effort.
Use medium grit sandpaper, around 120 to 150 grit, for initial work. Sand the plate edges in smooth, even strokes along the problem areas. Work gradually and check your progress frequently by testing the battery fit.
Pay special attention to the corners and sides where the lock mechanism contacts the plate surface. These areas often have sharp edges or slight protrusions that interfere with battery seating. Remove material slowly rather than aggressively to avoid creating new problems.
After initial sanding, switch to finer grit sandpaper, around 220 grit or higher. This smooths the surface and removes any rough spots left behind. A smoother edge allows the lock mechanism to slide past without catching.
Test your battery fit after each sanding session. Insert the battery and press the release button gently. The motion should feel smooth and consistent, not sticky or resistant.
If one side still jams slightly, sand that specific area more. Continue this process until the release button operates freely throughout its full range of motion.
Wipe away all dust with a clean cloth before final testing. Sand only the outer edges and corners, never the internal lock surfaces. This approach preserves the plate’s structural integrity while solving your jamming issue effectively.
Testing the Repair for Proper Function
Before you consider your repair complete, you need to test everything thoroughly. This step prevents future frustration and ensures your battery plate works smoothly every time.
Start by inserting your battery into the plate slowly. Watch how it slides in. The motion should feel smooth with no resistance or grinding sounds. If you hear clicking or scraping, something still needs adjustment.
Press the release button gently. It should move freely without any sticking or catching. Push it several times in quick succession. The button must return to its original position each time without hesitation.
Test the battery removal process next. Pull the battery away from the plate using only the release button. You should not need to wiggle, twist, or apply extra force. The battery should separate cleanly on the first try.
Now repeat this entire cycle at least five times. Insert, press the button, remove, and repeat. Consistency matters here. If jamming happens on the third or fourth attempt, you have not finished the repair yet.
Check for any new sounds or resistance patterns. Sometimes issues only appear after several cycles. Pay attention to whether the button sticks at the beginning, middle, or end of its travel.
If everything works perfectly, congratulations on your successful repair. Your plate and battery now function as intended. If problems persist, you may need to sand additional areas or verify that your battery model truly matches your plate design.
Keep your repaired plate clean going forward. Dust and debris can cause new jamming issues over time. Store both your battery and plate in a dry location away from moisture and extreme temperatures.
Common Mistakes That Worsen the Jam
Forcing incompatible battery models into mismatched plates is the most common mistake that makes jamming worse. Many people assume all V-mount batteries work with any plate, but this assumption causes serious damage.
Pushing too hard on the release button is another frequent error. When the button feels stuck, people instinctively apply more force. This pressure can bend the internal lock mechanism or crack the button itself. Stop immediately if you feel resistance. Forcing it will only create more problems.
Using the wrong plate depth for your specific battery model creates compatibility issues. Older battery designs don’t fit newer plates properly. The lock mechanism sits at different heights. Trying to make them work together by applying pressure damages both components.
Ignoring small signs of misalignment before they become major jams is a critical mistake. If your battery feels slightly loose or the button requires extra pressure, stop using that combination. These early warning signs tell you something is wrong.
Sanding too aggressively without testing between each step causes irreversible damage. People remove too much material from the plate edges in one session. This creates gaps that make the battery unstable. Always sand gradually and test your fit frequently.
Not cleaning dust away between sanding sessions prevents you from seeing the actual fit clearly. Debris masks whether your adjustments are actually working. Wipe your plate and battery thoroughly after each sanding step.
Skipping the original equipment test is another major mistake. Always try your original battery and plate combination first. This establishes whether the problem is with your specific equipment or with aftermarket parts. Testing with original gear gives you a reliable baseline for comparison.
Preventive Maintenance Tips for Smooth Operation
Regular maintenance stops jamming before it starts. The best approach is prevention rather than waiting for problems to develop.
Clean your plate and battery regularly. Dust and debris accumulate in the lock mechanism over time. Use a soft, dry cloth to wipe both surfaces weekly. Pay special attention to the edges where the lock contacts the plate. Small particles trapped here cause resistance and eventual jamming.
Store your equipment properly when not in use. Keep the plate and battery in a dry location away from extreme temperatures. Moisture can cause corrosion on metal surfaces, which leads to friction and jamming. Store them separately to prevent unnecessary pressure on the lock mechanism.
Inspect your plate monthly for wear signs. Look at the edges closely. Check if the lock mechanism extends properly from the plate surface. Early detection of misalignment prevents major problems later.
Test your battery fit regularly without forcing anything. Insert it slowly and listen for unusual sounds. The release button should press smoothly without resistance. If you notice any grinding or sticking, address it immediately.
Avoid stacking heavy items on top of your plate. Pressure can bend the plate slightly, causing misalignment with the battery lock. Store everything flat or upright in a stable position.
Use your original equipment whenever possible. Mixing different plate brands or battery models increases compatibility issues. If you must use alternatives, test the fit carefully before relying on them for important work.
Rotate between multiple plates if you own several. This reduces wear on any single plate. Even distribution of use extends the lifespan of all your equipment.
Final Thoughts
A jammed release button feels frustrating. But now you understand why it happens.
Depth mismatches and battery incompatibility cause most jamming issues. Your plate and battery need to fit together correctly.
Fixing this problem does not require special skills. You just need patience and the right approach.
Start simple. Check your battery model first. Verify it matches your plate design before touching anything else.
Sanding works well for minor fit issues. But go slowly. Small adjustments prevent bigger problems later.
Never force a battery into a plate. This damages both pieces permanently. Instead, stop and check compatibility again.
Testing matters more than most people think. Always test with original equipment first. This tells you if the problem is really about fit.
Regular maintenance saves you time and money. Clean your plate often. Dust causes many jamming problems that seem mysterious at first.
Small habits make big differences here. Check your equipment monthly. Look for wear before it becomes a real jam.
Your V-mount plate can work smoothly again. The fixes are simple once you know the causes.
Remember this: incompatible batteries cause most jams. Depth mismatches cause the rest. Both problems have clear solutions.
Take your time with repairs. Rushing leads to mistakes. Mistakes lead to more damage.
Your plate deserves careful attention. So does your battery. Treat both with care and they will serve you well.
Jamming does not have to be permanent. With the right steps, your equipment works properly again. Trust the process and test everything before you call the job done.
Frequently Asked Questions
Why does my V-mount battery plate release button stick?
The release button jams when your plate depth doesn’t match your battery model. Battery lock mechanisms need proper clearance to move freely. If the plate sits too short or too narrow, the lock can’t extend fully off the surface.
Dust and debris also trap the mechanism. Small particles accumulate inside the lock area over time. Clean this space regularly with a soft brush or compressed air.
Can I use any battery with any plate?
No. Older battery models like the VB 99 don’t work with newer plate designs. Always check your battery model number before installing it into a plate.
Test with your original equipment first. If the original plate works smoothly, your battery is fine. The issue is likely with an aftermarket plate that doesn’t fit properly.
Should I force the battery into the plate?
Never force it. Pushing hard on a stuck release button damages the mechanism further. Stop immediately if you feel resistance.
Instead, remove the battery and inspect both pieces. Look for gaps or misalignment. A smooth fit requires no force at all.
What’s the best way to fix a stuck release button?
Start by cleaning thoroughly. Remove dust from inside the lock mechanism with compressed air. Let it dry completely.
If cleaning doesn’t help, the plate edges may need light sanding. Sand very gently and test frequently. Stop as soon as the battery slides in smoothly. Sanding too much causes permanent damage, so work slowly.
How often should I maintain my V-mount plate?
Check your plate monthly for wear or debris. Clean it every time you store your equipment. Test the battery fit regularly without forcing anything.
Proper storage prevents most jamming problems. Keep your plate in a clean, dry place away from dust and moisture.

Hi, I’m Jessamine Rowell, the founder and voice behind ResizeMake (https://resizemake.com/), a space where I share my love for technology with the world. I write detailed and honest reviews on the latest tech products, gadgets, electronic devices, and trending Amazon items to help readers make smarter buying decisions.