How To Fix Action Camera Lens Protector Condensation?
Foggy footage can ruin your best adventure moments. You gear up for a dive or a snowy hike. Then you notice your shots look cloudy and unclear.
This problem often comes from condensation on your action camera lens protector. Moisture builds up when warm air meets a cooler surface. It creates that annoying foggy layer between your lens and the world.
The good news is that you can fix this issue. You can also stop it from happening again.
This guide walks you through simple steps to clear up condensation fast. We cover why this happens in the first place. Temperature changes and humid environments play a big role.
In a Nutshell
- Remove the lens guard first. Unscrew it carefully or take off the self-adhesive protector. This lets trapped moisture escape fast.
- Wipe with a soft, clean cloth. Gently dry the lens and the protector. Avoid rough materials that can scratch surfaces.
- Let air circulate fully. Leave the camera open for a few minutes. This helps trapped moisture evaporate completely.
- Warm up your camera before use. Cold cameras meeting warm, humid air cause condensation. Keep your gear at room temperature first.
- Try emergency fixes if fogging is bad. Remove the battery and leave the door open. You can also record briefly to generate gentle heat.
- Prevent future fogging with smart habits. Never fit protectors in humid rooms. Use dew heater strips or small fans for extra protection.
Why Condensation Forms Under Your Lens Protector
Condensation forms on your lens protector when moisture in the air meets a cold surface. This happens because warm, humid air holds water vapor. When that air touches your cool camera lens or protector, the vapor turns into liquid droplets. You see this as fog or cloudy spots.
Temperature differences create the perfect conditions for this problem. If you bring your camera from a cold outdoor environment into a warm room, condensation appears quickly. The sudden shift in temperature causes moisture to collect on the glass. This is especially common in winter or when moving between air conditioned spaces and humid areas.
Humidity levels matter a lot too. High humidity means more water vapor in the air. When you apply your lens protector in a humid room, moisture gets trapped underneath. The protector seals in that dampness, and you end up with fogging that won’t go away easily.
Applying your protector at the wrong time causes most condensation issues. If you fit it in a steamy bathroom or humid environment, you trap moist air against the lens. That moisture stays there because the protector blocks airflow. The problem gets worse if your camera is cold when you seal it up.
Even small temperature changes trigger condensation. Your camera doesn’t need extreme temperature swings to fog up. Moving from a cool bedroom to a warm kitchen can be enough. The lens protector acts like a barrier that prevents the moisture from escaping naturally.
Understanding these causes helps you prevent problems before they start. You now know that condensation isn’t a defect. It’s simply physics at work. Moisture in air plus cold surfaces equals fog. Once you recognize what causes it, you can take smart steps to stop it from happening again.
Signs Your Action Camera Has Moisture Trapped Inside
Your action camera sends you clear warning signs when moisture gets trapped inside the lens protector. Learning to spot these signals helps you act fast before condensation damages your footage.
Visible fogging is the most obvious sign. You will see a cloudy or hazy layer on the lens protector surface. This fog appears either inside the protector or between the protector and the actual lens. The fogging might come and go depending on temperature changes throughout your day.
Your video footage tells the story too. If your recorded clips look blurry or lack sharpness, condensation is likely the culprit. The fog blocks light from reaching the camera sensor properly. Your videos will appear soft and unclear even though your camera settings are correct.
Tiny water droplets inside the protector are another red flag. You might spot small beads of moisture when you look closely at the lens area. These droplets form when humid air gets trapped and cools down inside the protective cover.
Pay attention to temperature changes around your camera. If you move from a cold environment to a warm, humid space, condensation appears within minutes. Your lens protector will fog up quickly in these situations.
Check the edges of your protector too. Moisture sometimes collects along the seal where the protector meets your camera body. This buildup indicates that humid air has entered the protected space.
Your camera might feel slightly damp when you touch the protector area. This tactile sign confirms that moisture has accumulated inside.
Early detection matters. The moment you notice any of these signs, remove your lens protector and let it air dry completely. Acting quickly prevents moisture from damaging your camera’s internal components and keeps your next adventure shots crystal clear.
Step-by-Step: Removing and Cleaning a Fogged Lens Protector
Start by turning off your action camera completely. This protects the internal electronics while you work on removing the fogged protector.
Locate the lens guard attachment point. Most action cameras have lens protectors that either screw on or stick with adhesive. Check your camera’s manual if you’re unsure which type yours uses.
For screw on protectors, turn counterclockwise slowly and steadily. Don’t force it if resistance builds up. A gentle, consistent motion works best. Once loose enough, unscrew by hand carefully.
For self adhesive protectors, gently lift one corner with your fingernail or a plastic tool. Work your way around the edge slowly. This prevents damage to the camera body underneath.
Set the removed protector on a clean surface. Find a soft, lint free cloth or tissue paper. Microfiber cloths work especially well for this task.
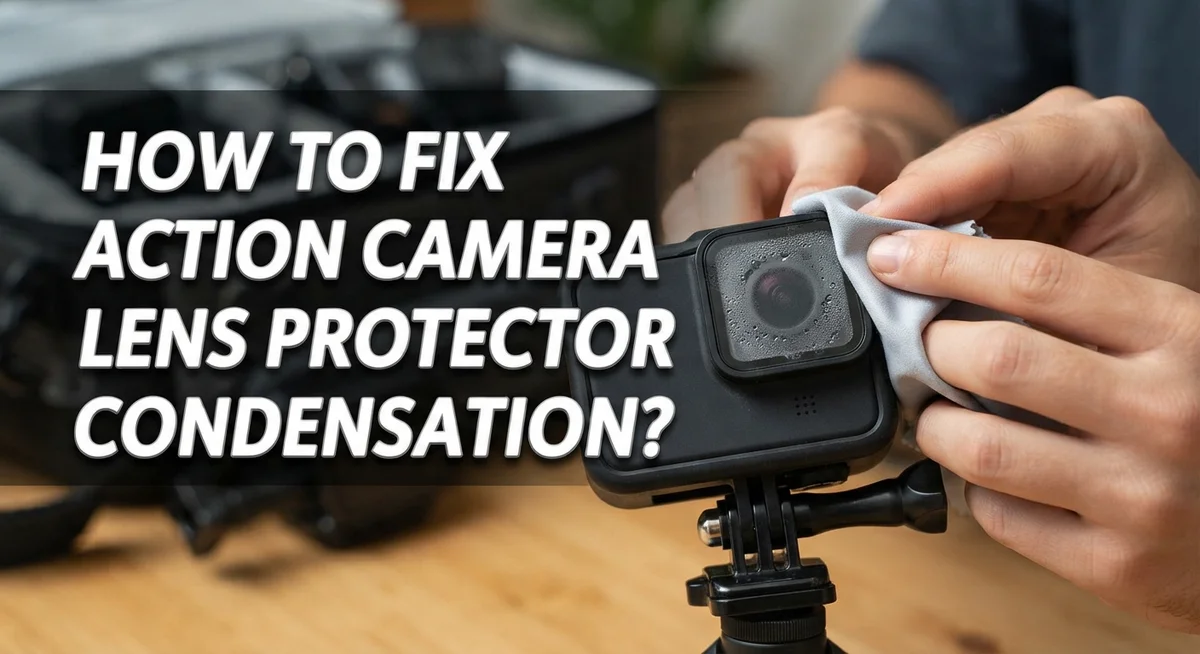
Wipe the protector gently with your cloth. Use circular motions starting from the center and moving outward. Don’t scrub hard or use rough materials. These actions can scratch the protective coating.
Next, wipe the camera’s lens area where the protector attaches. Remove any dust, debris, or moisture. This ensures a clean seal when you reattach it.
Leave both the protector and camera lens exposed to air for several minutes. Open air circulation helps any remaining moisture evaporate completely. You can use a fan nearby to speed this process up.
Inspect both surfaces before reattaching. Hold them up to light to spot any remaining water droplets or dust particles. Repeat wiping if needed.
Once completely dry, reattach your protector. Screw it on or press the adhesive back down firmly. Make sure it sits flush with no gaps or bubbles.
Test your camera to confirm clear video footage. The fogging should be completely gone. If moisture returns quickly, environmental conditions may be causing the problem, requiring prevention strategies instead.
Emergency Fixes for Condensation in the Field
When condensation strikes during filming, you need quick fixes that work right now. The first step is to stop recording and power down your camera completely. This prevents moisture from spreading deeper into the device.
Remove the lens protector immediately. If it screws on, turn it counterclockwise gently. If it’s self adhesive, lift one corner carefully with your fingernail or plastic tool. Don’t rush this step or you might damage the attachment point.
Once removed, wipe the protector dry with a soft, clean cloth. Use gentle circular motions. Next, wipe the camera’s lens area where the protector was attached. Both surfaces need to be completely dry before you continue.
Leave the protector off and expose the lens to open air for several minutes. Moving air helps moisture escape faster. If you have a small fan nearby, position it to blow gently across the lens area. This speeds up the drying process significantly.
Check your battery next. Remove it and leave the battery door open. This allows internal moisture to escape. Let the camera sit in fresh air for at least 10 to 15 minutes. Don’t rush this waiting period.
Once everything feels dry to the touch, reattach your protector. Make sure it sits flush against the camera body with no gaps. Gaps let new moisture creep back in.
For the rest of your shoot, monitor the lens closely every few minutes. If fogging returns, repeat these steps. Prevention is easier than fixing condensation repeatedly, so avoid applying protectors in humid rooms going forward.
These field fixes get you back to filming quickly while protecting your camera from further moisture damage.
Preventing Condensation Before It Starts
Preventing condensation before it starts beats fixing it later. The key is understanding when and where moisture forms on your lens protector.
Temperature changes create the perfect conditions for condensation. When your action camera moves from a cold environment to a warm one, moisture in the air condenses on the cool lens surface. Keep your camera warm during these transitions whenever possible. Avoid sudden temperature swaps by letting your camera adjust gradually to new environments.
Humidity levels matter just as much. Never apply a fresh lens protector in a humid room or outdoors on a damp day. The moisture in the air gets trapped between the protector and your lens. Wait for a dry environment before attaching any new lens guard. If you’re filming in naturally humid locations, be extra cautious.
Air circulation prevents moisture buildup significantly. Stagnant air allows condensation to settle and stick. Keep your camera in areas with gentle airflow. If you’re indoors, position your camera near a fan or open window. Moving air helps evaporate moisture before it reaches your lens.
Remove protective elements when you’re not actively filming. Taking off your lens protector occasionally lets trapped air escape. This simple step prevents moisture from accumulating over time. Leave the protector off for at least several minutes between shoots.
Store your camera properly in dry locations. Use storage spaces with low humidity levels. Keep your camera in a cool, dry area away from bathrooms or kitchens where steam builds up easily.
Monitor your camera regularly during filming sessions. Check the lens protector every few minutes for early signs of fogging. Catching condensation early makes removal and cleaning much easier. Early action prevents moisture from bonding permanently to your lens surfaces.
Common Mistakes That Make Condensation Worse
Condensation problems get worse when you make specific mistakes during setup and use. Understanding these errors helps you avoid them completely.
Applying your lens guard in humid rooms is the biggest mistake most people make. When you attach a protector in a bathroom, kitchen, or any damp space, moisture gets trapped between the lens and the guard. The air inside that sealed gap contains water vapor. As temperature drops later, that vapor turns into visible condensation on your lens.
Not allowing adequate air circulation around your camera creates another major problem. Stagnant air holds moisture much longer than moving air does. If you store your camera in a closed bag or tight case right after use, condensation has nowhere to escape. The moisture stays trapped and builds up over time.
Failing to remove protective elements when fogging starts makes things significantly worse. Many users notice condensation but leave the protector on, hoping it will clear itself. This traps the moisture against your lens permanently. Removing the protector immediately lets air reach the wet surface and dry it out.
Ignoring temperature changes causes condensation too. Moving your camera from a cold environment to a warm one (or vice versa) creates instant condensation. The lens surface becomes colder than the surrounding air, and moisture condenses on it. Rushing to film without letting your camera adjust to the new temperature makes this worse.
Using your camera in high humidity without preparation sets you up for failure. Rain, ocean spray, or muggy air all add moisture to your environment. If you don’t take preventive steps in these conditions, condensation becomes almost guaranteed.
Skipping regular inspections during filming means you catch problems too late. By the time condensation becomes visible, moisture has already damaged your equipment. Check your lens frequently when filming in humid or cold conditions.
Troubleshooting Persistent or Recurring Fogging
When condensation keeps returning to your lens protector even after you’ve cleaned it, you’re dealing with a persistent moisture problem. This happens because the underlying cause hasn’t been addressed yet. The key is identifying why moisture keeps forming in the first place.
Your camera experiences temperature changes throughout the day. Warm air holds more moisture than cold air. When your camera moves from a warm location to a cold one, the air inside cools down rapidly. This cooling causes the moisture in that air to condense on your lens protector. The cycle repeats because your environment keeps changing.
Check your storage location first. Are you keeping your camera in a humid room or near water? Moisture in the air around your storage area gets trapped inside the camera. Move your camera to a dry space instead. Open windows in your storage area to improve air circulation naturally.
During filming sessions, monitor your lens every few minutes. Don’t wait until you notice heavy fogging. Catch the problem early when condensation is just starting to form. Remove your protector immediately if you see any moisture appearing.
Airflow is your best weapon against recurring condensation. Position a fan near your camera setup to keep air moving around the lens. Moving air prevents moisture from settling on surfaces. This works especially well in humid environments.
Remove your lens protector when you’re not actively recording. This lets trapped air escape and prevents moisture buildup inside. Reattach it only when you’re ready to film again.
If condensation returns despite these steps, your camera may have internal moisture. Remove the battery and leave the battery door open overnight. This allows trapped moisture to escape completely. Your camera needs time to dry out fully before you resume filming.
Final Thoughts
Condensation on your action camera lens protector is a fixable problem. You now know why it happens and how to stop it. Moisture meets a cold surface, and fog appears.
The fix starts with patience. Let your camera adjust to new temperatures before you shoot. This simple habit prevents most fogging problems.
Your gear needs proper care too. Clean lens protectors regularly and store your camera in dry spots. These small steps add up to big results over time.
Remember that quick action matters when fog does appear. Pull off that lens guard fast. Give your camera time to breathe before you put it back on.
Weather conditions will always create challenges for outdoor filming. You cannot control humidity or sudden temperature drops. But you can control how you prepare and respond.
Think of condensation control as part of your regular camera routine. Check your gear before each shoot. Watch for warning signs during use. Address problems the moment you spot them.
Your footage quality depends on a clear lens. A foggy protector ruins otherwise great shots. Taking these precautions protects your investment and your content.
Some days you might still get unlucky. Sudden weather shifts can catch anyone off guard. Do not panic when this happens.
Apply the field fixes you learned here. Stay calm and work through the steps. Your camera will clear up soon enough.
Building good habits now saves you frustration later. Every action camera user faces this challenge at some point. The difference is knowing how to handle it.
Keep these tips handy for your next outdoor adventure. Your lens protector will stay clear when you follow this advice. Clear shots and smooth footage await you.
Frequently Asked Questions
Why does condensation form inside my lens protector?
Condensation appears when warm, moisture filled air meets a cold surface. Your lens protector acts like a barrier that traps this moisture. Temperature changes cause this problem most often. When you move your camera from a warm room to cold outdoor air, the temperature drop creates condensation instantly.
High humidity environments make this worse. If you apply your lens guard in a humid room, moisture gets trapped before you even start filming.
Can I prevent condensation before it starts?
Yes. Prevention works better than fixing fogging after it happens. Keep your camera warm during temperature changes. Avoid putting on your lens protector in humid spaces.
Use a dew heater strip if you film in cold conditions regularly. These strips warm your lens slightly to stop moisture from forming. A small fan or dew fan also helps by keeping air moving around your camera. Moving air prevents moisture from settling on surfaces.
What should I do if condensation appears right now?
Remove your lens protector immediately. Wipe it gently with a soft, clean cloth or tissue. Let the air circulate around your camera for several minutes. If you have a removable lens cover, take that off too.
Open your battery door slightly to allow moisture to escape. This helps dry out any internal dampness. Position a fan nearby to speed up the drying process.
When should I remove my lens guard completely?
Take off your protector when you’re not actively recording. This lets trapped moisture escape naturally. Remove it during breaks between filming sessions too.
If condensation keeps returning even after cleaning, your camera may have internal moisture. Leave the battery door open for 30 minutes to let everything dry completely.

Hi, I’m Jessamine Rowell, the founder and voice behind ResizeMake (https://resizemake.com/), a space where I share my love for technology with the world. I write detailed and honest reviews on the latest tech products, gadgets, electronic devices, and trending Amazon items to help readers make smarter buying decisions.