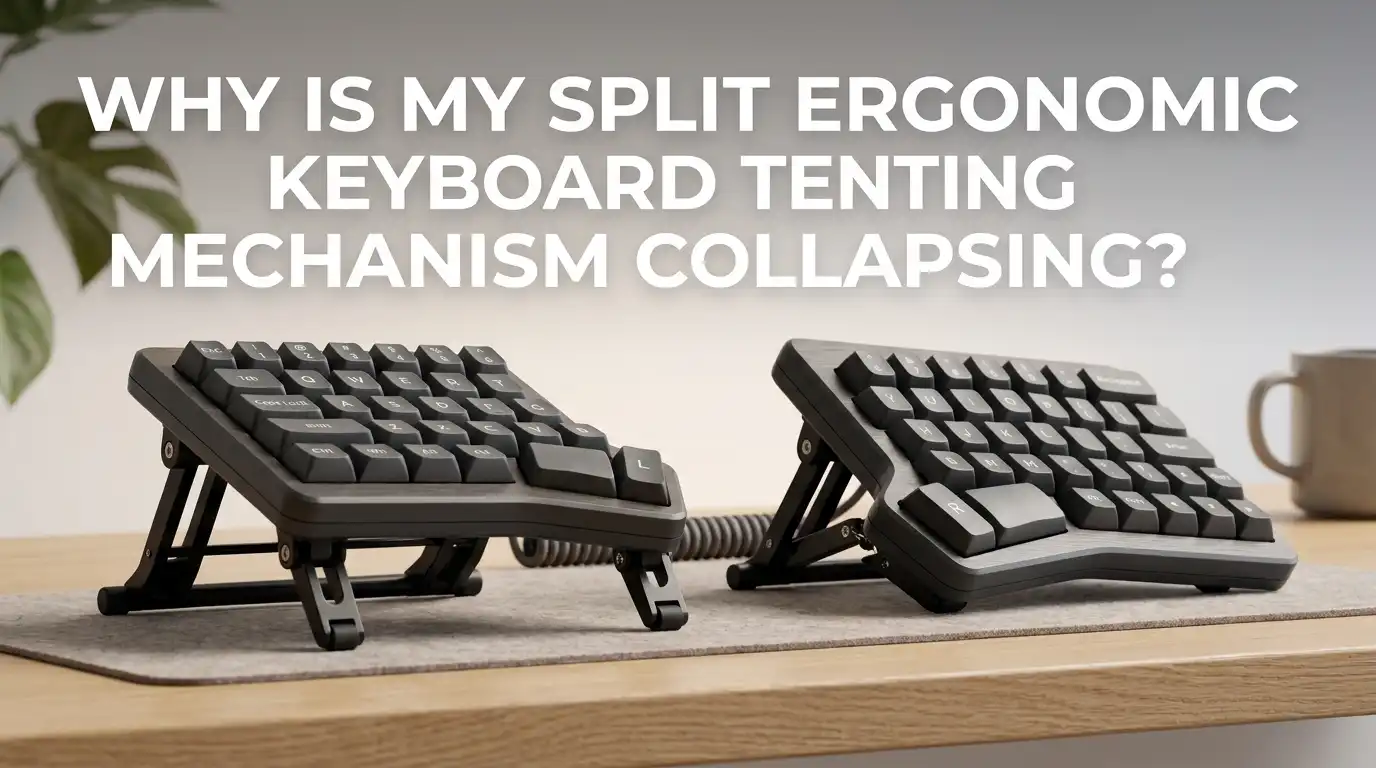
Why Is My Split Ergonomic Keyboard Tenting Mechanism Collapsing?
Your split ergonomic keyboard sits on your desk, tilted at a perfect angle. You place your hands on the keys and start typing. Then it happens. The left half dips forward.
The right side slides outward. The tenting angle you carefully set up suddenly collapses under the weight of your own fingers. You reset it, only to watch it fail again minutes later.
This is a common frustration among split keyboard users. The tenting mechanism is one of the best features of an ergonomic keyboard. It reduces wrist strain and keeps your forearms in a natural position. But when it fails, it turns your productivity tool into a source of daily annoyance.
Key Takeaways
- Loose hinge screws are the number one culprit. Over time, the screws that hold tenting legs in place loosen. A quick turn with the right screwdriver can restore firm tension.
- Small side stabilizer feet make a huge difference. Many users forget to deploy the tiny side legs that come with their tenting kit. These small feet prevent wobble and sliding.
- Placement of the legs affects stability dramatically. Tenting legs work best when positioned close to the inner edge of the keyboard. Placing them too far toward the center creates a lever that makes the keyboard tip over.
- Surface grip matters more than you think. A smooth wooden desk offers little friction. A thick desk mat, silicone bumpers, or Plasti Dip on the leg tips can eliminate sliding instantly.
- Extreme tenting angles need dedicated solutions. Bolt based legs work fine up to about 30 degrees. If you want steeper angles, switch to MagSafe mounts, tripod clamps, or adjustable laptop stands.
- Weight and center of gravity are your friends. A lightweight keyboard on steep tenting legs is a physics problem waiting to happen. Adding internal weights or using a heavier base keeps everything planted.
Understand Why Your Tenting Collapses in the First Place
The first step is knowing what goes wrong. Most tenting mechanisms rely on a few small parts working together. You have the main aluminum or plastic legs attached to hinges. You have small rods that lock into place. You have rubber feet touching the desk. When any one of these components fails, the whole system loses stability.
The most common failure point is the hinge itself. Screws holding the hinge in place loosen from repeated use. Every time you adjust the angle, you put micro stress on those threads. After weeks or months, the leg becomes floppy and refuses to hold its position.
Another major cause is simple physics. When you press a key near the outer edge of a steeply tented keyboard, your finger creates a lever effect. The keyboard pivots around the tenting foot and tips over. This is not a defect. It is center of gravity working against you.
The keyboard community on Reddit frequently points out that tenting legs placed too far inward make this problem much worse. The legs act as a fulcrum and your thumb cluster keys become the weight on the wrong end of the lever.
Surface conditions also play a role. A polished wooden desk or a glass top offers almost zero friction. Rubber feet that worked perfectly on a textured surface will slide on glossy finishes.
Check and Tighten All Hinge Screws First
Before you try anything fancy, grab a small screwdriver. Most tenting hinge problems come down to loose screws. Manufacturers like Dygma actually include adjustment instructions for this exact issue in their support documentation.
The process is straightforward. First, remove the small plastic tenting rods from the aluminum legs. Then pop the aluminum leg out of the hinge. You will see tiny screws holding the hinge mechanism onto the keyboard base.
Tighten these screws with gentle turns. A quarter turn is often enough. Do not overtighten because you can strip the threads or crack the plastic hinge housing.
If your keyboard uses a different tenting design, the principle stays the same. Look for any screw that connects the moving leg to the fixed mount.
Deploy the Small Side Stabilizer Feet
Many tenting kits include tiny U shaped plastic rods that people either lose or ignore. These are the side stabilizer feet. They serve a critical purpose. When your keyboard sits at a steep angle, only two points touch the desk: the main tenting leg and one edge of the keyboard body.
That edge becomes a pivot point. The side stabilizer adds a third contact point, creating a stable tripod effect. Without it, the keyboard wobbles like a two legged stool.
Dygma explicitly recommends users deploy these small side legs on every tenting position. One user on the Dygma subreddit went months without using them and fought constant sliding. The moment they deployed the side feet, the problem vanished.
These little rods are small enough to miss. Check your original box or accessory kit. They might be hiding in a tiny plastic bag. Once installed, they angle outward and make contact with the desk. This spreads the load across three points instead of two.
Reposition Your Tenting Legs Closer to the Inner Edge
Where you attach the tenting legs changes everything about stability. Think of the keyboard as a seesaw. If the support leg sits near the center, the outer edge becomes a long lever.
A light press on a thumb key lifts the entire opposite side off the desk. But if you move that same leg close to the inner thumb edge, the lever arm shortens. Your key presses push mostly downward into the leg rather than tipping the board over.
Many users on the ErgoMechKeyboards subreddit discovered this the hard way. They positioned their tenting legs near the middle of the board for aesthetic reasons. The result was constant tipping during layer switching with thumb keys.
Moving the legs just a centimeter closer to the thumb edge fixed the problem. You may lose a small amount of maximum tenting angle by doing this. But the stability you gain is well worth that tradeoff.
Pros: This adjustment improves stability without any extra parts or cost. It follows basic physics and works on almost any split keyboard. Cons: Moving the legs inward slightly reduces the maximum achievable tenting angle. Some keyboards have fixed mounting points that limit repositioning options.
Upgrade Your Rubber Feet for Better Grip
Factory rubber feet are often small, hard, and minimally textured. They work fine on a textured desk mat but fail on smooth surfaces. The fix is simple and cheap. Go to any hardware store and buy self adhesive silicone bumpers.
These are the clear or black domed stickers people put on cabinet doors. Stick one on the bottom of each tenting leg tip. The soft silicone grips almost any surface and creates far more friction than hard rubber.
The mechanical keyboard community has experimented with many grip solutions. Plasti Dip, the liquid rubber used for tool handles, is a popular choice. You dip the metal bolt tips of your tenting legs into the liquid rubber, let it dry, and repeat for a second coat.
The result is a thick rubber cap that grips like a tire on pavement. Sugru, a moldable silicone putty, works similarly. Shape a small cap around the foot, let it cure overnight, and enjoy custom fitted rubber pads.
Pros: These solutions cost a few dollars at most and take minutes to apply. They work on any tenting leg type and any desk surface. Cons: Some methods like Plasti Dip have a strong odor during application. Self adhesive bumpers may peel off over time and need replacement. Hot glue wears down faster than purpose made rubber.
Use a Thick Desk Mat to Absorb Movement
A quality desk mat does more than protect your desk surface. It creates a soft, high friction layer that keeps your tenting legs in place. The weight of the keyboard presses the feet slightly into the mat material.
This micro indentation acts like a shallow socket that resists sliding. Dygma support specifically recommends a thick desk mat as the easiest fix for tenting wobble. Their testing found that even slight wobble disappears when the keyboard sinks into a padded surface.
The type of mat matters. Thin fabric mousepads help with sliding but do not stop wobble. You want a mat with at least 3 millimeters of thickness and some squish to it. Neoprene gaming mats work well. Felt desk pads also perform nicely.
Leather desk mats offer a smooth premium feel but provide less grip than rubber or neoprene. One Dygma Defy user solved their sliding problem permanently by switching from a bare wooden desk to a leather desk mat. The improvement was immediate and dramatic.
Pros: A desk mat improves the whole desk experience, not just keyboard stability. It protects your desk, dampens sound, and provides a soft surface for your wrists. Cons: Good desk mats cost between twenty and fifty dollars. Some users dislike the feel of a mat under their arms. Shelf liner can look unattractive on a nice desk.
Add Weight to Your Keyboard for Lower Center of Gravity
A heavier keyboard stays put. This is basic physics. Lightweight keyboards, especially 3D printed ones with no internal weights, bounce around like a feather in the wind.
Every keystroke sends a small shock through the board that shifts its position. Adding weight inside the case lowers the center of gravity and makes the keyboard resist movement.
The easiest way to add weight is with wheel balancing weights. These are small adhesive backed metal squares sold at auto parts stores. Stick them to the inside of the bottom case plate, away from the PCB and switches. Avoid covering any components that generate heat.
Another option is to place a sheet of dense material under the keyboard. A small steel plate or even a heavy ceramic tile works as an external weight. Some users glue metal discs or ball bearings into empty spaces in their 3D printed cases.
Pros: Adding weight is a permanent passive solution. It works with any tenting system and requires no maintenance once done. Cons: It makes your keyboard less portable. Too much weight can stress the tenting hinges over time. You must be careful not to short circuit the PCB with metallic weights touching exposed contacts.
Fix Worn Out Tenting Rods with Tape or O Rings
Plastic tenting rods wear down with use. They slide in and out of grooves in the aluminum legs, and each cycle shaves off a microscopic layer of plastic. After months of daily adjustment, the rods become loose. They slip out of position during typing and the keyboard collapses.
The fix is remarkably simple. Remove the rods from the legs. Wrap a single layer of electrical tape, painter’s tape, or scotch tape around the part of the rod that fits into the hinge. This adds a tiny amount of thickness that restores the friction fit.
Dygma’s official support guide recommends this exact fix. They also suggest using the small O rings included in their enhancement kit. The O ring slips onto the part of the aluminum leg that goes into the hinge, adding friction at the pivot point rather than at the rod.
Pros: This fix uses household items you already own. It takes less than two minutes per leg. The tape is invisible once everything is reassembled. Cons: Tape eventually wears out and needs replacement. In humid environments, adhesive tape can become gummy and leave residue. O rings require you to have the right size on hand.
Switch to MagSafe Mounts for Steep Tenting Angles
Sometimes the problem is not the mechanism. It is the design limits of the tenting system itself. Basic bolt legs and plastic feet are designed for gentle angles up to about 30 degrees. If you want your keyboard nearly vertical, you need a fundamentally different approach.
MagSafe mounts, originally designed for phones and cameras, offer a brilliant alternative. You attach a thin magnetic metal ring to the bottom of your keyboard case. Then you connect a MagSafe stand with a heavy base and an adjustable ball joint.
This system solves multiple problems at once. The heavy magnetic base acts as a counterweight that prevents tipping. The ball joint lets you dial in any angle from flat to almost 90 degrees.
The magnetic connection is strong enough to hold the keyboard securely but easy enough to detach when you want to reposition. Users on Reddit and keyboard enthusiast blogs consistently rate this as the most stable tenting solution for extreme angles.
Pros: MagSafe mounts support extreme tenting angles that bolt legs cannot handle. They are quick to attach and detach. The heavy base eliminates tipping completely. Cons: This setup costs more than basic tenting legs. You need a keyboard case with enough flat surface for the magnetic ring. Some users dislike the extra height the mount adds.
Consider Adjustable Laptop Stands as a Budget Alternative
If MagSafe mounts feel too expensive or complex, adjustable laptop stands offer a middle ground. These are small folding stands with multiple height settings. You stick them to the bottom of each keyboard half using the included adhesive.
They fold flat when not in use and pop open to various angles when you want to tent. Evan Bartlett tested five different brands and found the Nillkin stands to be the most stable and versatile. They offered variable height options and held firm even during heavy typing.
The Aulumu stands came in second. They are very slim when folded, making them great for travel, but cost more than the Nillkin. The Invisible Stand and ProRiser both failed his tests.
They were too short, too flimsy, and could not hold the keyboard steady at any angle. Suntaiho stands had the same stability problem. This kind of real world testing data is valuable because it saves you from buying multiple duds.
Pros: Laptop stands are affordable and widely available. They fold flat for travel and offer multiple angle presets. Installation is as simple as peeling and sticking. Cons: The adhesive can weaken over time, especially in warm rooms. Not all stands are created equal; cheap ones fail quickly. The fixed angle presets may not match your exact preference.
Build a Custom 3D Printed Base Plate or Holder
If you have access to a 3D printer or a local makerspace, you can design a permanent fix. The idea is simple. Create a flat base plate with slots or clips that hold the tenting legs in a fixed position.
This connects both keyboard halves into one rigid unit and prevents any individual half from sliding or tipping. A Reddit user named Tucano42 designed exactly this for their Dygma Defy keyboard.
They created a 3D printed holder that clips the tenting feet of both halves together at a set distance. The result was complete stability, even on a slippery varnished wooden desk.
Dygma was so impressed they added the design to their official help center. The user shared STL files freely, so anyone can print the holder. Another approach is to print folding tenting feet that replace the factory ones entirely.
Pros: A custom 3D printed solution can be tailored exactly to your setup. STL files shared by the community are free and tested. It turns two independent keyboard halves into one stable unit. Cons: You need 3D printer access or money for a printing service. Designing your own files requires CAD skills. Printed plastic may not be as durable as metal parts.
Clean Your Rubber Feet and Desk Surface Regularly
This is the simplest fix that almost everyone overlooks. Rubber feet lose grip when they collect dust, oil, and dead skin cells. Over weeks of use, a thin film builds up on the rubber pads.
This film acts like a lubricant between the foot and the desk. The fix takes thirty seconds. Wipe each rubber foot with a damp cloth. For stubborn buildup, use a tiny amount of isopropyl alcohol on a cotton swab. The alcohol dissolves oils and evaporates without leaving residue.
Your desk surface needs cleaning too. Skin oils transfer from your wrists and palms to the desk area where the keyboard sits. A polished wooden desk with an oil based varnish turns into an ice rink over time.
Wipe the area under each keyboard half with a dry microfiber cloth or a slightly damp paper towel. Do this once a week and you will notice a significant improvement in grip.
Pros: Cleaning costs nothing and takes under a minute. It extends the life of your rubber feet and prevents premature replacement. Cons: This is a temporary fix that needs regular repetition. Very worn rubber feet will not regain grip even after cleaning.
Know When to Contact the Manufacturer for a Replacement
Sometimes the tenting mechanism is genuinely defective. No amount of tweaking, taping, or weighting will fix a warped component or a stripped thread. Reputable keyboard manufacturers stand behind their products.
Dygma, Keyboardio, ZSA, and other ergonomic keyboard makers all have support teams that handle tenting issues. Dygma will send replacement parts or even guide you through opening the keyboard to adjust internal hinges. Keyboardio replaced warped tenting stands for early Model 01 backers who experienced wobble.
Before contacting support, document the problem. Take a short video showing the collapse or wobble. Note which tenting positions trigger the issue.
Specify what surface you use and whether you have tried basic fixes like tightening screws or cleaning feet. This helps the support team diagnose the issue faster. Most companies respond within one to two business days.
Pros: Manufacturer support is free during warranty. They may send replacement parts or offer repair guidance specific to your model. Cons: Support responses can take days. Out of warranty keyboards require self funded fixes. International shipping for replacement parts may take weeks.
Test Your Fix and Adjust Over Time
Any fix you apply needs a real world test. Do not just set the tenting angle and walk away. Type on the keyboard for a full work session. Type hard. Test the keys at the far edges where leverage is strongest.
Try your thumb cluster keys that activate layers. These are usually the worst offenders because they sit at the outer extremity of the keyboard. If the keyboard stays put through aggressive typing, your fix is solid.
If it still moves, do not get discouraged. Stability problems often have multiple contributing causes. You might need to combine fixes. Tighten the screws AND add silicone feet AND deploy the side stabilizers AND reposition the legs closer to the edge.
Each fix addresses a separate aspect of the stability equation. Screws handle hinge tension. Rubber feet handle surface friction. Leg position handles center of gravity. Side stabilizers handle tripod balance. Together, they create a system that stays put no matter how you type.
Pros: Testing reveals hidden problems before they disrupt your workflow. Combining fixes creates redundancy and stronger overall stability. Cons: Troubleshooting takes time and patience. You may need to try several combinations before finding the perfect setup.
FAQs
Why does my keyboard tenting leg keep folding back in when I type?
This happens when the hinge friction is too low. The plastic rod inside the aluminum leg has worn smooth. Fix it by removing the rod and wrapping a single layer of electrical tape around the contact point. Then reinsert the rod. The added thickness restores the friction fit and stops the leg from folding under pressure.
Can I use my split keyboard without any tenting at all?
Yes, absolutely. Tenting is optional. Some people prefer a flat keyboard. The ergonomic benefit of tenting is reducing forearm pronation, but a split keyboard already improves shoulder posture even when flat. If tenting causes you more problems than it solves, set the legs to zero and use the keyboard flat.
How much tenting angle is too much?
Most bolt based tenting systems work reliably up to about 30 to 35 degrees. Beyond that, the center of gravity shifts too far and the legs become unstable regardless of fixes. If you want 45 degrees or more, switch to a MagSafe mount or a clamp based system with a heavy base.
Will adding weight damage my keyboard over time?
Weight inside the case is fine as long as the added mass does not touch exposed PCB contacts and does not overstress the plastic screw mounts. Distribute the weight evenly and avoid placing it directly under components that flex. External weights that press on the tenting legs are riskier because they increase the load on the hinge screws.
Do desk mats really stop tenting wobble that well?
Yes, they help significantly. A thick neoprene or felt desk mat absorbs microscopic height differences between legs. When the keyboard sinks slightly into the mat, all three or four contact points find their level. This eliminates the wobble that comes from slight manufacturing tolerances or uneven desk surfaces.
How often should I clean the rubber feet on my tenting legs?
Clean them once a week if you use your keyboard daily. A quick wipe with a damp cloth is enough. If you notice sliding returning sooner, clean them more often. In dusty environments or homes with pets, every few days may be necessary.

Hi, I’m Jessamine Rowell, the founder and voice behind ResizeMake (https://resizemake.com/), a space where I share my love for technology with the world. I write detailed and honest reviews on the latest tech products, gadgets, electronic devices, and trending Amazon items to help readers make smarter buying decisions.