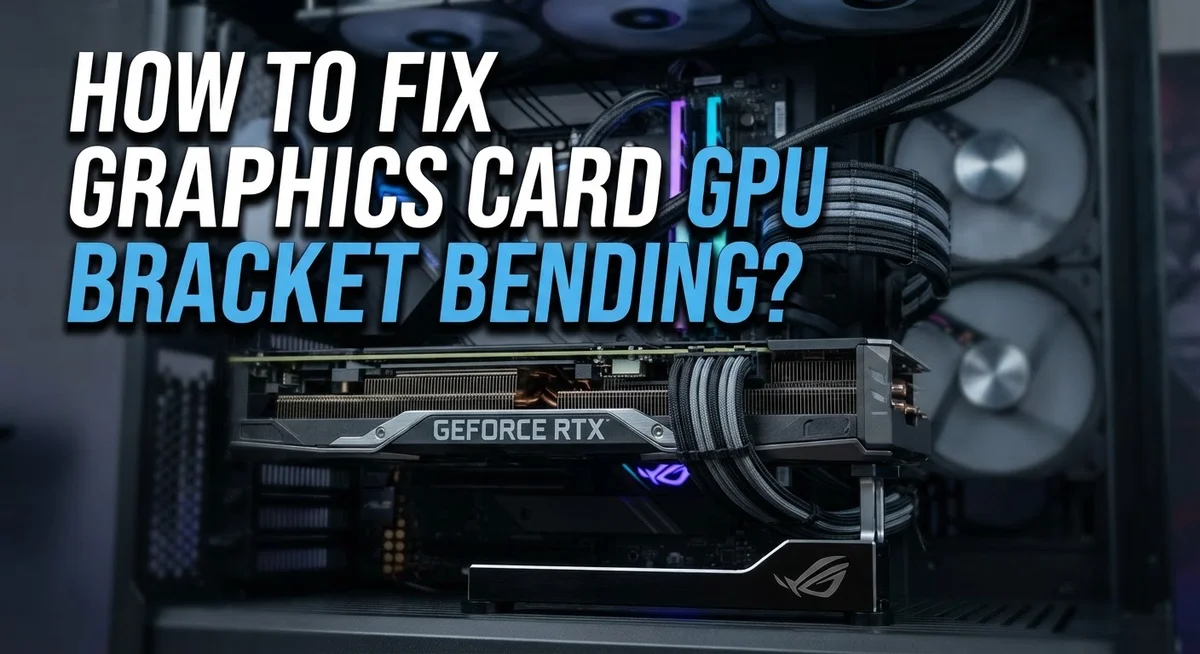
How To Fix Graphics Card GPU Sag Bracket Bending?
Does your graphics card droop like a tired flower? You are not alone. Many gamers and builders notice their heavy GPU sagging over time.
This sagging is not just a cosmetic issue. It puts real stress on your PCIe slot and motherboard. Left unchecked, it can cause connection problems or even damage your hardware.
The good news? You can fix this problem easily. An anti sag bracket is one of the best tools for this job. But here is the key: the bracket must push your card upward, not just prop it up from below.
In a Nutshell
- Use an anti-sag bracket. Place it underneath your graphics card to support its weight and stop it from bending.
- Push upward, not just support. The bracket must lift your GPU slightly. This removes pressure from the PCIe slot completely.
- Check your alignment. Sometimes you need to reposition your motherboard or case. This helps your card sit straight and level.
- Avoid common mistakes. Many people only support the card from below. This does not fix the real problem or protect your slot.
- Try free fixes first. You can reposition your case or adjust internal spacing. This costs nothing and often works well.
- Protect your hardware long term. Fixing sag early prevents damage to your PCIe slot and motherboard. It keeps your graphics card running safely for years.
What Is GPU Sag and Why It Happens
GPU sag happens when your graphics card bends downward from its own weight. The PCIe slot on your motherboard holds the card in place, but it was not designed to support heavy modern GPUs. Over time, gravity pulls the card down, creating visible sagging at the end.
Why does this happen? Modern graphics cards are much heavier than older models. High end GPUs can weigh several pounds. The PCIe slot connection alone cannot hold this weight perfectly level. The card gradually sags as the slot experiences constant downward force.
This sagging creates real problems for your hardware. The PCIe connection becomes stressed and weakened. Solder joints on the motherboard can crack from repeated stress. The graphics card’s circuit board may bend slightly, causing internal connections to fail over time.
What causes the most damage? The constant pressure on one side of the PCIe slot is the main culprit. Your motherboard was built to handle normal weight distribution, not heavy cards pulling downward. This uneven force can damage both the slot and the card’s connector.
Temperature also plays a role in GPU sag. Heat makes materials expand and contract. When your card gets hot during gaming, the plastic and metal expand slightly. This expansion combined with weight makes sagging worse over time.
Why you should care now Waiting to fix sag leads to expensive problems later. A damaged PCIe slot means your motherboard may stop working entirely. You cannot easily replace a motherboard slot yourself. The cost and hassle of replacement far exceed the cost of fixing sag early.
Many builders ignore GPU sag because it looks minor. They think a bent card still works fine. This is true until it suddenly stops working. By then, the damage is done and replacement becomes necessary.
Why Fixing GPU Sag Matters for Long-Term Hardware Health
Your graphics card’s weight puts constant pressure on the PCIe slot. Over time, this pressure causes real damage to your motherboard and GPU connection. Fixing GPU sag now prevents expensive repairs later.
The PCIe slot has delicate electrical contacts. When your card sags downward, it stresses these contacts unevenly. This uneven stress can loosen the connection between your GPU and motherboard. A loose connection means data transfer problems, crashes, or complete GPU failure.
Heat makes this problem worse. Your graphics card generates significant heat during use. This heat causes the PCIe slot and card materials to expand slightly. Combined with sagging weight, this expansion and contraction cycle weakens the connection faster. Your hardware degrades quicker than it should.
Long term damage adds up quickly. After months of sagging, you might notice performance drops. Your GPU may not run at full power. Games crash more often. In severe cases, the PCIe slot itself becomes permanently damaged. Replacing a motherboard costs far more than preventing sag from the start.
Your warranty might not cover sag damage either. Most manufacturers consider this a user installation issue. You pay for repairs out of pocket.
Fixing GPU sag is simple and affordable. An anti sag bracket lifts your card upward and removes downward pressure from the PCIe slot. This keeps electrical contacts aligned properly. Your GPU stays secure and performs reliably.
Prevention is always cheaper than repair. A few minutes spent installing a bracket today saves you hundreds of dollars tomorrow. Your graphics card will last longer and run more stable. Your motherboard stays protected from unnecessary stress. The electrical connections remain clean and reliable. This small fix makes a huge difference for your hardware’s lifespan and performance.
Tools and Materials You’ll Need Before Starting
Before you start fixing your GPU sag bracket, gather the right tools and materials. Having everything ready makes the job faster and easier.
Basic hand tools are your foundation. You need a Phillips head screwdriver to remove and install brackets. A flathead screwdriver helps with tight spaces or stuck components. An adjustable wrench or socket set works well if your bracket uses different fastener sizes. Keep these tools within arm’s reach before you begin.
Measuring and alignment tools help you get the bracket positioned correctly. A ruler or measuring tape ensures your GPU sits level after installation. A spirit level checks if your motherboard is perfectly horizontal. These tools prevent the bracket from pushing your card at odd angles.
The anti-sag bracket itself is your main material. These brackets come in various styles. Some mount to the case frame. Others attach directly to the motherboard or PCIe slot area. Choose one that matches your case design and GPU size.
Supporting materials keep everything stable during installation. Have a clean cloth ready to wipe dust from components. Thermal pads or shims help if you need to adjust bracket height slightly. Some people use rubber spacers to prevent metal to metal contact.
Safety items protect both you and your hardware. An anti-static wrist strap prevents electrical damage to your components. A small flashlight illuminates tight spaces inside your case. Keep your power supply switched off during the entire process.
Optional but helpful materials include thread locker for fasteners and compressed air for cleaning. These extras prevent future loosening and keep your system clean.
Organize all materials on a clean workspace before opening your case. This preparation prevents lost screws and ensures a smooth installation process. You’ll finish faster when everything is ready to go.
Step-by-Step Guide to Installing an Anti-Sag Bracket
Start by powering down your computer completely and unplugging it from the wall outlet. Wait a few minutes to let all components discharge safely. This step protects both you and your hardware from electrical damage.
Open your computer case and locate your graphics card. Take a moment to examine how the card currently sits in the PCIe slot. Notice if one side hangs lower than the other, which confirms GPU sag is present.
Identify the best bracket placement before installation. The anti-sag bracket should sit underneath your GPU, positioned to lift the card upward gently. Avoid placing the bracket directly against delicate components or cables.
Remove any dust from the area where the bracket will go. Use compressed air to clean around the PCIe slot and GPU mounting area. A clean space ensures proper contact and prevents debris from interfering with alignment.
Position the bracket so it makes contact with the GPU’s underside. The bracket should apply upward pressure, not just rest there passively. Adjust the bracket height carefully until your graphics card sits level with the motherboard.
Secure the bracket according to its design. Most brackets use adjustable screws or standoff points. Tighten these fasteners gradually and evenly to avoid putting stress on one side of the card.
Check your GPU’s alignment by looking at it from multiple angles. The card should sit parallel to your motherboard with no visible tilting. If you notice any remaining sag, adjust the bracket upward slightly.
Verify everything is stable before closing your case. Gently press on different parts of the GPU to confirm the bracket holds it firmly in place. The card should not move or flex when you apply light pressure.
Close your case and reconnect all cables. Power on your system and verify everything works normally. Your graphics card now has proper support that eliminates damaging pressure on the PCIe slot.
How to Properly Adjust Bracket Height for Upward Lift
The height adjustment of your bracket determines whether it actually lifts your GPU or just sits underneath it passively. This difference matters because upward pressure removes stress from the PCIe slot, while simple support does nothing to fix the underlying problem.
Start by loosening the bracket’s fasteners slightly. You want enough give to move the bracket up and down without it falling. Gently lift the GPU from below using the bracket, raising it just enough that you see a small gap between the card and its natural resting position.
Check the alignment by looking at your graphics card from the side. The card should appear level and straight, not tilted or twisted. If one corner sits higher than another, adjust the bracket height until everything looks even.
The bracket should make firm contact with the GPU’s underside, but you’re not trying to bend the card upward dramatically. A subtle lift of just a few millimeters works perfectly. Too much upward pressure can actually stress the card in a different direction.
Tighten the fasteners gradually and evenly. Tighten one side a little, then the other side a little, rather than fully tightening one side first. This prevents uneven pressure that could warp the bracket or card.
After tightening, push gently on the GPU from different angles. It should feel solid and immobile. There shouldn’t be any flex or movement when you apply light pressure.
Verify the PCIe slot connection by looking at where the card meets the motherboard. The card should sit flush against the slot without any visible gaps or tilting. The bracket’s job is complete when your GPU stays perfectly level and straight without any downward sag.
Common Mistakes That Prevent a Proper Fix
Many people install anti-sag brackets but still see their GPU sag because they make critical mistakes during the process. Understanding these errors helps you fix the problem correctly.
The biggest mistake is positioning the bracket to support rather than lift. A bracket that simply sits under your GPU does almost nothing. Your card still bends downward because the bracket applies no upward force. The bracket must actively push the GPU upward to relieve stress on the PCIe slot. This means the bracket should make firm contact and apply gentle upward pressure.
Another common error is applying insufficient upward pressure. People worry about bending their graphics card, so they barely tighten the bracket. This creates a false sense of security. Your GPU needs real support, not just light contact. The bracket should feel snug and stable when you gently push on the card from different angles.
Improper case or motherboard alignment causes problems too. If your motherboard sits at an angle inside the case, no bracket will work properly. Check that your motherboard is parallel to the case floor. Reposition your card and bracket if needed to achieve proper vertical alignment.
Many users also fail to verify their work after installation. They close the case without checking if the PCIe slot connection is truly relieved. Look at where your graphics card meets the motherboard. The connection should appear level and unstressed. If you see any downward bending at this point, your bracket isn’t working correctly.
Finally, people sometimes use the wrong bracket type for their GPU. Brackets come in different styles and lengths. A bracket that’s too short won’t reach your card properly. One that’s too long might create awkward angles. Choose a bracket designed for your specific GPU size and case layout.
Troubleshooting Persistent Sag After Bracket Installation
Your bracket is installed, but your GPU still sags? This happens more often than you’d think. The problem usually isn’t the bracket itself. It’s how the bracket works with your specific setup.
Check your bracket positioning first. Many people place brackets underneath the GPU, but the bracket never actually touches the card. Look closely at the gap between your bracket and the GPU’s underside. You should see firm contact along the entire support area. If there’s daylight between them, your bracket isn’t doing its job.
Adjust the bracket height gradually. Loosen the fasteners just enough to move the bracket upward. Push gently on the GPU to test contact. The bracket should lift the card slightly, not aggressively bend it. Tighten fasteners a little at a time while checking alignment from the side of your case.
Your motherboard angle matters more than people realize. If your motherboard sits crooked inside the case, even a perfect bracket won’t fix sag properly. Check whether your motherboard is flush against the case. Loosen motherboard screws and reseat it straight. This single step solves many stubborn sag problems.
Verify your PCIe slot connection next. Look at where the GPU’s metal bracket meets your motherboard. The connection should be straight, not angled downward. If it angles down, your motherboard positioning is off.
Test your fix by gently pushing the GPU from different angles. It should feel solid and not flex downward. Push from the front, back, and sides. The card should resist movement equally in all directions.
Sometimes multiple adjustments work together. You might need to adjust both your bracket height AND your motherboard position. Work on one variable at a time, then test. This systematic approach reveals what’s actually causing your persistent sag problem.
Final Thoughts
Fixing GPU sag comes down to one simple idea. Your bracket must lift the card, not just sit under it.
This small difference makes a big impact. A properly adjusted bracket removes stress from your PCIe slot. It protects both your graphics card and your motherboard for the long run.
You don’t need expensive tools or complicated methods. A basic anti-sag bracket costs very little. Some people even fix sag for free by repositioning their case.
The real work happens in the details. Loosen your fasteners, check your alignment, and tighten things evenly. Small adjustments often make the biggest difference.
Always test your fix after installation. Push gently on the GPU from different angles. If it doesn’t move and sits level, your bracket is doing its job correctly.
Remember that your motherboard’s position matters too. Even a great bracket can’t fix a crooked motherboard. Take time to check your case alignment before you blame the bracket itself.
Patience pays off here. Many people rush the process and miss small misalignments. A few extra minutes of checking can save you from future hardware damage.
If your card still sags after installation, don’t panic. Revisit each step calmly. Bracket height, motherboard angle, and PCIe connection all work together.
Think of this as ongoing maintenance, not a one time task. Cards can shift slightly over time, especially if you move your PC often. A quick check every few months keeps everything secure.
Fixing GPU sag isn’t about perfection. It’s about giving your card proper support so gravity doesn’t win. With the right bracket position and a little patience, your graphics card will stay level, protected, and stress free for years to come.
Frequently Asked Questions
Will an anti-sag bracket damage my graphics card?
No. A properly installed anti-sag bracket will not damage your GPU. The bracket pushes upward gently to counteract weight. It never applies downward force or bends the card itself. Make sure the bracket contacts the GPU at a sturdy point, not near delicate components like memory chips or power connectors.
How tight should I adjust the bracket?
Adjust it until your GPU sits level with the PCIe slot. The bracket should lift your card slightly upward. You want just enough pressure to eliminate sag, not so much that you’re forcing the card up. Think of it like this: the bracket removes weight from the slot, not adds pressure to the card.
Can I fix GPU sag without buying a bracket?
Yes. You can reposition your case or motherboard to improve alignment. Some cases sit at angles that make sag worse. Try rotating your case or adjusting how your motherboard sits inside. You can also use free materials like foam blocks or wooden spacers to support the GPU from underneath. These methods require patience but cost nothing.
Why does my GPU still sag after installing a bracket?
Your bracket might not be pushing upward enough. Check that it actually contacts the GPU and lifts it. Also verify your motherboard isn’t tilted inside the case. A crooked motherboard means your PCIe slot angles downward, and even a good bracket can’t fix that. Finally, confirm your bracket is the right type for your specific GPU shape and size.
How often should I check my GPU sag?
Check it every few months during routine maintenance. Look for visible bending of the card or gaps between the bracket and GPU. If you notice new sag developing, your bracket may have shifted. Tighten fasteners and readjust height as needed. Regular checks prevent long-term damage to your motherboard connection.

Hi, I’m Jessamine Rowell, the founder and voice behind ResizeMake (https://resizemake.com/), a space where I share my love for technology with the world. I write detailed and honest reviews on the latest tech products, gadgets, electronic devices, and trending Amazon items to help readers make smarter buying decisions.