How To Fix Camera Strap Peak Design Anchor Wear?
Your camera strap keeps you connected to your gear. But small parts like the Peak Design anchor can wear out over time.
This wear happens from daily use. Every time you lift, sling, or clip your camera, the anchor takes on stress. Over months of shooting, that stress adds up.
You might notice fraying, stretching, or a loose feel in the connection. These signs mean your anchor needs attention. Ignoring them risks a dropped camera at the worst moment.
In a Nutshell
- Check your anchors often. Look for cracks, fraying cords, or a loose feel around the connector. Catching this early stops bigger problems later.
- Clean the anchor and mount. Dirt and grime build up over time. A quick wipe keeps the connection smooth and reduces friction.
- Replace worn anchors right away. Don’t wait for the cord to snap. Fresh anchors keep your camera safe and secure.
- Test the connection before shooting. Give your strap a gentle tug after reattaching it. This simple check confirms everything is locked in properly.
- Rotate strap positions sometimes. Switching how you sling or clip your camera spreads out wear. Your anchors will last much longer this way.
- Store your gear properly. Avoid tossing your camera in a bag with the strap twisted or pinched. Proper storage protects the anchor system.
Understanding the Peak Design Anchor System
The Peak Design anchor system works through a simple but effective quick release mechanism. Your camera has two strap mounts, one on each side. The circular anchor piece inserts into the anchor link on your camera body. You push it in with your thumb until you hear a click or feel resistance.
This quick release design lets you attach and detach your strap in seconds. You don’t need to thread anything through or use tools. The speed and convenience make it popular with photographers who switch between different carrying methods throughout the day.
Understanding how the anchor connects helps you spot wear early. The anchor link on your camera is a small loop or slot. The circular end of the anchor slides into this space. When you pull your strap, all the stress concentrates at this connection point. This repeated tension causes the anchor to wear over time.
The strap positioning also affects how much stress hits your anchors. A longer sling position spreads the weight differently than a short cross body carry. Switching between positions reduces concentrated wear on any single anchor.
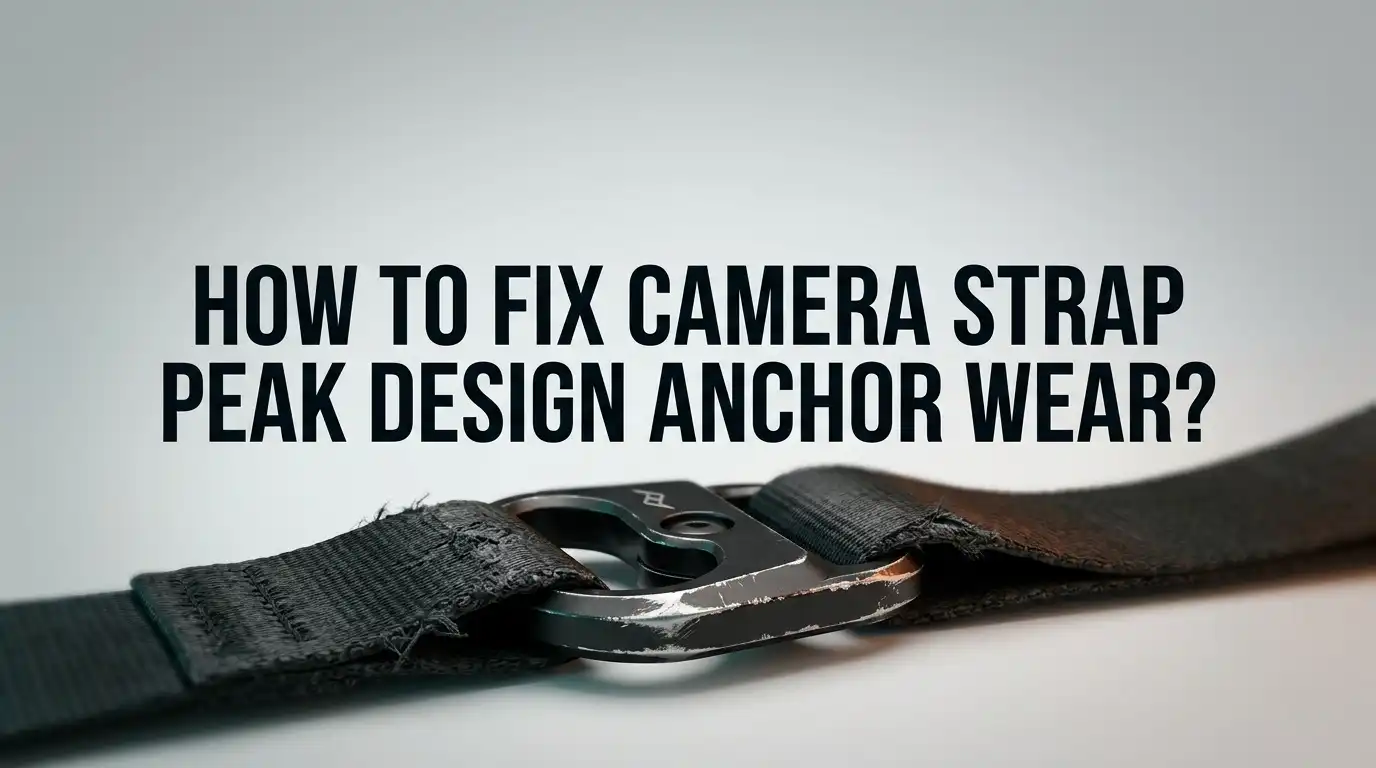
Daily use creates predictable wear patterns. The anchor cord can fray. The circular connector may crack or develop rough edges. The connection might feel loose or wobbly. These signs tell you the anchor needs attention soon.
The good news is that the system tolerates regular use well. Thousands of photographers use Peak Design anchors without major problems. The wear you see is normal and manageable. Catching the damage early prevents complete failure during an important shoot. Regular inspection takes just a minute but saves you from losing your camera or strap unexpectedly.
Identifying Signs of Anchor Wear and Damage
Your camera anchors show wear in several clear ways. Start by examining the cord around each anchor point. Fraying or splitting fibers indicate the anchor is breaking down from repeated use. Run your finger along the cord gently. If it feels rough or has loose strands, damage is present.
Next, check the connection itself. Attach your strap and give it a firm tug. A healthy anchor holds tight without any movement. If the strap shifts or feels loose, the anchor link may be worn. The circular end of the anchor should fit snugly into the anchor link every time.
Look at the actual anchor mount on your camera body. Cracks around the plastic or metal connector mean stress damage has occurred. Sometimes dirt and grime hide the real damage underneath. Wipe the area clean with a soft cloth to see clearly.
Test the quick release function. Push the anchor in and out several times. Smooth operation means everything works well. Grinding sounds or resistance suggest internal wear. The mechanism should feel effortless.
Check for discoloration or fading around the anchor area. This shows prolonged stress and UV exposure. The cord may also feel stiff or brittle instead of flexible. These signs mean replacement is coming soon.
Finally, inspect how your strap hangs. Does it sit at an odd angle? Does the camera tilt when attached? Uneven wear on the anchors causes positioning problems. One side may wear faster than the other depending on how you sling your camera.
Catching these signs early prevents sudden failure during important shoots. Regular inspection takes just a few minutes and saves frustration later.
Tools and Materials Needed for the Fix
Before you start fixing anchor wear, gather the right tools and materials. Having everything ready makes the repair process smooth and efficient.
Basic cleaning supplies come first. You will need a soft cloth or microfiber towel to wipe down your anchors and mounts. A small brush helps remove dirt and debris from tight spaces. Mild soap and water work well for gentle cleaning. Avoid harsh chemicals that can damage the anchor material.
Next, consider replacement components. If your anchor cord shows fraying or significant wear, you may need a new anchor unit. Peak Design produces replacement anchors that match your camera model. Check your camera’s manual to identify the correct anchor type for your setup.
Inspection tools are helpful too. A magnifying glass lets you examine small cracks or damage closely. Good lighting is essential when checking connection points and cord condition.
You should also have basic hand tools available. A small flathead screwdriver might help if your camera requires removing the anchor mount. Most Peak Design systems use thumb release, but some older models need tools for removal.
Lubricants can extend anchor life. A small amount of silicone based lubricant helps the quick release mechanism work smoothly. Apply it sparingly to avoid attracting dust.
Finally, keep your camera manual nearby. It shows exactly where anchors attach and how to properly install replacements. The manual also lists compatible anchor styles for your specific camera body.
Gather these items before starting repairs. This preparation prevents frustration and ensures you complete fixes correctly the first time.
Step-by-Step Guide to Repairing a Worn Anchor
Start by examining your anchor carefully. Look for visible fraying, discoloration, or loose fibers on the cord. Check if the circular end feels smooth or rough when you run your thumb over it. A worn anchor often feels gritty or has uneven texture.
Next, test the connection strength. Insert the anchor into the Anchor Link and apply gentle pressure. The fit should feel snug and secure. If the anchor slides in too easily or feels loose, wear has likely compromised the cord’s diameter.
Gently tug your camera strap after reattaching it. The anchor should hold firm without slipping. If you notice any movement or hear a clicking sound, the anchor needs attention soon.
Clean the anchor and mount thoroughly with a soft cloth. Dirt accumulation can make wear seem worse than it actually is. Sometimes debris creates a false impression of damage.
Inspect the anchor mount on your camera body too. Look for scratches, cracks, or bent edges. The mount itself can wear and affect how the anchor seats inside it.
Check how your strap hangs when attached. Uneven positioning or tilting suggests anchor damage. The strap should hang straight and balanced on both sides.
Finally, examine the cord for any white fibers or fuzzy areas. These indicate internal breakdown of the material. Once you spot these signs, replacement becomes necessary soon.
Document the wear with photos if possible. This helps you track how quickly damage progresses. Regular inspection catches problems before they cause failures during important shoots.
How to Reattach and Test Your Anchor Connection
Start by locating both camera strap mounts on your camera body. These are the small attachment points on each side. Insert the circular end of your anchor into the anchor link at each mount point. Push firmly until you hear or feel a click, which confirms proper connection.
Use your thumb to secure the connection by pressing down on the anchor. The quick release mechanism should feel snug but not overly tight. If it feels loose, remove it and reinsert. A proper connection creates a secure hold that won’t slip during use.
Thread or floss can help you create or tighten the loop at the attachment point if needed. Gently pull the strap to ensure it sits evenly on both sides of your camera. The strap should hang symmetrically without twisting or bunching.
Test your anchor connection by gently tugging your camera strap in different directions. Pull downward, then sideways, then at angles. The connection should remain firm without any movement or clicking sounds. If you notice any shifting, remove and reattach the anchor.
Check that your strap hangs naturally without kinks or tangles. Position it to run under your arm at a comfortable length. Raise your camera to your eye and confirm the strap stays secure throughout the motion.
Inspect the connection one final time before shooting. Look for any gaps between the anchor and the mount. Verify that the quick release mechanism engages smoothly. A properly attached anchor should feel rock solid and reliable.
Test the rapid removal feature by pressing the quick release button. The strap should detach instantly without resistance. Reattach it immediately to confirm the connection works consistently. This quick test takes seconds but confirms everything functions correctly before your next shoot.
Preventing Future Anchor Wear During Everyday Use
Your daily camera use directly impacts how quickly your anchors wear down. Understanding proper handling habits makes a real difference in extending their lifespan.
Avoid excessive flipping and rotating your camera throughout the day. Each time you flip your strap over your shoulder or rotate your camera, the anchor connection flexes. This repeated motion causes gradual stress on the anchor link and mount. Instead, position your camera once and keep it stable when possible.
Use proper grip techniques when handling your camera. Grab your camera by the grip itself rather than pulling on the strap. This reduces unnecessary tension on the anchor points. When you need to raise your camera to your eye, support it with your hands instead of letting the strap bear the weight.
Sling your strap correctly for comfort and durability. Thread the strap under your arm at a longer length rather than wearing it short around your neck. This positioning distributes weight more evenly and reduces concentrated stress on individual anchor points.
Switch between attachment methods when possible. If your camera system offers alternative mounting options like clips or different anchor positions, rotate between them. This prevents any single anchor from experiencing constant wear and fatigue.
Store your camera properly when not shooting. Avoid leaving your camera hanging by its strap for extended periods. Place it in a bag or on a secure surface instead. This simple habit significantly reduces the ongoing stress that anchors experience.
Clean your anchor connection regularly with a soft, dry cloth. Dirt and debris can create friction that accelerates wear. A quick wipe keeps everything functioning smoothly.
These everyday practices combined protect your anchors from premature failure and keep your camera secure during important shoots.
Common Mistakes to Avoid When Fixing Anchors
When fixing worn Peak Design anchors, many people make mistakes that actually cause more damage. Understanding what to avoid saves time and money.
Don’t force the anchor into the mount. Pushing too hard can crack the plastic connection points on your camera body. The anchor should slide in smoothly. If it feels stuck, stop and check for debris or misalignment first.
Avoid using the wrong tools. Pliers, screwdrivers, or other metal tools can scratch and weaken anchor components. Your fingers and thumbs work best for this system. The quick-release design needs gentle handling, not aggressive manipulation.
Never ignore warning signs. White fibers or fuzzy areas mean the cord is fraying. Loose connections that rattle mean the anchor is failing. Catching these early prevents complete failure during a shoot.
Don’t overtighten the connection. Many people press too hard when securing the anchor, thinking pressure equals safety. This actually stresses the internal components. Use firm thumb pressure only, not force.
Avoid mixing old and new anchors. If one anchor wears out, replace both sides. Mismatched anchors create uneven tension and cause faster wear on the newer piece.
Don’t skip cleaning. Dirt and dust get trapped in the connection point. This creates friction that speeds up wear. Wipe your anchors weekly with a soft, dry cloth.
Never reattach without inspecting. Always check both the anchor and the camera mount for damage before reconnecting. Reattaching worn parts without fixes just repeats the same problem.
These mistakes compound over time. Taking care during repairs and maintenance keeps your strap system working properly for years.
Troubleshooting Persistent Anchor Issues
When your Peak Design anchors show signs of wear, you need to identify exactly what’s happening first. Look for white fibers or fuzzy areas around the cord where it enters the anchor. These signs mean the connection is fraying and needs attention soon.
Start by removing your strap completely from the camera. Press the quick release button to detach it safely. Examine both the anchor and the anchor link on your camera body for visible damage or loose parts.
If the cord is fraying, you can sometimes prevent further damage by sealing the frayed end. Let the area dry completely, then gently work the loose fibers back into place. A soft cloth helps you do this without adding pressure that could cause more damage.
Check if the anchor link itself is loose on your camera body. Gently wiggle it side to side. A loose link causes anchors to wear faster because they move around during use. If it moves too much, the connection point may need professional attention.
Test your anchor connection by attaching your strap again. Press down with your thumb until you feel it click into place. The connection should feel solid, not loose or wobbly. Gently tug your camera strap in different directions to confirm everything holds tight.
If wear is severe, consider replacing both anchors at the same time. One worn anchor often means the other side is close behind. Replacing just one creates uneven wear patterns that damage your camera faster.
Store your camera in a padded bag when you’re not shooting. This reduces unnecessary movement and contact that speeds up anchor wear. Regular inspection every few weeks helps you catch problems early before they become serious issues.
Final Thoughts
Anchor wear happens to every Peak Design user over time. It’s a normal part of owning a camera strap.
The good news is that fixing this problem is simple. You don’t need special skills or expensive tools.
Just check your anchors regularly. Look for fraying, discoloration, or looseness.
Catching problems early saves you from bigger headaches later. A quick inspection takes only seconds.
Remember the quick release system works best when both anchors are healthy. Mismatched or worn anchors create uneven strain on your camera mounts.
This can lead to faster wear on the good anchor too. Replace anchors as a set whenever possible.
Your camera gear represents a real investment. Taking care of small parts like anchors protects that bigger investment.
A five minute check can prevent a dropped camera. It can also save you from a scratched lens or damaged strap mount.
Think of anchor maintenance as part of your regular camera care routine. Just like you clean your lens, check your anchors too.
Simple habits make a big difference. Avoid twisting your strap too much. Store your camera properly. Clean the anchor connection points often.
These small steps add years to your anchor life. They also keep your camera secure during every shoot.
Peak Design built these anchors to be reliable. But no gear lasts forever without proper care.
Stay alert to warning signs. Act quickly when you spot wear.
Your camera strap should feel secure every time you sling it over your shoulder. With regular checks and quick fixes, it will.
Take a moment today to inspect your anchors. Your camera and your peace of mind will thank you.
Frequently Asked Questions
What causes Peak Design anchor wear in the first place?
Peak Design anchors wear from regular use over time. The cord inside the anchor can fray from repeated attachment and removal. Environmental factors like moisture, dust, and temperature changes speed up wear. Improper insertion techniques also damage anchors faster than normal use would.
How do I know if my anchor is wearing out?
Look for white fibers or fuzzy areas on the cord. The anchor link might feel loose when you attach your strap. You may notice the connection doesn’t feel as secure as it once did. Test the attachment by gently pulling on your strap to see if it holds firmly.
Can I fix a fraying anchor cord myself?
Yes, you can seal a fraying cord end to stop further damage. Clean the frayed area first. Apply a small amount of clear sealant to the cord tip and let it dry completely. This prevents the cord from unraveling further, though it won’t restore the anchor to like new condition.
Should I replace one anchor or both?
Replace both anchors at the same time. Using one worn anchor with one new anchor creates uneven stress. The newer anchor will wear faster because it carries more load. Your strap will also hang unevenly on your camera.
How can I prevent anchor wear from happening again?
Attach and remove your strap gently using the quick release system as designed. Insert the circular end straight into the anchor link without forcing it. Store your camera in a padded bag when not shooting. Check your anchors monthly for early signs of wear.

Hi, I’m Jessamine Rowell, the founder and voice behind ResizeMake (https://resizemake.com/), a space where I share my love for technology with the world. I write detailed and honest reviews on the latest tech products, gadgets, electronic devices, and trending Amazon items to help readers make smarter buying decisions.