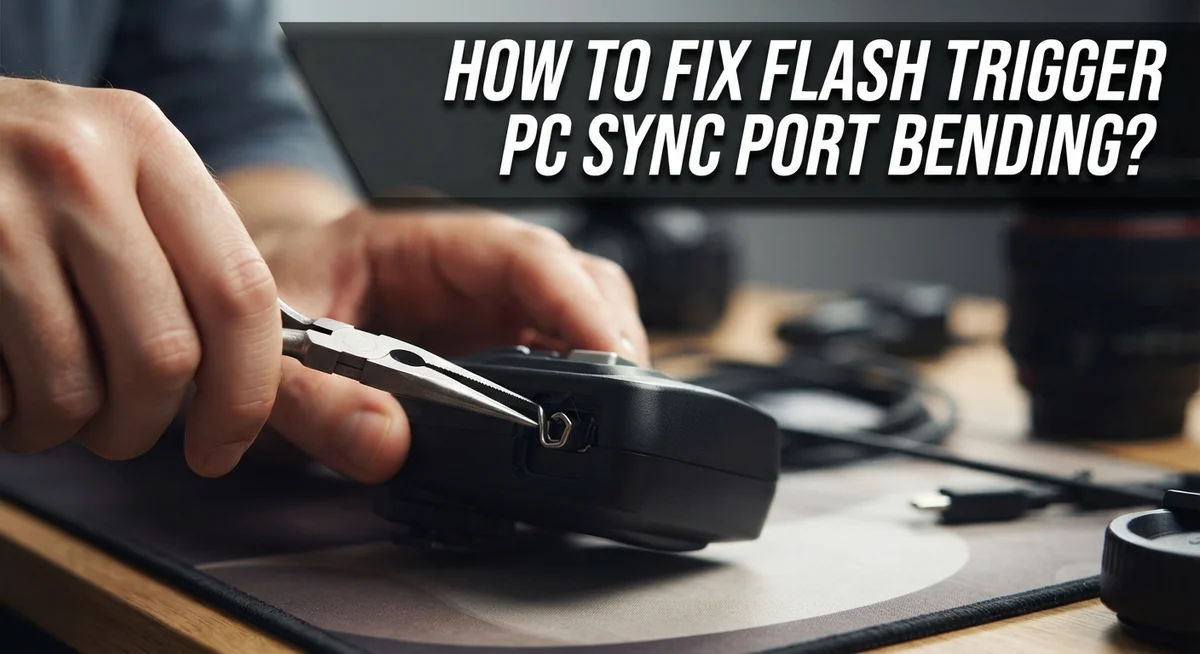
How To Fix Flash Trigger PC Sync Port Bending?
Does your flash refuse to fire at the right moment? A bent PC sync port could be the problem.
The PC sync port is a small but important part of many DSLR and film cameras. It connects your camera to external flash units through a simple cable link.
Over time, this tiny port can wear out or bend. This happens from repeated cable plugging or rough handling.
In a Nutshell
- Check the pin first. A bent center pin often causes weak or failed connections. Gently straighten it before trying anything else.
- The cable is usually the real problem. Most sync failures come from worn or loose cables, not the port itself. Test with a fresh cable before you blame the camera.
- Clean corroded contacts. Dirt and rust build up on terminals over time. A simple contact cleaning spray can restore a solid connection.
- Crimp the sleeve for a snug fit. A loose outer sleeve on your cable can cause the flash to misfire. Lightly crimping it helps the connection stay tight.
- Avoid over-bending the pin. Too much force can snap or permanently damage it. Small, careful adjustments work best.
- Know when to replace parts. If the terminal looks worn beyond repair, a long tip PC cable often solves the issue faster than repeated fixes.
Understanding the PC Sync Port and How It Works
The PC sync port is a small connector found on many DSLR and film cameras. It allows your flash to fire in perfect sync with your camera’s shutter. Understanding how it works helps you fix problems faster.
The port contains two main parts: a center pin and an outer metal ring or rail. When you insert a PC cable, the center pin makes contact with the socket inside. This electrical connection tells your flash to fire at the exact moment your shutter opens.
The firing process is simple. Your camera sends an electrical signal through the center pin to the outer contact. This signal completes a circuit that triggers your flash. The whole process happens in milliseconds.
Most connection problems happen at the contact points. The center pin must touch the socket firmly. Any gap between them prevents the signal from reaching your flash. This is why a bent or loose pin causes unreliable firing.
Wear and tear damage the port over time. Repeated cable insertions can bend the center pin slightly. Dust and moisture can corrode the metal contacts. These issues create resistance in the electrical path.
Cable problems are the real culprit in most cases. A worn cable sleeve becomes loose inside the port. This loose fit allows the center pin to shift during shooting. Your flash may fire late or not at all.
Understanding this connection helps you diagnose issues correctly. You can check if the pin looks bent or the contacts appear corroded. You can also inspect your cable for wear and looseness. This knowledge guides you toward the right fix. Some problems need pin adjustment. Others need cable replacement or contact cleaning. Knowing the difference saves you time and frustration.
Signs Your PC Sync Port or Pin Is Bent or Failing
Your flash may not fire at all, or it might fire at unpredictable moments. These signs often point to a bent PC sync port or failing pin. Let’s look at what to watch for.
Flash fires immediately when you insert the cable. This happens when the center pin no longer sits properly in the socket. Poor contact causes the flash to trigger too early. You may also notice the flash fires even before you press the shutter button.
The flash fires unreliably or not at all. A bent pin creates a loose connection inside the port. Sometimes the flash works, sometimes it doesn’t. This inconsistency is a clear sign of contact problems.
You see visible damage on the center pin. Look closely at the pin inside your cable connector. If it bends to one side or looks crooked, that’s your problem. A straight pin should sit centered in the socket.
The cable feels loose when inserted. Push the cable into the port gently. Does it wiggle side to side? A loose fit means the outer sleeve or the port itself needs attention.
Corrosion appears on the metal contacts. Check both the port and the cable connector for green or white buildup. Corrosion blocks electrical flow and weakens connections.
The flash misfires during important shots. Unreliable sync ruins photos. If your flash timing is unpredictable, the port or cable likely has issues.
You hear a clicking sound when moving the cable. This noise means the center pin is making and breaking contact repeatedly. The connection is failing inside the port.
These signs tell you something needs repair or replacement.
Step-by-Step: How to Fix a Bent PC Sync Pin
Start by examining the center pin inside your cable connector with a magnifying glass or bright light. Look for any visible bends, kinks, or flat spots that prevent proper contact.
Gently straighten the pin if it’s bent. Use a small, flat tool like a jeweler’s screwdriver or precision tool. Apply light pressure and work slowly. The pin is fragile, so avoid sudden movements or excessive force that could snap it completely.
Check the pin’s alignment inside the connector body. It should sit centered and straight. If the pin leans to one side, it won’t make reliable contact with the port socket.
Test the fit without applying power. Insert the cable into your camera’s PC sync port slowly. It should slide in smoothly without resistance. If you feel grinding or friction, stop immediately and recheck the pin alignment.
Look at the outer metal sleeve around the pin. If it’s loose or deformed, crimp it gently with pliers to create a snug fit. A tight sleeve holds the pin in the correct position and improves contact reliability.
Inspect the port socket on your camera for matching damage. If the socket appears crushed or severely corroded, the problem may exist on both sides.
Clean any visible corrosion from the pin using contact cleaning spray applied to a soft cloth. Wipe gently and let it dry completely before testing.
Insert the cable again and test with your flash. Fire a few test shots to confirm reliable operation. If the flash still misfires or doesn’t respond, the issue may require cable replacement or professional port repair.
Cleaning and Tightening the Sync Port Connection
Start by examining both the center pin and the outer metal sleeve of your cable connector. Use a magnifying glass or bright light to see any dirt, corrosion, or loose contacts clearly.
Spray contact cleaner on a soft, lint-free cloth. Gently wipe the center pin inside your cable connector. Make sure you remove all green or white corrosion buildup. Let the cleaner dry completely before testing.
Next, check the sync port socket on your camera body. Insert the cloth into the port opening and wipe the inner contacts gently. Be very careful not to force anything into the port.
For the outer metal sleeve, inspect how tightly it grips the connector. A loose sleeve means the cable moves around inside the port. This movement breaks the electrical connection.
Gently crimp the outer sleeve if it feels too loose. Use a small, flat tool to apply slight pressure. The goal is a snug fit without damaging the connector. Test the cable fit after each small adjustment.
Insert the cable slowly into the port and feel for resistance. The connection should feel firm but not tight. You should hear or feel a subtle click when it seats properly.
If the cable still feels loose after cleaning and tightening, the connector may be worn beyond repair. Cable problems cause most sync failures, so replacing the cable often solves the issue completely.
Test your flash connection after each step. Fire a test shot to confirm the sync works reliably. Repeat the cleaning process every few months if you use the PC sync port regularly.
When the Cable Is the Real Problem, Not the Port
Sometimes the real culprit isn’t your camera’s port at all. The cable connector itself often causes firing problems. A worn or damaged cable creates connection issues that feel identical to port damage.
Your cable takes physical stress every time you insert and remove it. The outer metal sleeve loosens over time. The center pin inside the connector gets bent from repeated use. These cable problems happen faster than actual port damage.
Test this simple way: borrow another PC sync cable if you can. Insert it into your port gently. Does the flash fire reliably now? If yes, your port is fine. Your original cable needs attention or replacement.
Look closely at your cable connector with good lighting. The center pin should sit perfectly straight inside the metal body. Any slight angle means the pin won’t contact the port socket properly. The outer sleeve should grip firmly without gaps.
Corrosion on cable contacts causes the most frustrating failures. Green or white buildup prevents electrical connection even when everything looks aligned. This buildup forms faster on cables stored in humid areas.
Clean your cable connector first before assuming port damage exists. Use contact cleaning spray on a soft cloth. Wipe the center pin gently. Wipe the inner walls of the connector body. Let it dry completely before testing.
If cleaning doesn’t help, try crimping the outer sleeve slightly tighter. This improves contact pressure inside the port socket. Use gentle pressure only. Too much force damages the connector permanently.
Cable replacement often solves problems faster than port repair attempts. A fresh connector costs less than camera service. It eliminates guesswork about what’s actually broken. Always test a different cable first. This simple step saves time and frustration.
Common Mistakes to Avoid When Repairing Sync Ports
Over bending the center pin is the fastest way to cause permanent damage. The pin is made from soft metal that breaks easily under pressure. Apply only gentle, slight pressure when you adjust it. Stop immediately if you feel resistance.
Ignoring worn sync terminals leads to endless frustration. Many people keep using the same loose cable repeatedly, hoping it will work. This damages your camera’s port socket more with each insertion. Check your port socket first before assuming the pin needs adjustment.
Using loose or worn cables repeatedly creates a false belief that your camera is broken. The cable connector wears out faster than the port itself. Test with a different cable before spending time on port repairs. This simple step saves hours of unnecessary work.
Applying too much force when crimping the outer sleeve crushes the connector. The metal sleeve should grip the port firmly, not tightly. Use gentle, gradual pressure. Stop when you feel slight resistance.
Skipping contact cleaning is a common mistake. Corrosion builds up invisibly on metal contacts. You cannot see it with your eyes under normal light. Contact cleaner removes this buildup quickly. Always clean before attempting any bending or crimping.
Forgetting to test after each small adjustment wastes time. Make one tiny change, then test the connection. This helps you find the exact adjustment needed without overdoing it.
Mixing up the center pin with the outer sleeve causes confusion. The center pin fires the flash. The outer sleeve provides the electrical return path. Both need proper contact, but they require different repair approaches. Understanding which part needs fixing prevents costly mistakes.
Troubleshooting Persistent Firing and Connection Issues
Persistent firing and connection issues with your PC sync port usually stem from either a bent center pin or loose contact points. When your flash fires immediately upon cable insertion, you likely have a poor insulation problem where the center pin touches the outer sleeve prematurely.
Start by examining the center pin inside your cable connector carefully. A bent pin sits at an angle instead of straight. Gently bend it slightly off center to improve how it grips the socket. This small adjustment often restores reliable contact without causing damage.
Next, check if your outer metal sleeve feels loose around the connector body. A loose sleeve creates intermittent firing problems because the connection breaks during use. Use a small flat tool to apply gentle pressure and crimp the sleeve slightly tighter. This increases grip without crushing the connector.
Unreliable firing typically means your contacts have worn down from repeated use. The connection becomes so loose that vibration or slight movement breaks the circuit. Test this by inserting your cable slowly and feeling for resistance. If you feel almost no grip, the connector is probably worn beyond adjustment.
Contact corrosion creates invisible problems that cause frustrating failures. Even clean looking contacts can have oxidized layers preventing electricity flow. Spray contact cleaner on a soft cloth and wipe both the center pin and outer sleeve thoroughly.
If these adjustments don’t solve your issue, your cable connector may be permanently damaged. Worn connectors fail repeatedly no matter how much you adjust them. Before assuming your camera port needs repair, try borrowing another PC sync cable to test. Cable replacement often solves problems faster than attempting port repairs.
Preventing Future PC Sync Port Damage
Preventing future PC sync port damage starts with smart handling habits. Your cable takes physical stress every time you connect and disconnect it. Store your cable loosely in a padded pouch rather than coiling it tightly. Tight coils bend the connector pins over time.
When inserting your cable, use gentle pressure. Push straight into the port without twisting or angling the connector. A slow, steady insertion prevents the pin from bending sideways. Remove the cable with the same care. Pull straight out without wiggling or rotating it.
Keep your port and cable connector clean and dry. Moisture accelerates corrosion on metal contacts. Store your flash and camera in a dry environment. Wipe connectors with a soft, dry cloth before each use.
Rotate your cables regularly if you use multiple PC sync cables. This prevents one cable from wearing out faster than others. Worn cables fail more easily and can damage your port.
Inspect your connector monthly for visible bending or corrosion. Catch problems early before they worsen. A bent pin gets worse with each use.
Avoid extreme temperatures. Heat and cold cause metal to expand and contract, loosening connections. Keep your gear at room temperature when possible.
Use a cable management system. Hanging cables loosely prevents kinks and bends. Coiled cables on the ground get stepped on and crushed.
Test your sync connection in a safe location first. Fire a test shot indoors before heading to an important shoot. This catches connection problems before they ruin your session.
Replace worn cables immediately. A damaged cable costs far less than repairing a bent port. Prevention through cable replacement is always smarter than fixing port damage later.
Final Thoughts
Fixing a bent PC sync port does not need to feel hard. Most problems come from small pin or cable issues, not major damage.
Start with the simplest fix first. Check your cable before touching the port itself. A worn cable often causes more trouble than the port.
Gentle adjustments make the biggest difference. Slightly bending the center pin can restore contact. Crimping the outer sleeve lightly can tighten a loose fit.
Cleaning corroded terminals helps too. A simple contact spray clears away buildup that blocks proper connection. This small step often fixes issues that seem serious.
Patience matters more than force. Rushing repairs or pressing too hard on the pin causes lasting damage. Small, careful movements protect your gear.
Testing after every adjustment keeps you on track. It shows you what works and stops you from overdoing any fix.
If your port still misfires after these steps, the cable connector may be the real problem. Swapping it out often solves what looks like a port issue.
Long term care matters just as much as quick fixes. Regular checks, gentle handling, and clean equipment reduce future problems.
A sync port does not need to be complicated to maintain. Treat it gently, check it often, and replace worn parts quickly.
With the right care, your flash trigger will fire reliably again. Small maintenance habits go a long way toward keeping your gear dependable.
Confidence comes from understanding your equipment. Once you know how the pin and sleeve work together, fixing future issues becomes simple.
Your PC sync port can serve you well for years. Just give it the attention it deserves, and it will keep working when you need it most.
Frequently Asked Questions
Why does my flash fire the moment I plug in the PC sync cable?
This happens when your center pin has poor insulation or makes accidental contact with the outer sleeve. The connection completes instantly instead of waiting for your camera trigger. Check your cable connector first because this is usually a cable problem, not a port problem. Look for visible damage, corrosion, or exposed wire on the connector.
If the cable looks fine, your port’s center pin may be bent outward and touching the side rail prematurely. Gently adjust the pin position slightly inward. Test the connection in a safe location before using it with your flash.
How do I know if my PC sync port needs replacement instead of repair?
If you’ve cleaned the contacts and gently adjusted the center pin but still get unreliable firing, your port terminals may be permanently worn. Most PC sync ports can last years with proper care, but repeated use wears metal contacts down.
Try one more cable before assuming port failure. Worn cables cause more problems than damaged ports. If a fresh cable fires reliably but your original cable still misfires, the cable was the issue all along.
Can I bend the center pin back into place myself?
Yes, but use extreme caution. Gentle pressure is key here. Use a small plastic tool or your fingernail to nudge the pin slightly off its bent angle. Never use metal tools that could scratch or snap the pin.
Bend slowly and test after each tiny adjustment. Over-bending causes permanent damage. If the pin breaks or snaps, your port becomes unusable.
What’s the fastest way to fix an unreliable sync connection?
Start with cleaning. Use contact cleaning spray on both your port terminals and cable connector tip. Let everything dry completely before testing.
Next, lightly crimp the outer cable sleeve to tighten the fit. This simple step fixes many loose connections. Test your flash after each fix to track your progress.

Hi, I’m Jessamine Rowell, the founder and voice behind ResizeMake (https://resizemake.com/), a space where I share my love for technology with the world. I write detailed and honest reviews on the latest tech products, gadgets, electronic devices, and trending Amazon items to help readers make smarter buying decisions.