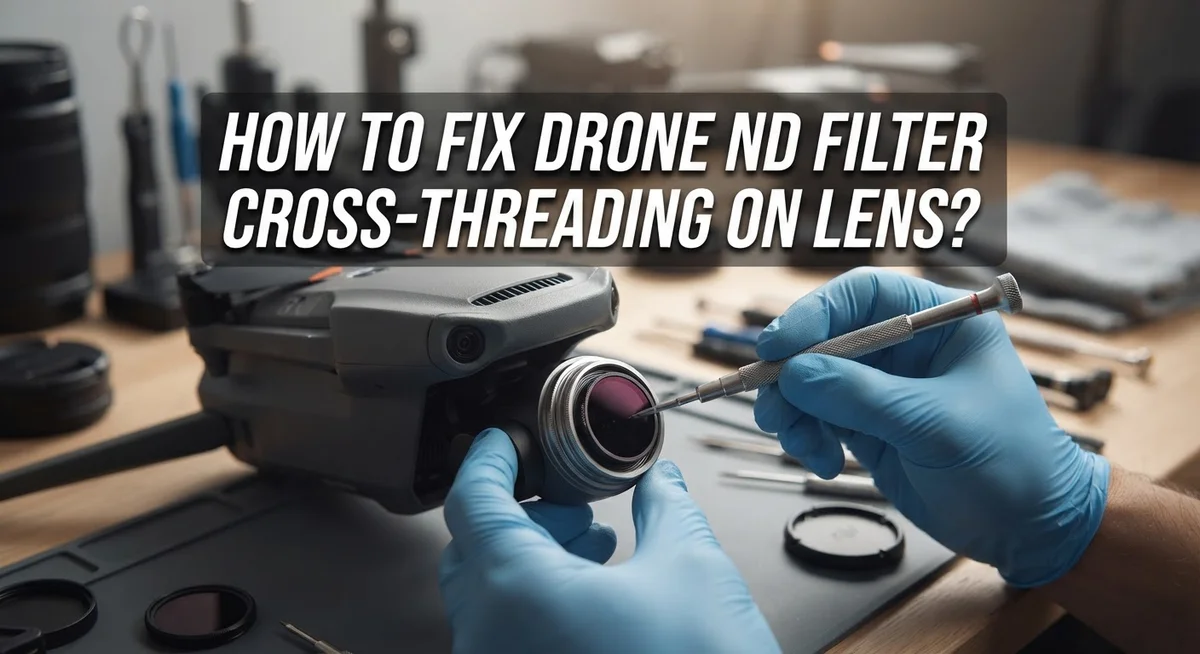
How To Fix Drone ND Filter Cross-Threading On Lens?
Have you ever tried to twist an ND filter onto your drone lens, only to feel it jam halfway? That stuck, grinding feeling usually means cross-threading. It happens when the filter threads misalign with the lens threads.
This small mistake can turn into a big headache. A cross-threaded filter can damage your lens threads permanently. It can also leave your expensive filter stuck in place.
The good news is that most cases are fixable. You just need the right approach and a little patience.
In a Nutshell
- Cross threading happens when the filter threads do not line up with the lens threads. Forcing it on causes damage fast.
- Always place your lens on a flat surface first. This gives you better control while threading the filter.
- Rotate the filter counterclockwise before tightening. You will feel it click into the correct starting groove.
- Use only gentle hand pressure to thread the filter. Stop right away if you feel resistance or grinding.
- For stuck filters, try a rubber gripper first. Pliers can work too, but they carry more risk.
- If your lens threads are stripped, an empty filter ring can sometimes save the day. It compensates for the damage.
- Store your filters separately from your camera. This simple habit prevents accidental cross threading later.
What Is Cross-Threading And Why It Happens
Cross threading happens when the filter threads do not align properly with your lens threads. Instead of screwing on smoothly, the threads catch at an angle and jam together. This creates friction and grinding that damages both the filter and lens.
The main reason cross threading occurs is rushing the installation process. You screw the filter on too quickly without checking alignment first. The threads on drone lenses are small and precise, so even a slight misalignment causes problems.
Over tightening makes the damage worse. Once the filter starts threading incorrectly, you might keep turning it harder to force it on. This pressure strips the delicate threads on your lens or filter. The harder you push, the more damage happens.
Environmental factors also play a role. Dirt or debris on the threads prevents proper alignment. Sand, dust, or small particles act like friction points that knock the threads out of sync.
Temperature changes can affect thread fit too. Cold weather makes materials contract slightly. Warm conditions cause expansion. These small shifts sometimes cause threads to misalign when you try to install a filter.
Vibration from flight can loosen a filter that was not threaded correctly in the first place. A slightly misaligned filter might seem fine at first. Then during flight, the vibration gradually strips more threads.
Understanding why cross threading happens helps you prevent it. The issue is not usually about defective equipment. It comes down to how you install the filter. Slow, careful installation with proper alignment stops most problems before they start.
Signs Your Drone ND Filter Is Cross-Threaded
When your drone ND filter has a cross-threading problem, your lens will show clear warning signs. Pay attention to these signals before the damage becomes permanent.
The first sign is resistance when threading. The filter should turn smoothly onto your lens. If you feel grinding, clicking, or a stuck sensation, stop immediately. Do not force it further. This grinding noise means the threads are already misaligned and colliding.
Look for visible wobbling once the filter is mounted. A properly threaded filter sits flush against the lens. If it tilts to one side or sits at an angle, the threads did not catch correctly. Gently wiggle the filter with your finger. Excessive movement indicates a cross-threaded connection.
Check the tightness inconsistently. A cross-threaded filter may feel loose on one side and tight on the other. This uneven pressure is a major red flag. The filter threads are not engaging uniformly around the lens.
Listen for unusual sounds during removal. When you try to unscrew the filter, it should turn freely. If you hear scraping, popping, or feel sudden resistance, cross-threading has likely damaged the threads inside your lens.
Inspect the lens threads with a magnifying glass if possible. Look for bent or crushed metal threads. Damaged threads appear flattened, twisted, or broken compared to normal threads.
Finally, notice if your filter sits higher or lower than normal. Cross-threaded filters often sit at different depths than they should. The top of the filter should align evenly with the lens barrel.
Catching these signs early saves your equipment. Stop using the filter immediately once you notice any of these problems.
Step-By-Step: Removing A Stuck Cross-Threaded Filter
When your filter gets stuck due to cross-threading, you need a careful approach. Forcing it will cause more damage to both the filter and your lens.
Start by placing your drone lens on a clean, flat surface. This prevents accidental drops and gives you better control. Make sure your workspace has good lighting so you can see exactly what you are doing.
Try rotating the filter counterclockwise very slowly. Sometimes a stuck filter just needs gentle persuasion to break free. Apply steady pressure without jerking or twisting hard. If it moves even slightly, keep going at the same slow pace.
A rubber gripper tool helps you get better traction on the filter. Wrap it around the filter ring and turn counterclockwise with controlled force. The rubber prevents your hand from slipping and reduces the chance of dropping your lens.
If the rubber gripper does not work, you might try using pliers with a cloth wrapped around the filter. This protects the filter surface from metal damage. Again, use gentle, steady pressure rather than sudden force.
Stop immediately if you feel the threads starting to strip further. Continuing will only make the problem worse. At this point, professional repair services may be your best option.
Once the filter comes free, inspect both the lens threads and filter threads carefully. Look for visible damage, stripped metal, or debris. Clean everything gently with a soft brush before attempting to remove or reattach anything else.
If your lens threads are damaged, an empty filter ring sometimes works as a workaround. It spaces out the threads and can help future filters sit properly. This is not a permanent fix, but it buys you time until professional service is available.
Step-By-Step: Correctly Re-Threading The Filter
Now that you have removed the stuck filter, it’s time to re-thread it correctly. This process requires patience and focus to prevent the same problem from happening again.
Start by placing your lens on a clean, flat surface. This gives you stability and control during threading. Position the filter directly above the lens so you can see the threads clearly.
Hold the filter at a slight angle, roughly 45 degrees. Rotate it counterclockwise slowly until you feel the threads begin to engage. This initial alignment is critical. You are listening and feeling for that first moment when the threads catch naturally.
Once the threads engage, rotate the filter clockwise very gently. Use only your fingertips and hand pressure. Do not use tools at this stage. Tools apply too much force and can cause the same cross-threading issue to repeat.
Thread the filter on slowly. Stop every quarter turn and check the alignment. The filter should move smoothly without resistance. If you feel any grinding or binding sensation, stop immediately and rotate counterclockwise to reset.
When the filter reaches the lens, tighten it only until it feels snug. You should hear a soft click or feel gentle resistance. Stop tightening at this point. Over-tightening is the main cause of future cross-threading problems.
Remove your hands and inspect the filter from different angles. It should sit evenly on the lens without tilting. The filter should not wobble or sit higher on one side than the other.
If everything looks correct, your filter is now properly threaded. Test it by gently trying to rotate it. A correctly threaded filter should not move.
Fixing Stripped Lens Threads With A Filter Ring Workaround
When your drone lens threads get damaged from cross-threading, you have a practical solution available. An empty filter ring acts as a workaround to restore functionality to your camera setup.
Here’s how this workaround works. The empty filter ring is a plain ring with no glass or optical elements inside. You thread this empty ring onto your damaged lens threads first. The ring’s threads engage with the lens, protecting the stripped areas underneath. Once the empty ring is secure, you can then thread your ND filter onto the ring instead of directly onto the lens.
This method offers real benefits. Your ND filter now threads onto undamaged surfaces provided by the ring. The ring absorbs any future wear and tear, keeping your lens threads safe. You get continued use of your filter without risking additional damage to the lens itself.
The installation process is straightforward. Place your lens on a flat surface. Thread the empty ring onto the lens using the same careful technique you learned for proper filter threading. Rotate counterclockwise first to align threads. Then rotate clockwise gently until snug. Next, thread your ND filter onto the ring using the same method.
Check alignment carefully from multiple angles. Make sure both the ring and filter sit evenly on the lens. Inspect the connection points to confirm everything looks correct.
This workaround is not a permanent fix for severely damaged threads. If your lens threads are extremely stripped or cracked, professional repair might become necessary. However, for moderate cross-threading damage, the empty filter ring solution works effectively and keeps your drone camera operational while protecting against further harm.
Common Mistakes That Worsen Cross-Threading
Forcing your filter onto the lens without checking thread alignment is the fastest way to damage both parts. Most people skip the initial rotation step where you gently turn the filter counterclockwise first. This simple check tells you if threads are lined up correctly.
Over-tightening after the filter threads on creates serious problems. Your hand pressure should stop the moment you feel resistance. Many users keep twisting to make sure it’s “secure,” but this crushes the delicate threads and makes removal nearly impossible later.
Stacking multiple cross-threaded filters together multiplies damage exponentially. If your first filter didn’t thread correctly, adding a second one on top won’t help. Each additional filter adds weight and pressure to already-misaligned threads, making the situation worse.
Using excessive tool pressure during removal is another common mistake. Pliers might seem like the obvious choice, but gripping too hard strips threads faster. The cloth wrapper helps, but gentleness matters more than force here.
Ignoring early warning signs costs you equipment. If your filter sits higher than normal or feels slightly loose, stop immediately. These signals mean threads aren’t fully engaged. Continuing to use the camera with a partially threaded filter will eventually jam it permanently.
Rushing the threading process causes most problems. Take your time placing the lens on a flat surface. Hold the filter at a 45 degree angle and rotate counterclockwise first. Let the threads guide naturally without pushing down. This patience prevents 90 percent of cross-threading issues before they start.
Preventing Cross-Threading Before It Starts
The best way to handle cross threading is to stop it before it happens. Prevention saves you time, money, and frustration with your drone equipment.
Start by setting your lens on a clean, flat surface. This simple step matters more than you might think. A stable lens prevents accidental tilting that throws off thread alignment.
Hold the filter at roughly a 45 degree angle when you approach the lens. This angle lets you see the threads clearly and feel them engage properly. You control the process better when you can see what you’re doing.
Rotate the filter counterclockwise first. This gentle backward motion helps the threads find their natural alignment path. You’ll feel a slight click or catch when threads begin to match up correctly. This is your signal to proceed forward.
Once threads engage, switch to clockwise rotation. Move slowly and use only your hand pressure. Your fingers give you immediate feedback about resistance. Machine tools or excessive force create the very damage you want to avoid.
Listen to what your hands tell you. If you feel grinding, catching, or unusual resistance, stop immediately. Back the filter off gently and try again. Never push through resistance.
Thread the filter on until it feels snug. Snug is not the same as tight. Your filter should sit flush against the lens without requiring effort to remove later. A properly threaded filter comes off easily by hand.
Take a moment to inspect the connection from different angles. Look for gaps or misalignment. Proper threading creates a smooth, even seal around the entire circumference.
These prevention steps take just 30 seconds but protect expensive drone equipment. Developing this habit eliminates cross threading problems before they start.
When To Seek Professional Repair
If your drone lens threads are severely damaged or your filter remains stuck despite your removal attempts, professional repair becomes the smart choice. Don’t wait until the problem gets worse.
Professional technicians have specialized tools that remove stuck filters without causing additional damage. They can assess whether your lens threads are salvageable or if replacement is necessary. This expertise prevents you from accidentally breaking the lens barrel or filter ring during removal.
You should seek professional help if you hear grinding sounds when threading. This noise indicates threads are already damaged. Stop immediately and take your equipment to a repair specialist. Continuing to force the filter will only multiply the damage.
Another sign you need professional repair is when the filter spins freely without tightening. This means threads have stripped completely. A technician can evaluate whether a filter ring workaround will work or if lens replacement is required.
Professional repair is also wise if your drone lens is expensive. The cost of professional service is often far less than replacing a damaged lens. Specialists can sometimes repair stripped threads using specialized techniques that restore functionality.
Contact authorized drone repair centers in your area. Many offer mail in service if local options aren’t available. Explain the cross threading issue clearly so they can prepare appropriate tools and parts.
Get a repair estimate before agreeing to work. Ask how long repairs typically take. This helps you plan whether to send your drone for service or continue flying with backup equipment.
Prevention remains your best strategy, but professional help protects your investment when problems occur.
Final Thoughts
Cross threading feels frustrating, but it rarely means your drone is ruined. Most problems start small and grow worse with rushed handling. Patience protects your equipment far better than force ever does.
Your lens threads are delicate parts of expensive gear. Treat them with care every single time you attach a filter. This habit becomes automatic after a few careful attempts.
Remember that speed causes damage. Slowing down during filter attachment saves you time and money later. A few extra seconds now prevents hours of frustration afterward.
Keep your filters organized and stored separately from your camera body. This simple habit stops accidental cross threading before it starts. Good storage habits protect your gear between flights too.
If you notice resistance while threading a filter, stop right away. Never push through resistance, since this action almost always leads to stripped threads. Your hands will tell you when something feels wrong.
Regular gear checks help you catch small issues early. Look at your lens threads and filter rings before each flight. This quick habit takes seconds but saves your equipment long term.
Cross threading teaches an important lesson about drone care. Small mistakes with filters create big problems for your footage and your budget. Careful habits protect both your gear and your peace of mind.
Every drone pilot deals with filter issues at some point. What matters most is how you respond to these situations. Stay calm, work slowly, and your equipment will thank you.
Good habits today mean fewer repairs tomorrow. Treat your gear well, and it will serve you reliably for years ahead.
Frequently Asked Questions
What causes cross threading on drone ND filters?
Cross threading happens when the filter threads don’t align properly with your lens threads. This usually occurs when you force the filter on at the wrong angle or rotate it the wrong direction initially. Over tightening makes the problem worse. Most cross threading happens because pilots rush the process. Taking 30 seconds to thread carefully prevents expensive damage to your lens.
How do I remove a stuck cross threaded filter?
First, try using a rubber gripper pad to gently turn the filter counterclockwise. Rubber grippers give you better grip without damaging the filter further. If that doesn’t work, try gentle pliers with a cloth wrapped around the filter to protect it. Never force it. If the filter won’t budge after these attempts, stop and seek professional help. Professionals have specialized tools that remove stuck filters safely without causing additional lens damage.
Can my drone lens be repaired if the threads are stripped?
Stripped threads are difficult to repair, but not impossible. Some repair centers can add a workaround by installing an empty filter ring to compensate for damaged threads. However, prevention is always better than repair. Professional technicians can assess the damage and tell you if repair is possible. The cost of professional service is usually much less than replacing your entire lens.
What should I do if I hear grinding sounds while threading?
Stop immediately. Grinding sounds mean your threads are misaligning and suffering damage right now. Remove the filter slowly by rotating counterclockwise. Don’t force it. Inspect both the filter and lens threads for visible damage. If damage exists, contact a professional repair center before attempting to thread anything else onto that lens.

Hi, I’m Jessamine Rowell, the founder and voice behind ResizeMake (https://resizemake.com/), a space where I share my love for technology with the world. I write detailed and honest reviews on the latest tech products, gadgets, electronic devices, and trending Amazon items to help readers make smarter buying decisions.