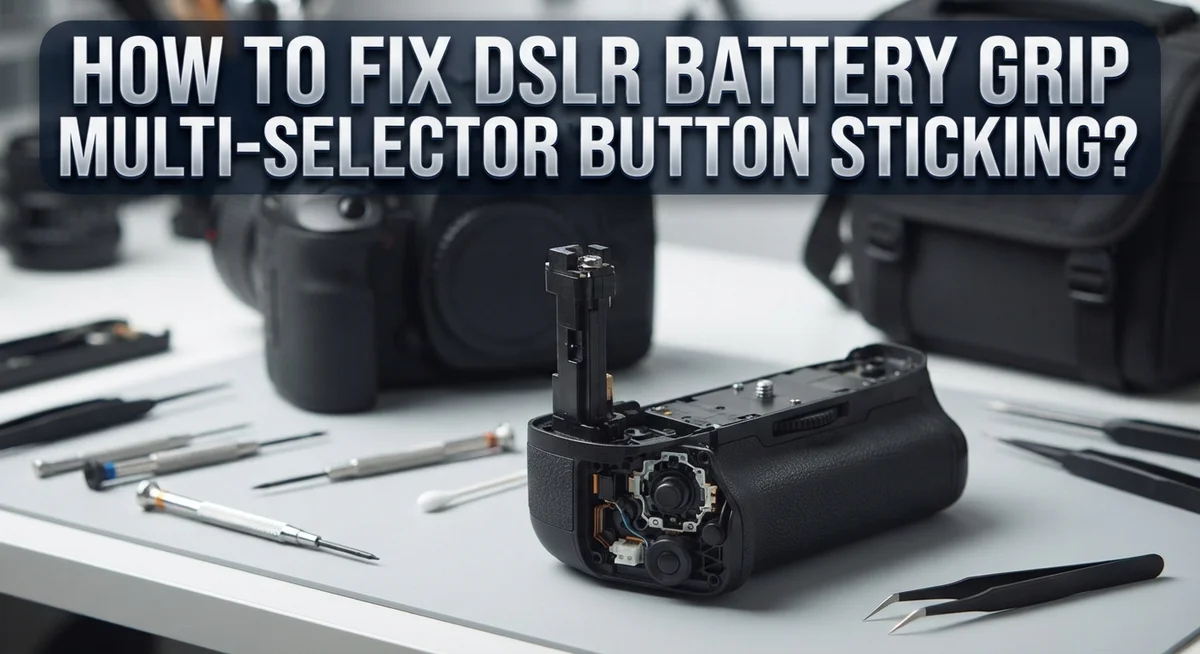
How To Fix DSLR Battery Grip Multi-Selector Button Sticking?
Does your DSLR battery grip multi-selector button feel stuck or unresponsive? This little problem can turn a smooth shoot into a frustrating one.
You press the button and nothing happens. Or worse, it feels jammed and stiff.
Don’t worry. This is a common issue that many photographers face. The good news is that you can often fix it yourself at home.
In most cases, the culprit is simple. Debris, dust, or leftover contact protection residue can block the button’s movement. Sometimes it is just a small mechanical jam.
In a Nutshell
- Debris is the main culprit. Dust, dirt, or grime often jams the button. A simple clean can fix it right away.
- Check contact protection residue first. Leftover material from contact covers can block smooth movement. Wipe this area gently before trying anything else.
- Wiggle the grip while pressing the button. This simple motion can loosen minor jams. It works well for mild sticking issues.
- Try dental floss for tough spots. This method helps loosen debris stuck in tight spaces. It’s a handy trick many photographers use.
- Never force a stuck button. Excessive force can damage the locking mechanism permanently. Gentle handling always works better.
- Prevent future sticking with proper storage. Remove contact protection if you won’t use the grip for a while. Keep contacts clean and dry at all times.
- Seek professional help when needed. If sticking persists after cleaning, a repair expert can inspect deeper issues. This protects your gear from further damage.
Understanding the Multi-Selector Button and Why It Sticks
The multi-selector button on your DSLR battery grip is a small directional control pad. It lets you navigate menus and adjust settings on your camera. This button moves in four directions: up, down, left, and right. It’s essential for quick camera adjustments without removing the grip from your hand.
Battery grips have metal contacts that connect to your camera body. These contacts transfer power and allow button commands to reach your camera. The multi-selector sits right above these contacts. This placement makes it vulnerable to dust and debris accumulation.
Why does the button stick? The most common reason is debris buildup. Dust particles, dirt, or small fibers get trapped inside the mechanism. When you press the button, these particles block smooth movement. The button feels resistant or completely frozen in place.
Contact protection materials also cause sticking. Many battery grips come with protective films or residue on the metal contacts. If this material creeps up into the button housing, it can jam the mechanism. This happens especially if the grip was stored for a long time.
Mechanical jams occur when internal springs or components misalign. This often happens after dropping the grip or applying pressure to the button area. The internal parts shift slightly and prevent smooth operation.
Understanding the root cause matters. Different causes need different solutions. Debris requires careful cleaning. Contact protection residue needs gentle removal. Mechanical jams might need professional help. By identifying what’s causing your sticking button, you can fix it properly without causing more damage. This saves you time and money on repairs.
Tools and Materials You’ll Need Before Starting
Before you start fixing your DSLR battery grip multi-selector button, gather the right tools. Having everything ready saves time and prevents frustration.
Cleaning supplies are essential. You’ll need soft, lint-free cloths to wipe away dust and debris. Microfiber cloths work best because they don’t scratch delicate surfaces. Isopropyl alcohol helps dissolve stubborn residue safely. Use a concentration between 70 and 90 percent for best results.
Small precision tools make a difference. A soft-bristled brush helps dislodge particles from tight spaces. Dental floss works surprisingly well for reaching stuck areas between components. Toothpicks can help gently probe problem spots, but use extreme care to avoid damage.
Protective gear keeps you safe. Wear cotton gloves to prevent oils from your skin transferring to metal contacts. Safety glasses protect your eyes if debris flies during cleaning. Good lighting is crucial, so have a desk lamp or flashlight nearby.
Optional but helpful items include a magnifying glass for inspecting small components closely. A small container holds screws if you need to disassemble anything. Paper towels or newspaper protect your work surface from spills.
Never use compressed air. It can force debris deeper into the mechanism instead of removing it. Avoid harsh chemicals or abrasive materials that damage plastic and metal parts.
Organization matters too. Keep all tools in one spot before starting. This prevents losing small pieces and speeds up the repair process. Check that everything is clean before use so you don’t introduce new contamination.
Having these tools ready means you can work efficiently and safely fix your multi-selector button problem.
Step-by-Step: Diagnosing the Cause of the Sticking
Start by examining your battery grip closely. Look at the multi-selector button from different angles under good lighting. Press the button gently in all directions and note which movements feel stuck or restricted.
Check the locking switch or release button near the multi-selector. Debris often collects around these areas. Use your magnifying glass to inspect for dust, dirt, or small particles lodged in the crevices. Pay special attention to the edges where the button meets the grip body.
Next, look for contact protection residue. If your grip has metal contacts, check whether any leftover material from protective covers is blocking the button’s movement. This residue appears as a thin film or coating around the contact areas.
Test the mechanical responsiveness by gently wiggling the entire grip while pressing the multi-selector button. Does the button move more freely when you apply slight pressure to different parts of the grip? This tells you whether you’re dealing with a simple jam or a deeper mechanical issue.
Inspect the button’s internal mechanism if possible. Look for signs that springs or components have shifted out of alignment. Don’t force anything open at this stage. You’re just observing.
Document what you find. Take mental notes about where debris accumulates most and which button directions feel most restricted. This information helps you choose the right cleaning approach.
If you see visible damage to the locking mechanisms or springs, stop here. Professional repair becomes necessary when internal components show cracks or permanent deformation. Otherwise, you’re ready to proceed with cleaning and loosening techniques.
Step-by-Step: Cleaning and Freeing a Stuck Button
Start with the gentlest approach first. Hold your battery grip firmly in one hand and use your other hand to gently wiggle the entire grip while pressing the multi-selector button repeatedly. This motion can help loosen debris that’s blocking the mechanism without forcing anything.
Next, use a soft-bristled brush to carefully clean around the button edges. Brush in small circular motions to dislodge particles trapped in the crevices. Pay special attention to the gaps between the button and the surrounding plastic or metal frame.
If debris is still visible, use a lint-free cloth slightly dampened with distilled water. Gently wipe the button surface and the areas around it. Never apply excess moisture. Let everything air dry completely before testing the button again.
For stubborn sticking, try the dental floss method. Thread a piece of unwaxed dental floss around the button’s sides and gently work it back and forth. This technique helps separate stuck components without applying direct pressure that could cause damage.
Test the button frequently during cleaning. Press it in all four directions to check for improvement. Stop immediately if you feel resistance or hear unusual sounds.
If the button moves freely after cleaning, congratulations. If sticking persists, the issue may be internal. At this point, consider whether professional repair makes sense for your situation.
Remember that patience matters more than speed. Rushing through these steps risks breaking delicate springs or pushing debris deeper into the mechanism. Take your time and let gentle, consistent cleaning do the work.
Using the Dental Floss Technique for Stubborn Jams
The dental floss technique works well for battery grips with stubborn jams. This method uses thin, flexible material to reach tight spaces that brushes cannot access.
Start by selecting unflavored, unwaxed dental floss. The floss must be thin enough to fit between the button and its housing. Flavored or waxed varieties leave residue behind, which makes the problem worse.
Gently insert the floss into the gap around the multi-selector button. Work it back and forth with slow, controlled movements. Do not yank or pull hard, as this can damage internal springs or the button itself. The goal is to dislodge debris, not force the mechanism.
Move the floss in different directions around the button. Try horizontal motions first, then vertical ones. This approach helps capture particles stuck in various angles. You may feel resistance as the floss catches on debris.
Apply minimal pressure throughout this process. Let the floss do the work rather than forcing it. If you feel something give way suddenly, stop immediately and test the button.
After several passes, remove the floss and test the button’s movement. Press it gently in all directions. If sticking persists, repeat the floss technique two or three more times.
Once the button moves more freely, use a lint-free cloth to wipe away any remaining particles. This final step removes debris that the floss loosened.
The dental floss method takes patience. Rushing this technique can snap the floss or push debris deeper into the mechanism. Most users see improvement within five to ten minutes of careful work.
If the button still sticks after this method, the issue likely involves internal mechanical damage that requires professional attention.
Common Mistakes That Make the Problem Worse
Many people make mistakes that actually make their battery grip’s multi-selector button worse instead of better. Understanding these errors helps you avoid them.
Applying excessive force is the biggest mistake. When a button sticks, your instinct might be to push harder or wiggle it aggressively. This damages internal springs and contact points. The button becomes even more stuck. Patience works better than strength.
Ignoring debris accumulation is another common error. Dust and particles build up around the button over time. People often don’t notice this gradual buildup until the button completely stops working. Regular inspection prevents this problem from developing.
Not checking contact protection materials causes real trouble. Battery grips often have protective coatings on metal contacts. This coating can migrate onto the button mechanism. Many people skip this inspection step and wonder why cleaning doesn’t help.
Using the wrong cleaning tools creates additional damage. Abrasive materials scratch the button’s surface. Metal tools can bend delicate internal components. Rough brushes push debris deeper into gaps instead of removing it.
Disassembling the battery grip without proper knowledge is risky. The internal mechanism has many small springs and parts. One wrong move loses a crucial component. Your camera stops working entirely after that mistake.
Rushing the cleaning process leads to incomplete results. People clean quickly and declare the problem fixed. Hours later, the button sticks again. Thorough cleaning takes time but actually solves the issue.
Forcing stuck parts to move faster damages them permanently. Your battery grip’s multi-selector button needs gentle treatment. Slow, careful work prevents costly mistakes. The button usually responds well to patient, methodical cleaning and minimal pressure.
Preventing Future Sticking Issues
Preventing future sticking issues requires simple habits and smart storage choices. The best approach is keeping your battery grip clean and dry at all times. Dust and moisture are the main culprits behind sticky buttons, so store your grip in a protective case when not in use.
Check your battery grip regularly, even when it works perfectly. Look at the multi-selector button and release mechanism every few weeks. This catches small debris before it becomes a real problem. A quick visual inspection takes only seconds and saves you hours of troubleshooting later.
Remove contact protection materials if you plan long-term storage. These protective covers can leave residue that interferes with button movement. If you won’t use your grip for weeks or months, take off these materials and store them separately. This simple step prevents stuck buttons from developing on their own.
Handle the release button gently during normal use. Avoid pressing it harder than necessary when changing batteries. Rough handling stresses the mechanical parts and increases wear over time. Treat your battery grip with care, just like you would your camera body.
Store your grip in a cool, dry place away from extreme temperatures. Heat and humidity create conditions where debris sticks more easily. Keep the grip away from sandy or dusty environments when possible. If you use your camera outdoors in challenging conditions, clean the grip more frequently.
Consider keeping a small brush nearby for quick cleanings. Dust off your grip before storing it. These preventive actions take minimal effort but deliver maximum protection. Consistent maintenance stops problems before they start, keeping your multi-selector button responsive for years to come.
When to Seek Professional Repair
Sometimes your multi-selector button needs more help than cleaning can provide. You should seek professional repair when the problem persists after you’ve tried basic fixes yourself.
Persistent sticking after cleaning is your first warning sign. If you’ve removed all visible debris and the button still won’t move smoothly, internal damage might exist. The mechanical parts inside could be bent or misaligned in ways you can’t see or fix at home.
Visible damage to locking mechanisms requires expert attention. Cracks in the plastic housing, broken springs, or damaged contact points need specialized tools to repair correctly. Attempting to fix these yourself could make the damage worse and cost more money later.
Complex jams that resist gentle pressure indicate internal problems. When the button feels completely locked and won’t budge even with careful wiggling, forcing it further risks breaking internal components permanently. A professional can disassemble the grip safely and identify the exact cause.
Loss of button function after an accident or drop means internal damage occurred. Even if the button moves, it might not register commands properly. This requires testing equipment that only repair shops have.
Professional technicians have the right tools and experience to handle these situations. They can safely open your battery grip without damaging it. They understand the internal mechanisms and can replace broken parts correctly.
Contact a camera repair service if you notice any of these issues. They can diagnose problems accurately and restore your battery grip to working condition. Getting professional help early prevents small problems from becoming expensive failures.
Final Thoughts
A sticky multi selector button feels frustrating, but most fixes stay simple. Debris and dried contact protection cause the majority of these jams.
Start with gentle methods first. A soft brush or careful wiggle often solves the problem in minutes.
Patience matters more than force here. Rushing repairs or pushing too hard can turn a small issue into a broken button.
Regular cleaning prevents most problems before they start. Check your grip every few months, even if it works fine.
Remove contact protection during long storage periods. This simple habit stops residue buildup that causes future sticking.
If cleaning doesn’t fix the issue, don’t panic. Some jams need professional attention, and that’s completely normal.
Visible damage or persistent sticking after multiple cleaning attempts signals a deeper problem. Internal mechanisms may need expert repair.
A camera technician has specialized tools for these situations. They can diagnose issues you might miss at home.
Think of your battery grip as an investment worth protecting. A few minutes of maintenance saves you money and frustration later.
Small habits make a real difference over time. Clean contacts, gentle handling, and proper storage all extend your grip’s life.
Most photographers can handle basic sticking issues themselves. The techniques covered here work for common problems without needing special skills.
Know your limits though. Complex internal jams or accident damage often need professional hands.
Your camera gear serves you better when you understand basic maintenance. This knowledge saves time during important shoots.
Keep these steps in mind next time your multi selector button acts up. Simple troubleshooting solves most sticking problems quickly.
When in doubt, seek help rather than risk further damage. A working button matters more than saving a repair visit.
Frequently Asked Questions
Why does my battery grip’s multi-selector button stick in the first place?
Sticking happens when debris gets trapped around the button mechanism. Dust, sand, or small particles accumulate over time. Contact protection materials can also block movement if they’re not removed properly. Mechanical jams occur when the internal spring loses tension or components shift slightly out of alignment.
Can I fix a stuck multi-selector button myself?
Yes, you can try simple fixes at home. Start by gently wiggling the grip while pressing the release button. This helps loosen minor jams without forcing anything. Carefully inspect the button area for visible debris and remove it with a soft brush or cloth. For stubborn cases, some people use dental floss to gently work around stuck components.
What should I absolutely avoid doing?
Never apply excessive force to a stuck button. Forcing it will damage internal springs and contacts permanently. Don’t ignore debris accumulation thinking it will go away on its own. Avoid using sharp tools or liquids that could corrode the mechanism. Don’t attempt repairs if you see visible cracks or damage to the locking mechanism.
How do I prevent sticking from happening again?
Store your battery grip properly between uses. Remove contact protection materials if you plan long-term storage. Keep the button area clean by wiping it occasionally with a soft, dry cloth. Handle the release mechanism gently during normal use. Store your grip in a cool, dry place away from extreme temperatures and humidity.
When should I get professional help?
Contact a camera technician if sticking persists after cleaning. Visible damage to the locking mechanism requires expert attention. Complex jams that resist gentle pressure indicate internal problems. If the button stops working entirely after an accident, professional repair is necessary.

Hi, I’m Jessamine Rowell, the founder and voice behind ResizeMake (https://resizemake.com/), a space where I share my love for technology with the world. I write detailed and honest reviews on the latest tech products, gadgets, electronic devices, and trending Amazon items to help readers make smarter buying decisions.