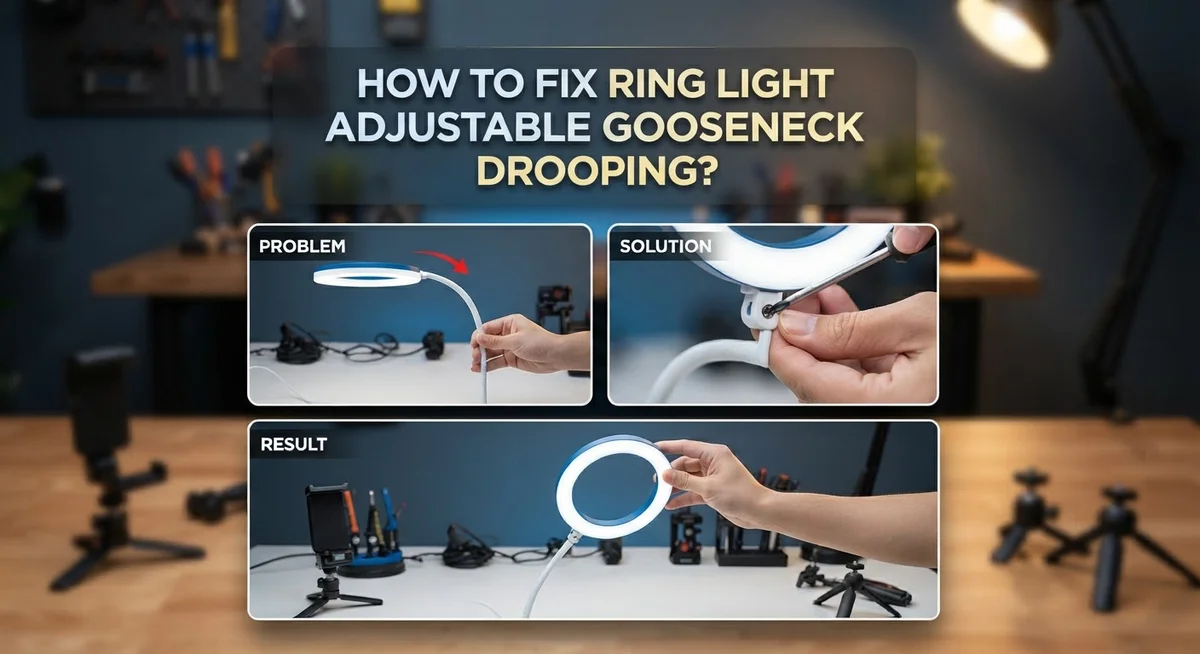
How To Fix Ring Light Adjustable Gooseneck Drooping?
Your ring light gooseneck keeps drooping right when you get the perfect shot. Frustrating, right?
You adjust it once, and within minutes, it slowly sinks again. This annoying problem happens to almost everyone with an adjustable gooseneck ring light.
The good news? You can fix this issue yourself. You don’t need to buy a new light or call a repair shop.
Most drooping problems come from loose ball joints or dirty connection points. Sometimes screws just need a simple tightening. Other times, worn parts need a bit more attention.
In a Nutshell
- Clean the ball joint first. Use rubbing alcohol on the joint and clamps. This removes grime and restores natural grip instantly.
- Tighten every screw and mount. Loose connections are the main cause of sagging. Check the stand screws and mounting points before each use.
- Avoid over-tightening. This is a common mistake that can strip screws or crack plastic parts. Snug is enough.
- Fix stripped screw holes with super glue. Scratch the area lightly first so the glue bonds better. This is a last resort fix, not a first step.
- Position your light correctly. Set it at eye level and secure the tripod base firmly. A wobbly base makes drooping worse.
- Skip the weight. Do not hang extra accessories on the gooseneck. Extra weight speeds up sagging over time.
Most droopy gooseneck problems get solved with cleaning and tightening alone. You rarely need a replacement part.
Why Ring Light Goosenecks Start Drooping
A ring light gooseneck droops because the connection points lose grip over time. The ball joint is the main culprit. This rounded joint allows you to position your light at any angle, but it relies on friction and tight clamps to stay in place.
When you first use your ring light, all components fit snugly together. Dust, oils from your hands, and small debris gradually build up on the ball joint surface. This buildup acts like a lubricant, making the joint slippery. Your light slowly sinks downward even though you tightened it earlier.
The clamps that hold the ball joint also wear down. Each time you adjust the gooseneck, the clamp pressure weakens slightly. After dozens of adjustments, the clamp no longer grips firmly enough to support the weight of your ring light and mounting bracket.
Loose screws at the base and mount connections make drooping worse. The tripod stand has multiple screws that secure different parts together. If even one screw is loose, the entire structure becomes unstable. The gooseneck then sags under its own weight.
Temperature changes also affect your gooseneck. Plastic components expand and contract as rooms warm up or cool down. This movement can loosen connections you thought were tight.
Over time, the plastic threads in screw holes wear out. When this happens, screws cannot grip properly anymore. Your gooseneck droops because the screws spin freely without tightening anything.
The good news? Most drooping happens from simple issues like dirt buildup and loose connections. You do not need to replace your entire light. A thorough cleaning combined with proper tightening fixes the problem in most cases. Understanding why your gooseneck droops helps you prevent it from happening again.
Tools and Materials You’ll Need
Before you start fixing your drooping gooseneck, gather the right tools. You won’t need many items, and most people have them at home already.
First, get rubbing alcohol and a clean cloth or soft brush. These items clean the ball joint and clamps where dirt buildup causes sagging. The alcohol removes grime that prevents a tight grip between parts.
Next, find a screwdriver set with multiple sizes. Your ring light uses different screw types at the base, mount, and connection points. Having the correct size prevents stripping screws during tightening.
You’ll also want a small flashlight or headlamp. This helps you see inside tight spaces where the gooseneck connects. Good lighting makes it easier to spot loose screws or debris.
Keep super glue on hand for stripped screw holes. This becomes your backup option when regular tightening doesn’t work. The glue reinforces worn plastic threads so screws grip properly again.
A fine grit sandpaper or small file helps scratch screw hole areas before applying glue. Light scratching creates texture that helps adhesive bond better to plastic surfaces.
Finally, grab a towel or mat to work on. This protects your surface and prevents small screws from rolling away. It also gives you a clean workspace for organizing parts.
You don’t need expensive equipment or specialty tools. Most fixes use items from your junk drawer. Having everything ready before starting saves time and frustration. You’ll finish the job faster when all materials sit within arm’s reach.
Step-by-Step: Cleaning the Ball Joint and Clamps
Start by removing the plastic diffuser from your ring light. This gives you clear access to the ball joint and clamp mechanisms underneath. Set the diffuser aside on a clean surface so it doesn’t get damaged.
Take your rubbing alcohol and dampen a clean cloth or soft brush with it. Gently wipe the entire ball joint surface where it connects to the gooseneck arm. Pay special attention to the grooves and crevices where dirt accumulates. Alcohol dissolves sticky residue and dust that reduces grip strength.
Next, clean the clamp surfaces that hold the ball joint in place. These metal or plastic clamps lose their gripping power when covered in dust or dried liquids. Wipe them thoroughly until they look clean and dry.
Let everything air dry completely for a few minutes. Moisture can interfere with the connection strength, so patience here matters.
While the components dry, inspect the clamp screws carefully. Look for any visible dirt or corrosion around the screw heads. If you spot debris, use your cloth to clean those areas too.
Once dry, gently tighten each clamp screw using your screwdriver. Turn clockwise slowly until you feel resistance. Stop immediately when you feel snug contact. Do not force the screws or turn them aggressively.
Test the ball joint movement with your hand. Push gently on the gooseneck arm to see if it holds position better. The cleaned and tightened connection should feel more stable than before.
If your gooseneck still droops after cleaning, the ball joint may need additional reinforcement or the clamps might require deeper inspection for wear damage.
Step-by-Step: Tightening Stand Screws and Mount Connections
Start by locating all the screws that connect your stand base to the main light body. These screws hold everything together and often become loose from regular use. Use your screwdriver set to check each one carefully.
Gently turn each screw clockwise to tighten it. Do not force the screws or turn them too hard. Over tightening causes damage to the plastic threads inside the holes. You want a firm fit, not a super tight grip.
Pay special attention to the mount connection where the gooseneck attaches to the stand. This area experiences the most stress when you adjust the light. Tighten these screws first before moving to other areas.
Check the screws at the base of your tripod stand next. A loose tripod base makes the entire light unstable. This instability puts extra pressure on the gooseneck and makes drooping worse. Tighten these screws until the stand feels solid.
After tightening, test your light by gently pushing on the gooseneck. It should hold its position without sagging immediately. If it still droops, you may have stripped screw holes that need reinforcement.
For stripped holes, remove the screw completely. Scratch the hole area lightly with fine grit sandpaper. Apply a small amount of super glue inside the hole. Let it cure for the time recommended on the bottle. Then reinstall the screw while the glue is still slightly tacky.
Repeat this process for any screw hole that spins freely without tightening. This method restores grip to worn plastic threads. Once complete, your gooseneck should hold its position much better during use.
Repairing Stripped Screw Holes With Super Glue
When screw holes become stripped, the screw spins without gripping. This common problem causes your gooseneck to droop because connections loosen over time. Super glue offers a simple fix you can do at home.
Start by removing the stripped screw completely from the hole. Set it aside in a safe place. Look inside the hole with your flashlight to see if it’s enlarged or damaged.
Take your fine grit sandpaper or small file and gently scratch the inside walls of the screw hole. This roughens the surface so super glue adheres better. Scratch in multiple directions to create texture. Wipe away any dust with a clean cloth.
Apply a small amount of super glue into the scratched hole. Do not overfill it. Use just enough to coat the interior surfaces. Let the glue dry completely according to the product instructions, usually 24 hours.
Once dry, carefully reinsert the screw into the hole. Turn it slowly and steadily. The glue creates a stronger grip than the bare plastic alone. Tighten until snug but do not force it, as this can strip the hole again.
Test your gooseneck by gently moving it. It should hold position better now. If the hole still feels loose, you can repeat this process.
This method works well for minor stripping. For severely damaged holes, you might need to drill a new hole nearby and use a different size screw. Always work slowly and carefully to avoid causing additional damage to your ring light assembly.
Proper Assembly and Positioning for Stability
Proper assembly and positioning are essential for keeping your ring light stable. Start by ensuring every connection point is hand tightened before you use the light for the first time. This simple step prevents most drooping problems from occurring.
Position your ring light at eye level when you sit in your normal work position. This height reduces strain on the gooseneck and prevents excessive sagging over time. Your light should feel balanced and not pull to one side.
Secure your tripod base properly on a flat, level surface. An unstable base causes the entire gooseneck to droop because the foundation shifts. Make sure all three legs of your tripod stand are fully extended and locked in place.
Check that the ball joint clamp is positioned correctly before tightening. The clamp should grip the ball joint firmly without gaps. Improper positioning here is a common reason for drooping.
Avoid placing heavy accessories or diffusers on the gooseneck arm. Extra weight causes the ball joint to sag gradually, even when properly tightened. Keep the light itself as the main load.
Before each use, do a quick inspection of all visible screws and connections. Look for any that appear loose or out of place. A five second check prevents problems from developing.
When positioning your light, avoid extreme angles that put stress on the gooseneck. Keep the arm relatively straight rather than bent at sharp angles. Extreme positions force the ball joint to work harder and fail faster.
Finally, store your ring light in an upright position when not in use. Laying it on its side or storing it at odd angles can weaken the ball joint over time. Proper storage habits extend the life of your equipment significantly.
Common Mistakes to Avoid When Fixing a Drooping Gooseneck
When fixing a drooping gooseneck, many people make mistakes that actually make the problem worse. Understanding these errors helps you avoid costly damage to your ring light.
Over tightening screws is the biggest mistake. Many users think tighter is always better. They crank down hard on every screw they find. This approach damages the threads and strips the holes. Once stripped, the screw spins freely and won’t hold anything. Your gooseneck will droop even more. Instead, tighten screws firmly but gently. Stop when you feel resistance.
Another common error is ignoring the ball joint. People jump straight to tightening screws without cleaning first. Dust and residue build up on the ball joint surfaces. This buildup prevents the clamp from gripping properly. A simple cleaning with rubbing alcohol often fixes drooping without any other work. Skip this step and you’ll waste time on unnecessary repairs.
Improper tripod base positioning causes ongoing problems. Users place their ring light on uneven surfaces or don’t secure the base properly. The light tips or shifts during use, stressing the gooseneck. Always position your tripod on a flat, level surface. Make sure the base sits firmly with no wobbling.
Neglecting regular maintenance is another mistake. Small issues become big problems when ignored. Check your connections before each use. A quick visual inspection takes seconds and prevents major drooping issues later.
Avoid adding too much weight to the gooseneck arm as well. Heavy diffusers or multiple accessories strain the joints. Keep the setup simple and light. These simple practices prevent most drooping problems from developing in the first place.
Preventing Future Drooping With Regular Maintenance
Regular maintenance keeps your ring light stable and prevents drooping before it starts. Clean the ball joint every two weeks if you use your light daily. Use rubbing alcohol and a soft cloth to wipe away dust and debris that accumulate on the joint surfaces.
Check all screws and connections once per week. Gently turn each screw to confirm it feels snug. A loose screw often causes drooping, so catching this early stops the problem.
Inspect the gooseneck for any visible damage or wear. Look for cracks, bent sections, or discolored areas. These signs tell you when parts need attention before they fail completely.
Store your ring light upright when you’re not using it. Laying it on its side puts unnecessary pressure on the gooseneck arm. An upright position keeps the internal components properly aligned.
Avoid leaving heavy diffusers or accessories attached during storage. Remove these items and store them separately. This reduces stress on the ball joint over time.
Wipe down your light setup once monthly with a dry cloth. Dust buildup can affect how tight the ball joint grips. A quick cleaning takes just a few minutes and makes a real difference.
Position your light at a moderate angle during use. Extreme angles stress the gooseneck and cause faster wear. Keep the light angled slightly downward rather than pointing straight up.
Test the stability of your setup before each recording or photo session. Gently push the gooseneck arm to confirm it doesn’t move. This simple check catches problems early and prevents frustrating mid session drooping.
Final Thoughts
A drooping gooseneck feels like a big problem. But it’s actually simple to fix.
Most sagging issues come from loose parts or dirty ball joints. You don’t need a replacement light. You just need a few basic tools.
Start with the easiest fix first. Clean the ball joint with rubbing alcohol. This step alone solves many drooping problems.
If cleaning doesn’t work, check your screws next. Tighten every connection by hand. Never use excessive force when tightening.
For stripped screw holes, super glue works well. Scratch the area lightly first. This helps the glue stick better to the surface.
Remember that prevention saves you time. Clean your gooseneck regularly. Check connections before each use.
Your ring light should serve you well for a long time. Small maintenance steps make a real difference over time.
Think about how you use your light daily. Are you gentle with the gooseneck arm? Do you avoid extra weight on it?
These habits matter more than people realize. A little care goes a long way with adjustable equipment.
Most gooseneck problems have simple solutions. You don’t need special skills or expensive tools. Just patience and the right approach.
Try the alcohol cleaning method first. It fixes most sagging issues quickly. Move to screw tightening if needed.
Save the super glue method for stripped holes only. This is your last resort fix.
Your ring light can work like new again. Follow these steps carefully. Take your time with each fix.
Trust the process and results will follow. Your gooseneck will hold steady once more.
Frequently Asked Questions
Why does my gooseneck droop even when I tighten the screws?
Drooping happens when the ball joint loses grip or when screws aren’t tight enough. The ball joint is the rotating connector that holds your light in place. Over time, dust and residue build up on this joint and reduce friction. Cleaning with rubbing alcohol restores grip better than tightening alone.
Start by cleaning the ball joint thoroughly. Wipe away any debris. Then check if all screws are hand-tight. Avoid over-tightening because this damages the threads and makes drooping worse later.
Can I fix a stripped screw hole without buying a new gooseneck?
Yes. Stripped screw holes are fixable with super glue. First, scratch the hole area lightly with sandpaper or a small tool. This helps the glue bond better.
Apply super glue into the hole and let it dry completely. Then reinstall your screw. The glue fills the gap and gives the screw something to grip. This solution works well for most minor damage.
How do I know if my tripod base is causing the drooping?
An unstable base causes your entire light to shift and sag. Place your ring light on a flat, level surface. Check that all three or four base feet touch the ground evenly.
If your surface is uneven, the base rocks and the gooseneck compensates by drooping. Move your setup to a flat table or desk. Test the stability by gently pushing the light sideways. It should not wobble.
What’s the best way to clean the ball joint?
Use rubbing alcohol and a soft cloth. Dampen the cloth and wipe the ball joint thoroughly. Get into the grooves where dust collects.
Let it air dry for a few minutes. This simple cleaning fixes most drooping problems. Alcohol evaporates quickly and leaves no residue behind.

Hi, I’m Jessamine Rowell, the founder and voice behind ResizeMake (https://resizemake.com/), a space where I share my love for technology with the world. I write detailed and honest reviews on the latest tech products, gadgets, electronic devices, and trending Amazon items to help readers make smarter buying decisions.