How To Fix E-Reader Bezel Cracking Around The Screen?
Did your e-reader take a little tumble and now sports a cracked bezel? You are not alone. That thin frame around the screen protects your device, but it can crack from a drop or hard knock.
The good news is that a cracked bezel does not always mean a broken e-reader. Many devices still work perfectly fine even with cosmetic damage around the edges.
This guide walks you through fixing that cracked bezel step by step. We will cover how to safely open your device and remove the damaged frame.
In a Nutshell
- Power off your device first. This step protects the internal parts during repair.
- Use plastic tools only. Metal tools can scratch or crack other parts of your e-reader.
- Remove the back cover slowly. Gentle pressure helps you avoid snapping small clips.
- Disconnect the ribbon cables with care. These thin cables connect your screen to the device and tear easily.
- Scrape away old adhesive patiently. Floss or a similar soft tool works well without damaging the frame.
- Swap in the new bezel piece. Once the old one is off, the replacement usually fits right into place.
Understanding E-Reader Bezel Cracking
A bezel is the frame or border that sits around your e-reader screen. It holds the display in place and protects the edges from damage. When this frame cracks, it affects how your device looks and feels.
Bezel cracks happen in several ways. Physical drops cause the most common damage. Your e-reader hits a hard surface, and the impact creates fractures in the bezel material. Pressure from squeezing the device too hard can also cause cracks to form slowly over time.
The bezel itself has multiple layers. The outer casing provides protection. Underneath that sits a glass overlay or plastic screen protector. The frame connects everything together with adhesive. When any layer cracks, the entire bezel structure weakens.
You might notice cracks spreading from a single point. This happens because the damaged area loses structural strength. Pressure on one side of the crack pushes it wider. The good news is that most e-readers still work even with a cracked bezel. The screen displays text normally, and the device functions as expected.
However, bezel damage does create problems over time. Dust and moisture can enter through cracks. This exposure damages internal components slowly. The cracked frame also feels uncomfortable to hold. Sharp edges might cut your fingers during reading sessions.
Understanding bezel damage helps you decide on repair options. Some cracks are minor and cause no functional issues. Others spread quickly and require immediate attention. Your e-reader model matters too. Some devices have bezels that are easier to replace than others.
The repair process involves removing the damaged bezel and installing a new one. This requires patience and the right tools. Most repairs take between one and three hours for someone with basic technical skills.
Common Causes of Bezel Damage
E-reader bezels crack for several clear reasons. Understanding what causes the damage helps you prevent future problems and know when repair is necessary.
Physical drops remain the most common culprit. Your e-reader hits a hard surface, and the bezel absorbs the impact. The frame around your screen bears most of the force because it sticks out slightly from the device body. Even small falls from table height can create visible cracks if the angle is wrong.
Pressure and squeezing also damage bezels over time. When you carry your e-reader in a tight backpack or sit on it accidentally, the frame bends. Repeated stress weakens the material, and hairline cracks appear. The bezel is often made of plastic or composite materials that cannot handle constant pressure.
Temperature changes play a surprising role too. Extreme heat or cold makes materials expand and contract. When your e-reader goes from a cold car to a warm room, the bezel expands at a different rate than the screen. This stress creates small fractures that grow larger.
Manufacturing defects occasionally cause bezel problems. Some devices leave the factory with weak points in the frame. These areas crack more easily than others, even without obvious damage.
Moisture and corrosion weaken bezels from the inside out. Water seeps into small gaps and damages the adhesive holding the bezel together. The frame becomes brittle and prone to cracking.
Age and material fatigue matter as well. Plastic degrades over years of use. The material becomes less flexible and more likely to crack when bumped. Older e-readers face higher cracking risks simply because their bezels have weakened with time.
Tools and Materials You’ll Need
Before you start fixing your e-reader’s cracked bezel, gather the right supplies. Having everything ready makes the repair smoother and reduces the risk of damage.
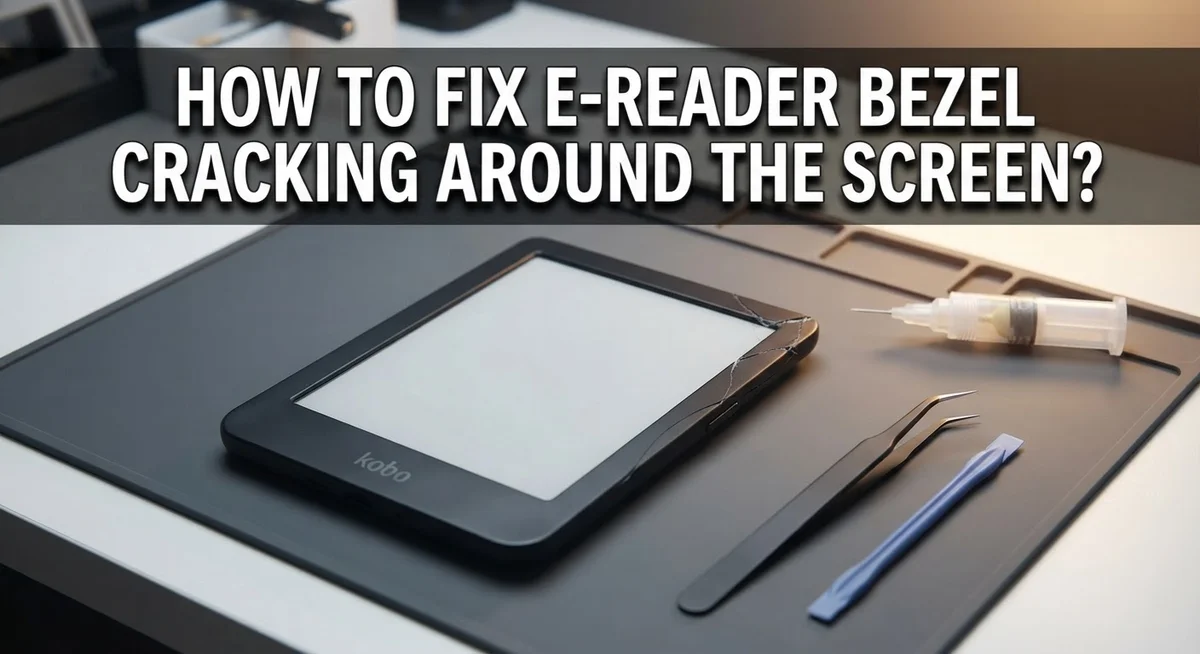
Plastic tools are your best friends here. You will need a plastic pry tool to gently lift the back cover without scratching or cracking other parts. Metal tools can leave marks or cause additional damage to the frame. A plastic spoon or old credit card can work in a pinch if you do not have a dedicated pry tool.
Cleaning and adhesive removal require specific items. Dental floss works surprisingly well for scraping away old adhesive without harming the underlying frame. You can also use a plastic scraper or soft cloth. Rubbing alcohol helps dissolve sticky residue. Have paper towels or lint-free cloths nearby to wipe surfaces clean.
Cable management tools keep delicate connections safe. A small flashlight or headlamp helps you see ribbon cables clearly inside the device. These thin cables are fragile, so you need good visibility to avoid accidents.
Safety and protection items matter too. Keep a soft mat or towel under your workspace to prevent the e-reader from sliding. An anti-static wrist strap protects internal components from electrical damage during the repair.
Documentation and reference materials support your work. Have your device’s repair manual handy. Many manufacturers provide guides online that show exactly where screws and cables sit.
The replacement bezel itself is essential. Order the correct bezel for your specific e-reader model before starting. Having the new part ready means you can complete the repair without delays.
Optional but helpful items include a small container for screws and a magnifying glass for close work. These extras make the job easier and reduce frustration.
Step-by-Step Guide To Fixing A Cracked Bezel
Start by powering off your e-reader completely. This step keeps your device safe during the repair process. Wait a few minutes after shutdown to let any remaining power drain from the internal components.
Next, locate the seams around your device’s back cover. Use your plastic pry tool to gently lift one corner. Apply steady, even pressure rather than forcing the tool into the gap. Work your way around the edges slowly until the back cover separates from the frame.
Once open, you’ll see ribbon cables connecting your screen to the motherboard. Locate the digitizer cable first. Gently lift the small latch or clip holding it in place. Slide the cable out horizontally with care. Repeat this process for the LCD ribbon cable. These connections tear easily, so move slowly and deliberately.
Now you can access the cracked bezel. Most bezels are glued in place with strong adhesive. Take your floss or soft scraping tool and work around the edges. Lift the damaged bezel gradually as you remove the adhesive. Patience here prevents damage to the underlying frame.
Once the old bezel is completely removed, scrape away any remaining adhesive residue. This ensures your new bezel sits flush against the frame. Use gentle circular motions rather than aggressive scraping.
Position your replacement bezel over the frame opening. Press it down firmly and evenly across all edges. Let the adhesive set according to the manufacturer’s recommendations before reconnecting any cables.
Reconnect your ribbon cables in reverse order. Start with the LCD cable, then the digitizer. Snap each latch back into place securely. Finally, reattach your back cover and power on your device to verify everything works correctly.
Tips For A Smooth Repair Process
A smooth repair process starts with proper preparation. Clear your workspace of clutter and distractions before you begin. Lay out all your tools and materials in an organized manner so you can grab what you need quickly.
Work in good lighting to see small components clearly. A well lit area prevents mistakes and helps you spot delicate ribbon cables. Poor lighting causes you to miss important details.
Take photos of your device before disassembly. These images serve as a reference guide when you reassemble everything. Photograph each step as you go to document the process.
Handle ribbon cables with extreme care. These connections are fragile and easily damaged. Never pull or bend them at sharp angles. Gently disconnect them by lifting the retention clips first.
Use plastic tools exclusively throughout the repair. Metal tools scratch components and create additional damage. Plastic spreaders and pry tools protect your device’s internal surfaces.
Work slowly through adhesive removal. Rushing this step breaks components or damages the frame underneath. Gentle scraping with floss or plastic tools takes time but produces better results. Let the adhesive soften slightly if it resists removal.
Keep screws organized in a small container. Label compartments if you remove multiple screw types. This prevents confusion during reassembly and ensures you use the correct screws in the right locations.
Take frequent breaks during longer repairs. Fatigue leads to careless mistakes and accidents. A fresh mind catches errors that tired eyes miss.
Document any issues you encounter. Note which components seemed fragile or required special attention. This information helps if you need to repair your device again in the future.
Common Mistakes To Avoid
Making mistakes during bezel repair can turn a simple fix into a costly disaster. The most common error is using metal tools on your device. Metal screwdrivers and pry tools scratch components and damage delicate ribbon cables. Plastic tools prevent this damage and protect your screen from additional harm.
Rushing through adhesive removal causes major problems. Many people try to peel away old adhesive too quickly. This rips underlying components and breaks connections you need for reassembly. Take your time with gentle scraping instead. Work slowly around the entire bezel area.
Improper cable disconnection ranks high on the mistake list. Some people yank ribbon cables without looking at how they connect. This breaks the tiny connectors permanently. Always photograph your cables before touching them. Gently lift the cable retention clips first. Then slide cables out slowly and straight.
Skipping the power off step creates unnecessary risk. Leaving your e-reader on during repair can cause electrical damage. Always power down completely before opening your device.
Forgetting to organize small screws leads to assembly chaos later. Screws look identical but different sizes exist throughout your device. Using the wrong screw in the wrong hole damages threads and components. Keep screws in a labeled container as you remove them.
Working in poor lighting causes you to miss important details. You might damage ribbon cables or misalign components during reassembly. Find a bright workspace with a desk lamp or magnifying light.
Avoid touching adhesive residue with bare hands too. Skin oils transfer to the surface and prevent new adhesive from bonding properly. Wear clean gloves throughout your repair work. These simple precautions protect your investment and ensure successful bezel replacement.
Troubleshooting Post-Repair Issues
After you’ve completed your bezel repair, several issues might pop up. Your e-reader might not power on, the screen could display incorrectly, or the device might feel unstable. These problems are fixable with the right approach.
Power-on failures often stem from loose ribbon cable connections. Check that both the digitizer and LCD cables snap firmly into their sockets. The connections should click into place without forcing. If your device still won’t turn on, try a hard reset by holding the power button for 30 seconds.
Display problems like flickering or dark spots indicate improper cable seating. Power off completely and reseat each cable. Make sure no adhesive residue interferes with the connections. Sometimes debris trapped under cables causes intermittent screen issues.
Bezel misalignment creates gaps between the frame and screen. This happens when you don’t apply adhesive evenly. The replacement bezel should sit flush against the device frame all around. If gaps exist, carefully lift the bezel and reapply adhesive to problem areas.
Touchscreen sensitivity issues mean the digitizer cable needs attention. Disconnect and reconnect it slowly. Ensure the cable routes properly without kinks or pinches. A kinked cable reduces responsiveness significantly.
Loose or rattling sounds suggest your back cover isn’t seated properly. Check that all screws are tight. The back panel should sit completely flush with no movement.
Test your device thoroughly before declaring the repair complete. Power it on, navigate menus, and touch different screen areas. Let it run for several minutes to ensure stability. If problems persist after these checks, you may need professional assistance or component replacement.
Preventing Future Bezel Cracks
Preventing future bezel cracks requires a multi-layered approach. Your first defense is a protective case designed to absorb impact. Cases with raised edges around the screen provide the most effective protection against drops.
Screen protectors add another layer of defense. They won’t stop the bezel itself from cracking, but they protect the glass overlay from damage. Many people combine cases and protectors for maximum safety.
Handle your e-reader with both hands whenever possible. One-handed use increases drop risk significantly. Keep your device away from edges of tables, desks, and furniture where accidental bumps happen.
Store your e-reader in a dedicated bag or pouch when traveling. Loose items in backpacks or purses can shift and create pressure on your device. A padded sleeve works well for this purpose.
Avoid exposing your e-reader to extreme temperature changes. Temperature fluctuations cause materials to expand and contract unevenly. This stress weakens the bezel’s structural integrity over time.
Keep moisture away from your device. Humidity and water exposure can degrade the adhesive bonding your bezel to the frame. Store your e-reader in a dry location.
Check your device regularly for small cracks or stress marks. Early detection lets you address minor damage before it becomes severe. If you notice hairline cracks forming, avoid dropping the device or applying pressure to that area.
Consider your e-reader’s durability rating before purchase. Some models feature reinforced bezels or tougher materials. Research reviews focusing on durability and drop resistance. Your choice of device significantly impacts your long-term repair needs.
These prevention strategies reduce your chances of facing bezel damage again. Consistent care practices protect your investment and keep your e-reader functioning properly for years.
Final Thoughts
Fixing a cracked bezel is a manageable task for most e-reader owners. You don’t need advanced technical skills to complete this repair successfully.
The key lies in patience. Rushing any step increases your risk of damaging delicate components.
Take your time with each phase of the process. Careful work always beats fast work when dealing with sensitive electronics.
Your e-reader can still work fine even with a cracked bezel. Many users continue reading on damaged devices for months.
However, waiting too long to repair cracks often leads to bigger problems. Dust and moisture can enter through gaps and affect internal parts.
Fixing the issue promptly protects your investment. It also keeps your reading experience smooth and enjoyable.
Remember that every e-reader model differs slightly. Check specific repair guides for your exact device before starting.
iFixit and similar resources offer detailed instructions for popular models. These guides help you avoid common pitfalls during disassembly.
Gather all necessary tools before you begin. Having everything ready saves time and reduces frustration mid-repair.
Plastic pry tools remain essential throughout the process. They protect your device’s internal components from scratches and cracks.
Once your bezel repair is complete, test your device thoroughly. Check the screen, buttons, and overall function.
A successful repair means your e-reader looks and works like new again. This gives you confidence in your DIY skills.
Bezel cracks don’t have to mean the end of your device. With the right approach, you can restore it to full function.
Trust the process, follow each step carefully, and your e-reader will serve you well for years to come.
Frequently Asked Questions
Can my e-reader still work if the bezel is cracked?
Yes, your e-reader usually continues to function normally. A cracked bezel is primarily a cosmetic issue. The damage affects the frame around your screen, not the display itself. However, you should still repair it soon. Waiting allows cracks to spread and potentially damage internal components over time.
What tools do I absolutely need for bezel repair?
You need a plastic pry tool as your main instrument. Metal tools can scratch or damage sensitive parts underneath. A soft cloth helps remove dust and adhesive residue. Tweezers assist with handling small ribbon cables. A heat source like a hair dryer loosens old adhesive gently. Gather everything before starting so you stay organized throughout the process.
Why shouldn’t I use metal tools on my e-reader?
Metal tools scratch delicate components easily. They can damage ribbon cables and LCD connections. Plastic tools provide enough leverage without causing harm. Metal tools also risk creating electrical shorts if they touch the wrong areas. Stick with plastic to keep your device safe during repair.
How long does bezel adhesive removal typically take?
Patience is essential here. Adhesive removal usually takes 15 to 30 minutes depending on how strongly it was applied. Rushing this step damages components underneath. Work slowly with your pry tool. Use dental floss or similar materials to scrape gently. Heat softens adhesive, making removal easier and faster.
Where can I find repair instructions for my specific model?
Online repair communities maintain detailed guides for most popular e-reader models. Search for your device model plus “repair guide” to find step-by-step instructions with photos. These resources show exactly where ribbon cables connect on your particular device. Device-specific manuals prevent costly mistakes during your repair.

Hi, I’m Jessamine Rowell, the founder and voice behind ResizeMake (https://resizemake.com/), a space where I share my love for technology with the world. I write detailed and honest reviews on the latest tech products, gadgets, electronic devices, and trending Amazon items to help readers make smarter buying decisions.